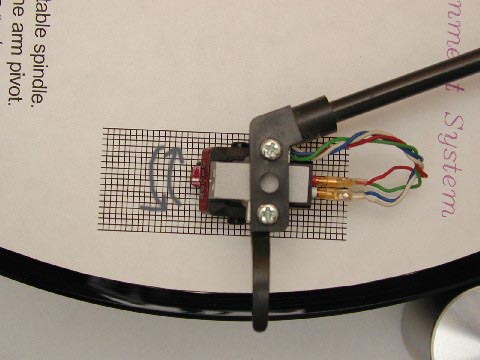
Now the overhang and offset angles are set correctly.
The turntable/tonearm/cartridge setup in any system is critical to achieve the most accurate reproduction from records. In my case, I had the Infinity Black Widow arm, but I had no documentation on how to set it up, and worse, the Gyro SE came with an armboard for a Rega arm, and one for the Black Widow would probably cost me more than I paid for the arm. The solution was to modify the Rega armboard for use by the Black Widow. Luckily, the center hole in the Rega armboard was the right size and in the correct position, so the only thing I had to do was drill and tap four mounting holes for the arm and then align the arm/cartridge properly. After doing some research, I found a patent for a cartridge alignment device (this device was sold comercially as the Geodisc). From this patent, I was able to make a device that sets the overhang (this sets the optimum distance of the turntable pivot from the spindle) and the offset angle (the angle of the cartridge relative to the tonerm). The following steps show how this is done. You can download the Cartridge Alignment Device (protractor) here.
|
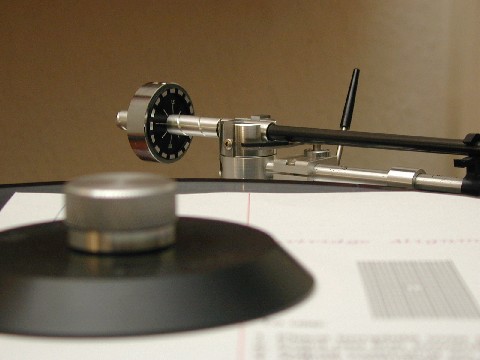
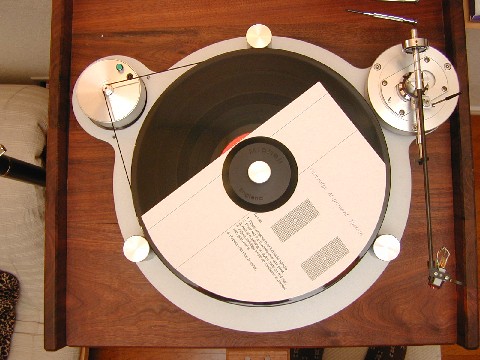
The first step is to place the cartridge alignment device over the turntable spindle and turn the platter until the line to the right of the spindle points directly at the arm pivot. Do not place the cartridge alignment device directly on the turntable platter, but rather on top of a record so as to take into account the proper tracking height of the arm. |
|
|
|
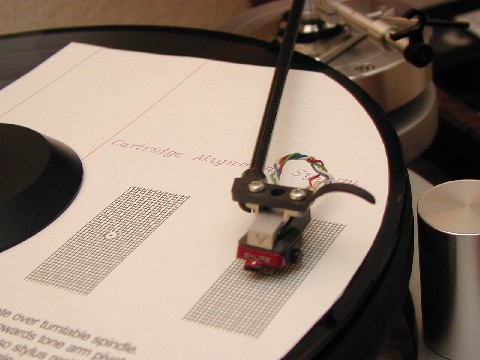
Second, place the tonearm over the outermost alignment grid and adjust the position of the cartridge so the tip of the stylus rests on the star in the center of the grid. In my case, this adjustment is done by sliding the whole arm back or forward to acheive the correct position. In most cases, the cartridge will be moved to or fro within the headshell to acheive the correct position. |
|
|
|
Third, turn the cartridge within the headshell (in the direction
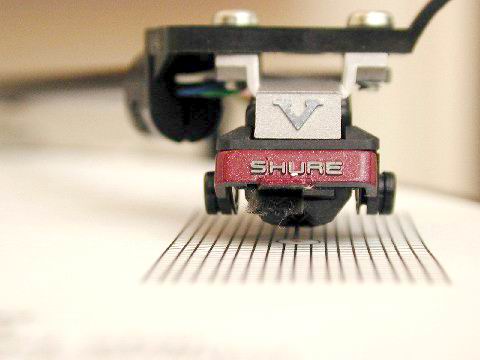
of the arrows) so the cantilever is paralell to the gridlines. This can be
done either by sighting from the front, or if your headshell allows, sighting
from above and aligning the edges of the cartridge body with the grid.
Now the overhang and offset angles are set correctly. |
|
|
|
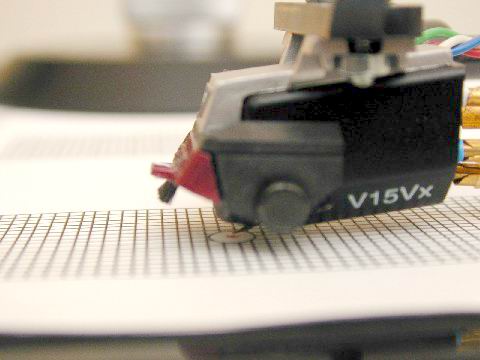
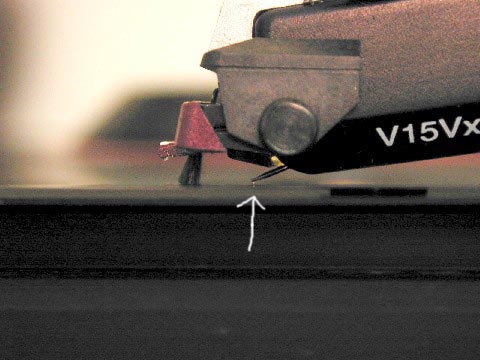
The next adjustment is Vertical Tracking Angle (VTA) or Stylus Rake Angle(SRA). This is the angle the stylus makes with the record surface as it tracks. This angle should be ever so slightly (about 1 degree) towards the front of the cartridge. In other words, while the stylus is in the groove and tracking, look at it from the side (a magnifying glass or jewler's loupe helps.) The shank of the diamond should be "leaning" ever so slightly towards the front of the cartridge. This adjustment is done by either adjusting the height of the arm at the pivot. or by shimming the front or the back of hte cartridge to achieve the proper result. |
|
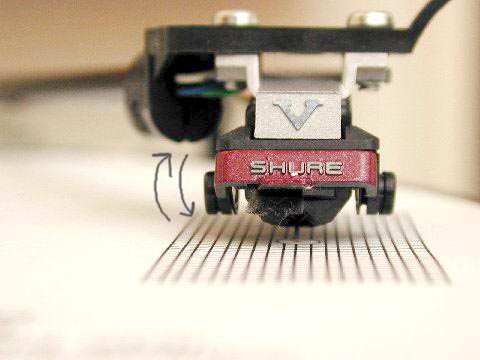
The final adjustment is azimuth. This is the side-to-side angle of the stylus when seen from the front. This angle should be 0 degrees at the stylus shank (straight up-and-down) This is adjusted by twisting the headshell on the arm (if allowed by the arm design), or by shimming the cartridge on the left or right side to achieve the proper angle. |
The following articles contain the information from which this page was developed.
1. Helge Gundersen, In Reply to: Tonearm geomtry basics, The Vinyl Asylum, October 25, 2000
3. Gary Markowitz, Understanding The Issues Behind Cartridge Alignment (Date Unknown)
4. Jon Risch, VTA Once and for All!, The Vinyl Asylum, May 5, 1999
 Back to
System Home Page
Back to
System Home Page