Windows Maker Maker is a simple editing device available in most PCs. If you don't have it on your PC then you can download it off the web, legally!
I'm not an expert but I'll try to tell you about the basics of Windows Movie Maker by showing you how to make a music video.
To get started, open the application by clicking on Start>Programs>Windows Movie Maker. This is the icon:

When the Movie Maker is opened it will look something like this:
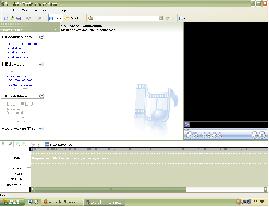
You'll see the left frame which shows you the movie tasks, the center frame where you can view your collections, the right frame which houses the monitor, and the bottom frame or your timeline.
There are two very important elements in creating a music video, the "music" and the "video". You first have to make these two things available for editing. You can do that by clicking on File>Import into Collections>(your file)>OK. If you imported an audio file or an image, it will appear in your collections folder or in whatever folder you were currently viewing when you imported the file. If you imported a video file, it will create a new folder under "Collections".
It can get a little tricky when you are looking for video clips that you can use on the web. First of all, you can't be sure whether the file is corrupt or if it is safe. Then, you have to wait a long time when the file is downloading because some of them could be really big. Fortunately, there are some things you can do.
-Download only from trusted websites (like mugglenet or veritaserum). They have videos that you can download and you can be sure that they're safe.
-You can also try downloading ".flv" files, they download much faster. Unfortunately, you cannot use this file type for editing which means that you have to convert it to another file type. You can convert using the Command Prompt application (learn how to do that here).
Ok you're all set. You have your audio and video files ready, all you have to do is compile them.
First, select your Audio File and add it to the timeline. Do that either by right clicking on the file and clicking on "add to timeline" or by dragging it to the timeline.
Now you can add your video files. Add video files to the timeline by following the same process mentioned above. You can adjust the volume of your video (you can mute it, make it louder, or make it softer), by right clicking on the video's audio on the timeline and clicking the mute or volume option. If the video's audio can't be seen on the timeline, maybe your video track is "collapsed", "expand" it by clicking on the small plus sign beside the word "Video" on yor timeline. Sometimes the video can be too long or too short. To make a video shorter, you can either splice it (cut it) by pressing on this button  which can be found under the monitor when the marker on the timeline is on the correct position or speed it up by right clicking on the video in the timeline, clicking Video Effects, then choosing the desired effect, in this case it is "Speed Up, Double" (I don't recommend this because it will make your video look weird, the characters move too fast) unless you're using it as some sort of special effect. To make a clip longer, you can slow it down by following the same process as speeding it up, instead of choosing "Speed Up, Double" choose "Slow Down, Half". This effect is great for slow songs or in adding a dramatic effect.
In making music videos, I recommend matching the video with the lyrics of the song but you can do whatever you want. You can add all sorts of cool stuff such as video effects, video transitions (left frame click "View Video Transitions">Select the transition you want>Drag it to the timeline), or titles and credits (left frame click "Make Titles or Credits">Select the title you want>Edit it to cater to your preferences>Done).
Just continue adding content to your movie and when you're finished and satisfied with what you have created, save it as a project which you can edit (File>Save Project/Save Project As...) and/or a movie file that you can watch using media players and stuff (File>Save Movie File...>[Your Preferences]). Tadah!!! You're all done.
Windows Movie Maker is pretty easy to use and easy to get the hang off which makes it perfect for beginners, so with some practice I'm sure you'll get better and better at editing. Good Luck with your future projects!
What do you think of this tutorial? Let us know by clicking here.