|
AKSA Amp
11/7/01
This page describes
my Aspen Kitset Amplifier (AKSA). It
has two incarnations--an earlier 55W version and a newer 100W version.
Both power amps utilize a dual mono configuration, where each amplifier is
a self-contained unit (power transformer, power supply, amp). The AKSA was
designed and is marketed by Printed Electronics in Australia. I decided to
add functionality by putting in my own volume control, a 20Kohm DACT CT-2
stepped attenuator. The Elma rotary switch feels precise and deliberate in
its motion. Sweet.
Here is a picture
of the finished product.
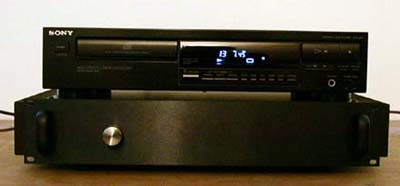
OK, so the volume
control is a little off center. My father drilled it. HAHAHA. He drilled
it, but it was a combination of hurrying to finish the amp up at around
10pm, me marking the center off by around 1mm, then my father starting the
drill bit 1 mm further away from the center mark. At least it works.
I chose the AKSA
due to its good reputation. I figured that the 100W version would be more
suitable for my needs as I will soon upgrade to lower efficiency speakers
(86dB / 1W 1m) For those considering to build the amp, let me tell you a
little about myself. I had limited experience with soldering prior to this
project. Soldering was required in a physics course I took at college, so
even though I didn't have to make millions of solder joints, I am decently
handy with the soldering iron. That class was fun, or at least the
experimentation was pretty fun. I know the basics of E&M and some
stuff about RLC. I forgot most of the stuff about L. I remember more about
R and C. I know a little about mains wiring, but mostly I had my father
help me with that part to make sure that I wasn't going to kill myself. I
know how to follow directions. That is probably the most critical skill
required in kitset building, along with concentration and excellent
eyesight.
Building your own
amp is like knowing what's in sausage. You know every little imperfection,
and you worry about the things that you've done (like, did I heat that
semiconductor too much?). It is definitely not for the faint of heart.
However, it is a very rewarding experience, knowing that you built the
dang thing yourself.
The AKSA is pretty
much finished. I will maybe tweak around
with shielding of the input signal, and with the chassis wires. There is a little hum at the speakers,
even though I am using low-ish efficiency speakers (88dB / 1W 1m).
The amplifier needs some burn-in time, but it has very dynamic, highly
resolved, uncolored sound.
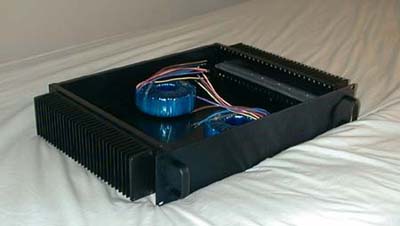
Here are a few
pictures of the building process. There unfortunately isn't much detail
here. Here is a picture
of the amplifier chassis, heatsinks and dual transformers.
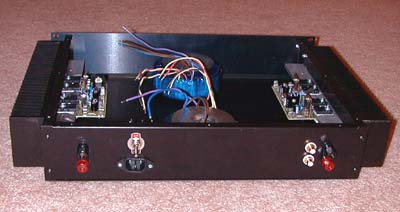
Here is a picture
towards the end of the project. The transformers
were mounted, and the various
jacks (speaker, RCA, power) and power switch were also mounted. The
chassis feet have also been mounted. The
power jack is a little skewed in its mounting. I might fix it in the
future. I am kind of peeved, but I
am also glad it is in the back panel. Here is a picture, viewed
from the backside:
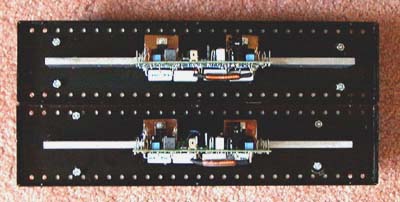
I mounted the PCBs to the side panel/heatsink assembly. As you
can see, the screw holes that mount the heatsink to the side panel were
drilled pretty much ad hoc. However, they line up pretty well! I used a
drill press for this step.
The supplied power supply PCB was made for 30mm
caps or less. Unfortunately the capacitors I have, Nichicon KG Gold Tune -
Great Supply IV, are
slightly above this measurement, even though they are specified as 30mm
nominal. Isn't that the way of it? I tried to modify the PCB, but it
became too crowded. I had to fabricate my own PCB.
Upgrades that I may
consider in the future are better internal wiring, better RCA connectors,
maybe some shielding of the AC cords leading into the power supply.
Many
thanks to General Semiconductor for sending free samples of their UG10DCT
rectifier. You would not believe how hard it is to find this particular
rectifier in North America.
|