|
Prepping to prime
& paint...
| |
|
|
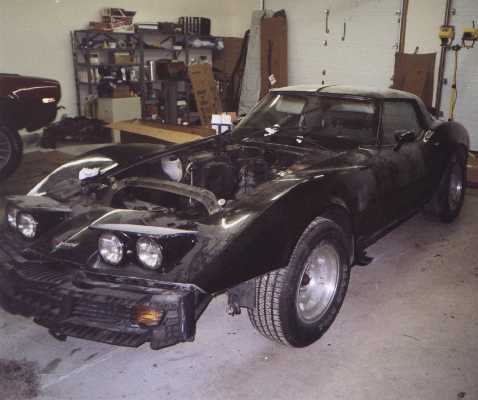
Wow, this body is ugly!
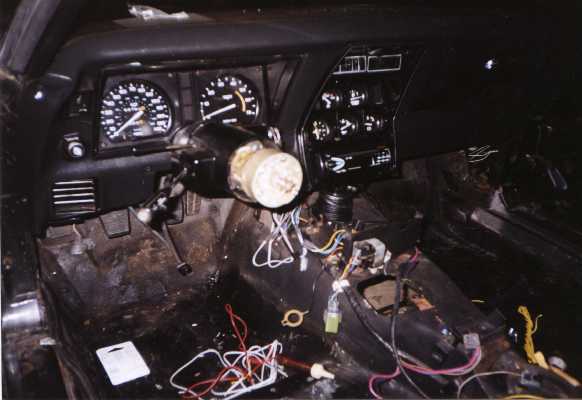
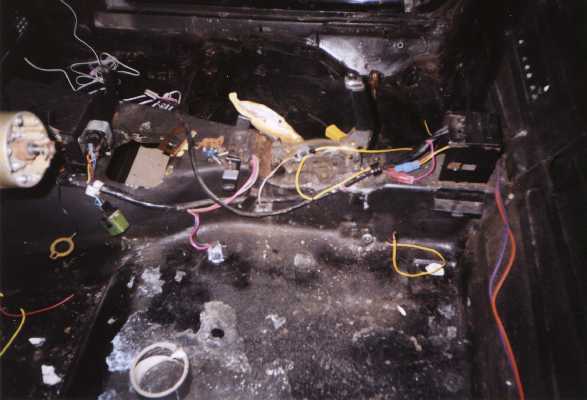
Before installing the interior, I figured the
best thing to do was to fix the exterior. This would allow me to work with
reckless abandon on the body while avoiding damage on the inside, as well as
occupy me for a few months, so I could forget where all the wires went inside
the car.
The car had a couple of paint jobs over the
original black, so the DA came out and my good friend and head body man Aaron
Boy Wonder Frase dug in and stripped her down. His meticulous work throughout
the project, and his tireless correction of my mistakes made the finished
product look as good as it does.
|
|
|
After stripping the car down, we fixed the
quantum amount of imperfections in it. We used a product called Fusor,
manufactured by Lord Corp to repair the fiberglass (actually it is called sheet
molded compound, which as I found out is radically different from fiberglass,
and will get you verbally chastised on the ncrs site if you confuse the two. )
I purchased some scrap fiberglass from a local
body shop and used the pieces as supports under my repairs. The Fusor bonds the
2 pieces together under heat, and the resulting repair is very strong. It worked
flawlessly, with the only problems being self-inflicted, such as when I burned
the rear quarter by putting the heat lamp to close. Who knew?
|
|
The previous owner in his quest to turn the car into a road
racer had ripped out the power antenna, drilled a 1 inch hole in the space left
and filled it with an aluminum plug. Ugly, yet nonfunctional. However we filled
it and smoothed and sanded it to perfection. It looked so good we could not bear
to drill another hole in it for the new antenna. More on that later.
Bodywork on a vette seems to have real good points and real
bad ones. On the plus side, there is really no rust, and no bondo bucket
worries. Negatively, if you are a little too aggressive with the DA you can
easily wipe out the body lines and make the car look like a bar of soap.
Out with the old Stock Motor |
|
|
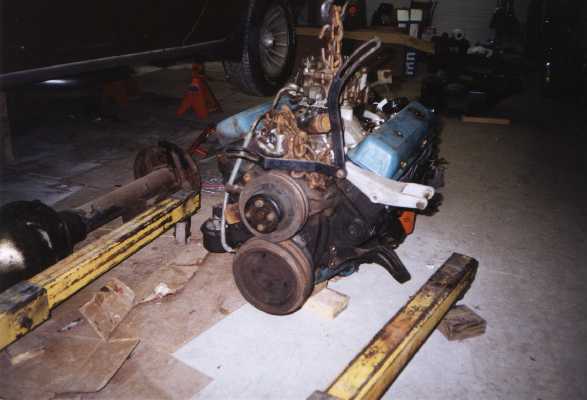
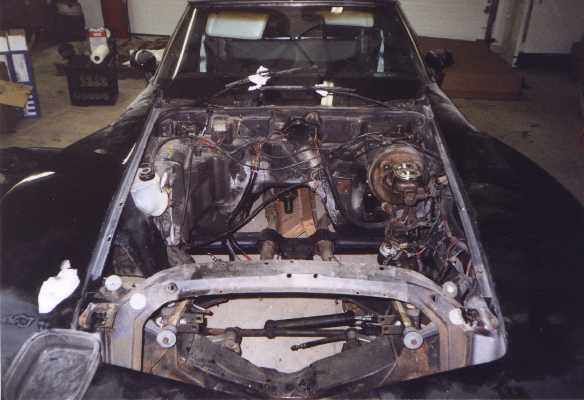
In the meantime, the new motor was completed by Gemler
Performance. I decided to install a different motor for several reasons. One,
the factory L-48 motor was a slug, and it was in need of a rebuild. Secondly, I
wanted more power; the original motor would be an embarrassment, particularly
with the high tech suspension, so more horses were needed. Third, I wanted to
use the new Vortec heads.
The original 350 now powers an engine stand in my garage,
and a new 460 horse, 383 stroker resides between the fenders. It is great
looking motor, and I cant wait to get in on the road. And without butchering
the stock engine, the car can be returned to stock some day. But not by me.
|
|
I had some more fun with the break in of the motor. I used
Hooker Comp headers and I stripped them down to bare metal, and then I coated
with POR 15 header paint. I followed the directions, doing everything
recommended except sandblasting them, which the company said was not necessary,
just beneficial.
Nonetheless upon initial start up, things looked OK, but
at about 5 minutes into the process, large chunky flakes of the coating flew off
and attacked us. By the time the break in was complete the bulk of the material
was gone, and we were blinded by stray chunks.
POR 15 could care less about my problem, as expected, so I
removed the headers and in a fit of fiscal blindness, I sent them off to High
Performance Coatings to be ceramic coated. It wasnt cheap, but they wont rust.
And as I lay under the tight undercarriage confines of my car reinstalling said
headers, I realized that I hate POR 15 with the intensity of a thousand burning
suns.
|
 |
|
|
| Home
| Prev | Next |
|