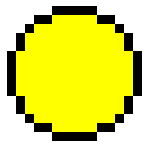
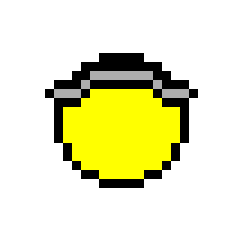
The Face Step Two Now then, my next step is always to put the basic color of our smiley. This helps visualize the image as more than just a circle. A little yellow, and its already looking like a smiley.
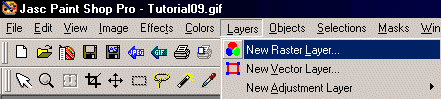
Now, we'll be working in layers here. Remember, layers are just that, a layer you can draw on that is on top of the previous layer. That means you can start drawing on top of an image without actually changing the image in the layer underneath. This is really handy when you want to make helmets and weapons that you might want to reposition later, because you can just drag them around wherever you want and the smiley base will just stay there showing through. However, I can't show you pictures of how a layer looks, but I can show you where to find them in PSP. We'll want to be coloring on things, so we need a new Raster Layer. Here's where to go to make a new layer:
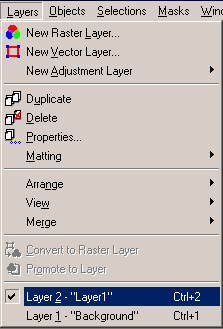
Click New Raster Layer, tell it Okay (the settings it has as default are acceptable, although you can rename the layer if you just really want to). The program then automatically takes you to the new layer. Later on, you'll want to change layers, and here's how to do that. Open up Layers, and at the bottom will be your layer list. Just click on the layer you want to work in.
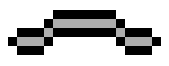
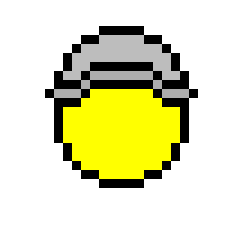
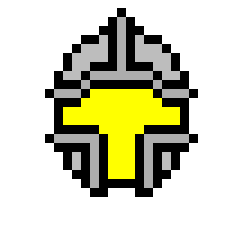
Okay, now that that is out of the way, lets move on to the reason we made the new layer. We're now going to make the helmet for our fighter smiley. First up, lets make the brim for our helmet. Remember, we're on Layer 1 now, so for just this once, I'm going to show you what we're drawing on the new layer, and what the whole thing looks like put together. After this, when I show you how we're doing, I won't show you every single little layer, that'll be up to you to keep track with. But anyway, here's what we have so far:
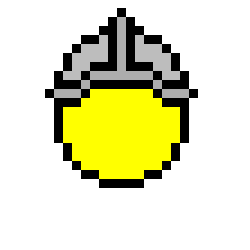
Notice how much black is at the top of the smiley right now. Thats where the black outline of the brim is nudging up next to the outline of the smiley. Lets finish off the basic helm here so we can see it more clearly. After thats done, the helm looks kinda bland, so lets make that brim turn into a ridge kind of thing, just because it looks good.
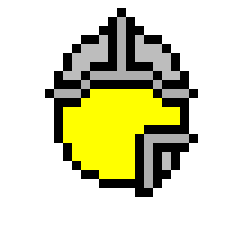
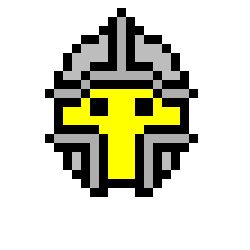
You may have noticed that the curve that makes the top of the helm is the same curve we used to make the circle out of. See the 1-2-5 pixel pieces? It helps keep things looking like they go together when you reuse pieces like that. Keeps it from looking patchwork or having any jarring areas that detract from the smiley as a whole. Okay, lets finish off the face now. What else goes with a helmet? The face guard of course! Now lets make one side of our face guard, then use the mirror tool to flip it over, and paste it back down on the other side. You can also just draw another one by hand if you want. After that, our face is going to need some eyes, so drop those in while we're at it.
Okay, the face of our smiley is now complete! Time to rejoice, right? Nope, this is a fighter, we need to give him some props to make it really obvious what he is. What does a good fighter have? Right, a sword and a shield. So, lets move on to Step Three, which has a new layer, and some fun weapons to play with. |