Sword and Shield Step Three We're done with our base smiley, so you might want to save here. Don't bother trying to convert it over to a .gif or anything like that, because we're not done yet. Just save it as the program extension (.psp for paintshop pro) just in case something happens, so you don't lose your work and have to start all over again. Okay, we all caught up? Now that we're making weapons, we need to make a new layer. This way we can move the sword and the shield around where ever we want without messing up whats beneath. Remember when I said you might want to save that basic circle in case you wanted it later? Guess what, its later, and you want it again. That circle just happens to be the perfect size for our shield, and its already nice and round. Now, I prefer to keep all my work on the same canvas, and up till now I've kept the canvas just a little bigger than the smiley has been. But its soon going to need to make room for that sword and shield, and I want to have room off to the side to work on my shield with. So, we need to resize our canvas, or if you are in a program that can't do this, open a new canvas, and copy/paste your work over to the bigger size, but you'll have to do it one layer at a time. Thats a lot of hassle, so lets just resize our canvas. There is the resize tool, just set it to something big like 100x100 or 200x200 to give yourself lots of working room.
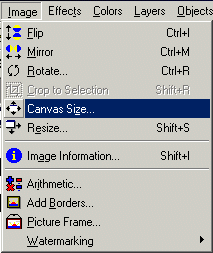
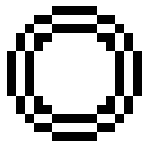
Okay, now copy and paste your circle over to the top layer. That will be the outline of our shield. To make it interesting to look at, lets make it a wooden shield with metal reinforcing. Take the circle, and make a thin ring out of it by drawing another ring inside it one pixel out (see illustration). After that, we can make the reinforcing section, which will be a bar and another steel disk in the middle.
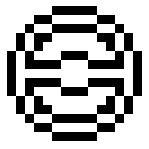
Now, we apply the gray color to the ring and the bar in the middle, and make the two half circle parts a wood/leather kind of brown. We could stop here, but lets make the shield a little more interesting. Pick a color a little lighter than the brown you used before, and lets add some little lines into the wood part of the shield so it looks like woodgrain, and our shield is done!
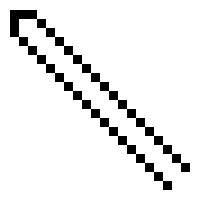
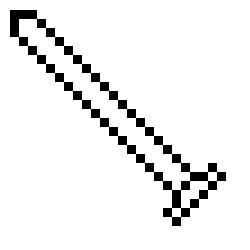
Putting the shield to one side, lets make the sword on the same layer. Later on when we animate it, we can just move the entire layer up and down a little bit to make it look like our fighter smiley is bobbing up and down ready for some action, without having to draw a single thing over. First thing I always do when making a sword is the blade. Blades are very easy on this scale, as they're really nothing more than two parallel lines and a point. After that, its just a quick couple of pixels to make a hilt for the sword.
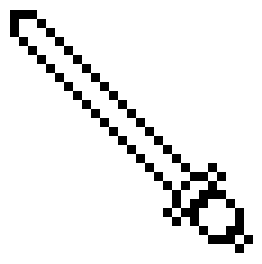
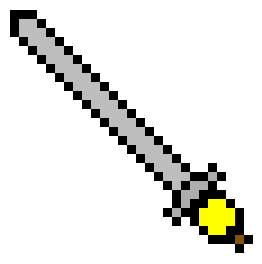
Now, since the sword won't be floating in mid air, we should draw a little blob circle under the hilt to represent the hand, and a little extra spot sticking out for the handle. Then flood fill everything with the colors we want to us, and add a little line of darker gray down the center of the blade for some texture.
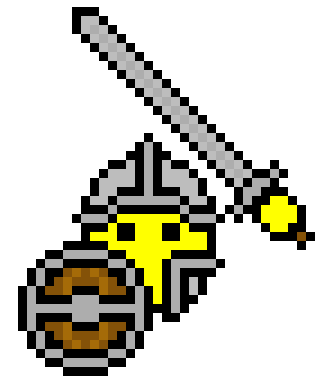
Thats our smiley face finished, thats our shield finished, and now thats our sword finished. Time to put them all together! If you've been working on these in seperate images, you need to copy/paste them over to your main smiley (don't forget to resize your canvas if you need to). If you've been working on a big image with these things over on the side, all you're going to have to do is slide them over.
And guess what? We're finished drawing the smiley! Yay! We're not done with it, but we don't have to draw anything else from here on out to finish this particular smiley. Everything else is just setting transparencies and animating it. Although sometimes you'll have to draw more stuff to animate it, but this one has a simple animation that can be done real quick without redrawing anything. We'll get to all that in a little bit. |