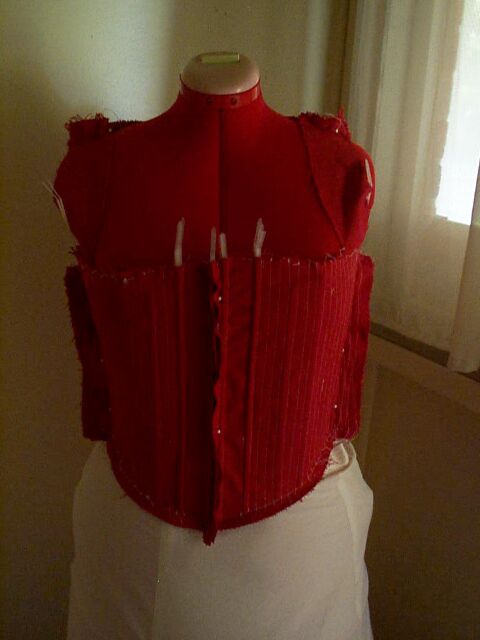
Tudor Kirtle c.1545

Constructing the Bodice

I relied primarily on Emily Knapp's page on constructing a working class woman's kirtle. So following her concept I am beginning with two layers of canvas interlining which will hold the bones. As I used my interlining canvas for the first and second drafts of my bodice pattern I didn't want to waste it so I decided that interlining on the strap wasn't important and cut it off leaving one layer of canvas in the shoulder strap instead of two. I began by sewing the two layers together around the bottom and side edges, leaving the top edge open to allow me to insert the boning.
I then sewed vertical channels 1 cm wide all the way around the bodice, which you can see in the picture to the right.I used white thread partly so it would show up better but mainly because I couldn't be bothered re-threading my sewing machine.

I chose to use cable ties as boning for the sake of my budget. I also wanted to experiment with the placement of the bones so I needed boning that I could adjust the length depending on which channel I placed the boning in. However I am rather disappointed by the amount of support they give. Beside the lacing holes I have had to stack them three at a time into the channels to get reasonable support, and this still is not equal to steel boning. Elsewhere I can get away with one or two per channel by placing the boning in every channel or every second channel at the back. If I make another of these kirtles I will use spring steel which only takes up the space of one cable tie. However these cable ties will be useful for experimenting with exactly what length boning I need, and they could be useful for stiffening a gown, which is not performing the same structural role as this kirtle.

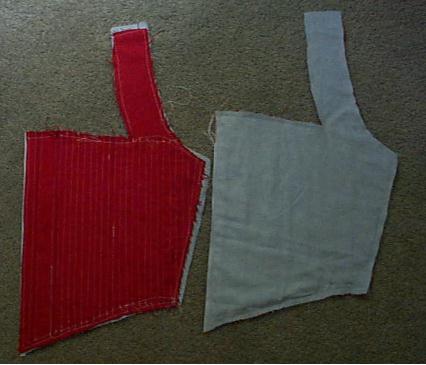
The canvas interlining of my Kirtle with boning.

The bodice worn by my dummy with cable tie boning poking out

In the picture to the left you can see the bodice pinned together. At the sides you can see that I have made the bodice slightly too large, I knew this problem was there but I forgot to adjust my pattern accordingly. You can see the ends of some of the cable ties poking out as I have not yet cut them off to the right length. To begin with I simply rounded off one end and then inserted them into the appropriate channel I then took a felt tip pen and marked where they poked out of the fabric. I removed the bones from the channel and cut them 1.5 cm (i.e. standard seam allowance) below the mark and rounded the ends with a nail file.
After the interlining had been completed the next step was to attach the outer layer of fustian (i.e a linen cotton blend). I cut one layer of linen and flat lined it with my fully boned interlining layer. This means I sewed all the way around the edges and I will now treat these three layers of fabric (two of canvas and one of fustian) as one.
The fashion fabric flat lined with the canvas interlining

The pattern pieces laid out on the fabric.

At this point I realised that the way I had been working up to now, cutting each section out individually was not making efficient use of my fabric so, before I cut the next layer of fustian, (to line the bodice) I decided to find my skirt and sleeve patterns and lay them out on the fabric alongside the bodice. By doing so I managed to leave a roughly one metre of fabric which I can add as an extra panel in the skirt.
At this stage of construction I switched from machine sewing to hand sewing, this is a purely personal choice because I want to enter this garment into a competition. The rest of the bodice construction could be done on a machine without a problem. Hand sewing does however produce a garment that sits better as you can attach the outer layer and the lining together at all the seams rather than only around the edges, as you see with a standard bag lining.
  I assembled the two layers (i.e. sewed the front piece to the back) I then sewed the lining and the outer layer together around the neckline and the centre front opening before working my way down the two side seams. Once the two layers were sewn together I set in the sleeves and bound the seam with a strip of fustian.  
Back to: Creating the Pattern Forwards to: The Skirt

This page is maintained by Elizabeth Walpole

Known in the SCA as Elizabeth Beaumont

Last updated, 9 December, 2004


BACK TO MY WARDROBE

HOME

EMAIL

LINKS

Hosted by www.Geocities.ws

1