 |
|
|
|
|
|
|
|
|
|
|
|
|
|
|
|
|
|
|
|
|
|
|
|
|
|
|
|
|
|
Getting Started..... |
|
|
|
 |
|
|
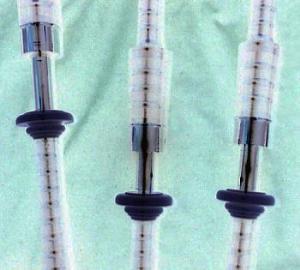
Click to view a diagram of the practice chanter before you get started! You'll be better off, trust me. |
|
|
|
|
|
By now, you should have gotten a practice chanter of decent quality and it should have a reed included. If the chanter was disassembled and the reed supplied loosely from the chanter, take the reed from the end with the yellow string wound around it (called hemp) and place it firmly in to the top of the bottom half (the part with the holes) of your practice chanter. Then, carefully place the top upon the chanter. If yours was fully assembled, give it a gentle shake to be sure the reed isn't loose. If it is, follow the directions as if it was disassembled. When you're sure that all is sound, blow the mouthpiece end of the chanter. It should make a sound. If it makes a honking sound, you're not blowing hard enough. If you made a sound, but as you blew, it shut off, you're blowing too hard. Adjust your blowing until you get a steady sound. If the reed is too uncomfortable for you to blow, wind a dental rubber band around the blades of the reed 2-3 times about a an eighth of an inch from where the blades meet the reed binding. Once your chanter is working properly, continue to lesson 1, then follow the order at your own speed. |
|
|
|
|
|
|
A cooler picture of a similar set of pipes I own. |
|
|
|
|
|
When your chanter is in good working order, proceed to the lessons in chronological order for the method to work best. |
|
|
|
|
|
Lesson 1: Holding the Chanter and Finger Positions |
|
|
|
|
|
Lesson 2: The Chanter Scale and the Chanter Staff Notation |
|
|
|
|
|
Are you sure you got a good look at the practice chanter diagram? |
|
|
|
|
|
If you have any questions, feel free to e-mail me anytime. Once again, I'm Erik Leiken. Thanks for visiting! |
|
|
|
|
|
Email: |
|
|
|
[email protected] |
|
|
|
|
|
|
|
|
 |
|
|
|
More Lessons in development. Check back soon and often! |
|