|
Purple Passion Side Border Stationery ©D'zines by Grace 2006 Created Oct. 24, 2006
This is what we'll be making. (Resized for viewing) All the settings for this tutorial, are just guides. Please feel free to experiment with them. :-)
Supplies Needed: Paint Shop Pro, any version Graphic or tube and complimentary pattern of choice Performance Notes: This tutorial was done using PSP XI No outside filters Results of some steps may vary with graphic or tube used Open Paint Shop Pro 1- File > Open > Graphic or tube of choice 2 - Window > Duplicate > Close original 3 - File > Open Complimentary Pattern Minimize
4 - Dropper Tool > Left click on graphic or tube Choose a medium dark to dark color from graphic or tube Note: This will be used for your background fill 5 - Right click on graphic or tube > Copy > Minimize Background 6 - File > New Settings: 1280 X 300 Pixels (height depends on graphic or tube being used) Resolution 72.000, Raster Background RGB – 8 bits/channel Note: Versions 9 and earlier use 24/bits Transparent NOT checked Right click on color box, choose your background color OK
7 - Layers > New Raster Layer OK
8 - Selections > Select All
9 - Right click > Paste > Paste Into Selection Note: the copy of your graphic or tube should still be on the clipboard.
10 - Selections > Select None
11 - Image > Mirror (optional)
12 - Layers Palette Settings: Blend mode = Soft Light
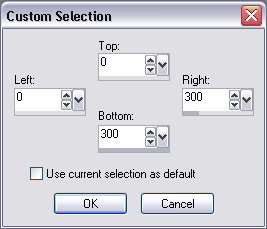
13 - Lower Opacity = 30 - 40 14 - Activate Background layer 15 - Effects > Texture Effects > Texture Texture of choice 16 - Right click on either layer > Merge > Merge All (Flatten) Side Border 1 - Materials Palette > Open Foreground > Pattern This will be the pattern you've chosen to use (I’ve used the Halftone Plaid made from my Halftone Plaid tutorial) Settings: Angle = 0, Scale = 100 OK 2 - Layers > New Raster Layer OK 3 - Selection Tool > Custom selection
Settings:
Top = 0, Right = 300, Bottom = 300, Left = 0 OK Note: Right setting depends on graphic or tube being used
4 - Flood Fill Tool Settings: RGB Value, Tolerance = 0 Use all layers NOT checked, Normal, Opacity = 100 5 - Fill selection with pattern Leave Selected! 6 - Effects > 3D Effects > Drop Shadow Settings: Vertical = 0, Horizontal = 3 Opacity = 70, Blur = 10, Color = Black Shadow on new layer NOT checked OK Leave Selected! 7 - Selection Tool > Custom selection Settings: Same as #3 except change Left to = 10
OK 8 - Effects > 3D Effects > Drop Shadow Settings: Same as # 6 except change Horizontal = -3 (minus 3) OK Leave Selected! 9 - Optional: Effects > 3D Effects > Buttonize Settings: Height = 30, Width = 30 Opacity = 70, Edge = Transparent Color = Background Color (dark) or black OK 10 - Selections > Select None Finish Background 17 - Restore your graphic 18 - Image > Resize Settings: Resample using = checked, Smart Size, Maintain original print size NOT checked Lock aspect ratio = checked Resize all layers = checked (optional) Width = No wider than 275 pixels Height = No taller than 250 pixels Resolution = 72.000 OK 19 - Image > Mirror (optional) 20 - Right click > Copy Close graphic 21 - Right click > Paste > Paste As New Layer 22 - Move Tool Move graphic to left side of background and position centered 23 - Layer > Duplicate 24 - Effects > Edge Effects > Trace Contour Not to worry!! This is how it's supposed to look!
25 - Layers Palette Blend Mode = Darken Optional: Play with opacity settings. Note: Results may vary with the graphic or tube used
26 - Close bottom 2 layers 27 - Layers > Merge > Merge Visible 28 - Reopen bottom 2 layers 29 - Activate merged graphic or tube layer 30 - Effects > 3D Effects > Drop Shadow Settings: Change only Horizontal = 0 OK 31 - Layers > Merge > Merge All (Flatten) 32 - Effects > Image Effects > Seamless Tiling Settings: Show tiling preview checked Mirror, Vertical, Horizontal and Vertical Offset = 0 percent Width and Transition = 0 OK
33 - Layers > New Raster Layer OK 34 - Add your watermark 35 - File > Export > JPEG Optimizer Compression = 20
You’re done! Thanks so much! Can be used in Outlook Express or Letter Creator for use in IncrediMail OR even a web page!
10/29/2006 01:01:37 PM |