 |
|
Host multiple Web sites by using IIS and a single IP address
Use Host Header Names to Host Multiple Sites from One IP Address in IIS 5.0
SERVICES.EXE Terminated Unexpectedly with Status Code 128" Error Message When You Start Windows 2000
Error message when you install or start an MS-DOS or 16-bit Windows-based program
What does the "X" mean when used to define speed? What is CAV or CLV?
What is the relationship between the "X" and CD-ROM drive's spinning speed?
To make a backup of your Windows DNS server configuration, do the following:
Start
regedit.exe and export the following key:
[HKEY_LOCAL_MACHINE\SOFTWARE\Microsoft\Windows NT\CurrentVersion\DNS Server\Zones] |
|
Copy
the following files to a save location:
%windir%\system32\dns\*.dns |
To restore the configuration (or load them on a new server), do the opposite and restart de DNS service to make the new configuration active. You may have to press refresh (F5) in the DNS snap-in to update the display.
2. Host multiple Web sites by using IIS and a single IP address
The information in this tutorial applies to: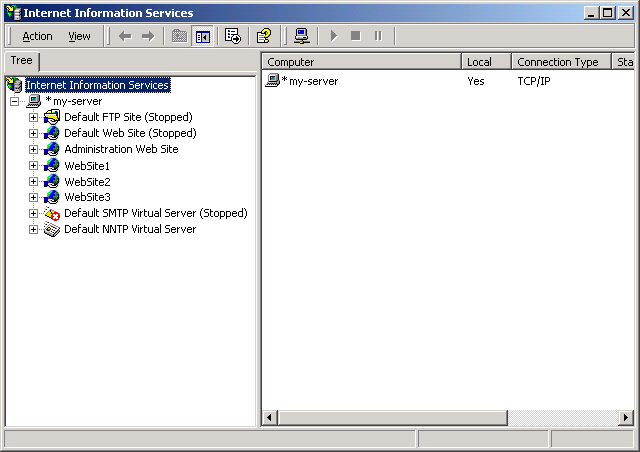

To configure host header names in IIS
| 1. | Start the Internet Service Manager (Iis.msc). |
| 2. | Right-click the Web site to be configured, and then click Properties. |
| 3. | On the Web
Site tab, select the IP address that the site will use. Note: if you only have one IP address on the server, select All Unassigned, and set the TCP Port that should be used (usually 80). |
| 4. | Click Advanced. |
| 5. | In the Multiple identities for this Web Site list, select the identity that you want to use. |
| 6. | Click Edit,
and then add the desired host header name. NOTE: If you want this site to respond to more than one host header name, use the Add button to add additional identities to this list. Specify a different host header name for each identity, but be sure to use the same IP address and port. |
| 7. | Apply these changes and start the Web site (if it is not already running). |
| 8. | Register the
host header name with the appropriate name resolution system. If the computer is on an intranet (a private LAN that uses Internet technology), register it with the intranet's name resolution system, such as the Windows Internet Name Service (WINS). If the computer is on the Internet, register the host header name with the Domain Name System (DNS), which is administered by InterNic. |
| 9. | After the host header name is registered with the name resolution system, test it from a browser by attempting to browse the host header name. The browser should open the expected Web site. |
| • | When your
computer boots or when you manually start the Microsoft Internet
Information Server service, Event Viewer may log the following event:
Event ID : 115
This problem can occur when some or all of the Web sites that are using
Host Headers have the same port number defined for Secure Sockets Layer
(SSL). Internet Information Server 4.0 does not support the use of Host
Headers for SSL. For more information, see the references links below.Source : w3svc Description : The service could not bind instance X. |
| • | Erratic behavior can occur when applying a host header name to the default Web site if add-on packages for IIS (such as Microsoft Proxy Server) are also being used. For this reason, it is generally not recommended that you apply a host header name to the default Web site created by IIS. |
ftp://ftp.microsoft.com/bussys/winnt/winnt-docs/papers/
| 1. | Click the Start button, point to Settings, and then click Control Panel. Double-click the Network icon, and then click the Services tab. |
| 2. | Click Add, select Microsoft DNS Server from the Select Network Service dialog box, and then click OK. |
| 3. | Type the
location of your Windows NT source files, click OK, and then click
Close. NOTE: If you have any service packs installed, you will need to re-apply your service pack before restarting your computer. |
| 4. | Restart your computer. |
| • | Your domain
name (must be approved by Internic) |
| • | The IP
address of each server for which you wish to provide name resolution |
| • | The host names of each of the servers in step above |
   Domain Name: <Domain.com>
   Servers:   192.168.50.11   <Mail1.domain.com>
              192.168.50.12   <Ftp1.domain.com>
              192.168.50.12   <WWW.domain.com> (notice the same IP
                               address)
              192.168.50.15   <DNS1.domain.com>
| 1. | Click the Start button, point to Programs, point to Administrative Tools, and then click DNS Manager. |
| 2. | From the DNS menu, click New Server. |
| 3. | Type the IP address of your DNS server in the Add DNS Server dialog box (192.168.58.15 in the example information), and then click OK. |
| • | In DNS Manager, right-click your DNS server, and click Update Server Data Files. |
| 1. | In DNS Manager, right-click your DNS server, and then click New Zone. |
| 2. | Click Primary from the "Creating New Zone for" dialog box, and then click Next. |
| 3. | The Zone Name
is derived from your IP network address. In the example information, the
Zone Name is 58.168.192.in-addr.arpa. Type your reverse zone name (the
least significant part of the IP address, and work toward the most
significant part of the address). For example:If your network ID is: Then your reverse zone is: 10.0.0.0 10.in-addr.arpa 130.20.0.0 20.130.in-addr.arpa 250.30.203.0 203.30.250.in-addr.arpa NOTE: The syntax of the reverse lookup zone is imperative to its operation. |
| 4. | After you type the reverse lookup zone name, press Tab and the reverse lookup zone file name will automatically fill in using the zone name in step 3 appended by ".dns" (without the quotes). |
| 5. | Click Next, and then click Finish. |
| 1. | In DNS Manager, right-click your server, and then click New Zone. |
| 2. | Click Primary Zone, and then click Next. |
| 3. | Type the Zone Name for your DNS domain. This is the domain name that is registered with Internic (<Domain.com> in the example). |
| 4. | Press Tab, click Next, and then click Finish. |
| 1. | Right-click the A record for your DNS server, and then click Delete Record. |
| 2. | Click Yes in the confirmation dialog box. |
| 3. | Right-click your forward zone, <Domain.com>, and then click New Host. |
| 4. | Type the host name of your DNS server and the IP address. |
| 5. | Click Create Associated PTR Record to enable it and click Add Host. |
| 6. | Click Done. |
| 1. | Right-click your forward zone, <Domain.com>, and click New Record. |
| 2. | Select CNAME Record from the Record Type list box in the New Resource Record dialog box. |
| 3. | Type an alternate name for access to this computer. For example, in the sample information earlier in this article, WWW is an alternate name for FTP1.domain.com. |
| 4. | Type the
original host name in "For Host DNS Name." For example,
<FTP1.domain.com>. NOTE: It is important to use the fully-qualified domain name (FQDN) for the originating host DNS name. |
| 5. | Click OK. |
| 1. | Right-click your forward lookup zone, <Domain.com> and then click New Record. |
| 2. | Select MX Record from the Record Type list box in the New Resource Record dialog box. |
| 3. | The Host Name
(Optional) field is used for the host name of the mail server. However,
if you want users to be able to send mail to your domain using the
format [email protected], then leave the Host Name field blank. NOTE:
If the MX record contains the hostname, sending mail to [email protected]
may not work. There are three ways to resolve this. First, remove the
hostname from the MX record as described in step 3. Second, after the MX
record is created with the hostname, create an "A" record for
the domain that has no hostname. Third, delete the existing MX record
and re-create as described in steps one through six in the Creating an
MX record section of this article. |
| 4. | Type the FQDN
of the mail server in the Mail Exchange Server DNS Name, for example,
Mail.domain.com. NOTE: There is a trailing dot, ".", after the Mail Exchange Server DNS Name. The FQDN that is used for the Mail Exchange Server must have a corresponding A record for that domain. If the Mail Exchange Server is a different computer than the DNS Server, the DNS Server must know where to redirect the mail traffic. |
| 5. | The Preference Number is any number from 0 to 65535. In the case of multiple mail servers, this number identifies which mail server is to be used first. The lower the preference number, the higher the priority. |
| 6. | Click OK. |
5.SERVICES.EXE Terminated Unexpectedly with Status Code 128" Error Message When You Start Windows 2000
| 1. | Restart the
computer in Safe mode:
|
||||||||
| 2. | Click Start, click Run, type regedit in the Open box, and then press ENTER. | ||||||||
| 3. | Locate and
then click the following registry key:
HKEY_LOCAL_MACHINE\SYSTEM\CurrentControlSet\Services\lanmanserver\Shares
|
||||||||
| 4. | Back up the
registry key:
|
||||||||
| 5. | Examine the
list of values in the right pane of Registry Editor. Notice that the Data column contains the paths to shared folders. For example, you may see a line similar to the following:
CSCFlags=0 MaxUses=4294967295 Path=E:\NS Permissions=0 Remark= Type=0
This refers to the E:\NS shared folder. |
||||||||
| 6. | For each value, use Windows Explorer to make sure that the path displayed in the Data column represents an existing shared folder. Delete all values that do not correspond to shared folders. | ||||||||
| 7. | Quit Registry Editor, and then restart the computer. |
6.Windows 98 machine not showing CD drive in my computer
Click start>> Run>> type regedit >> click OK
find and click on the following key
HKEY_LOCAL_MACHINE\System\CurrentControlSet\Services\VxD\IOS
in the right pane right click the NOIDE value and then click Delete
Then Reboot .
NB: Before doing this please backup the regietry.
7.How to login as Administrator in Windows XP?
|
Start the Registry Editor [Regedit.exe] |
|
|
Navigate
to the following registry key: |
|
|
Use the File, Export option to backup the registry. |
|
|
Right-click an empty space in the right pane and select New DWORD Value. |
|
|
Type-in Administrator as the value. |
|
|
Double-click this new value, and enter 1 as it's data |
|
|
Close the registry editor |
|
|
You may use this procedure to hide/show users in the Welcome Screen for any user account. Type the account name accordingly in step 5. |
8. Error message when you install or start an MS-DOS or 16-bit Windows-based program
You will receive an error message that reads something like this:
16-bit MS-DOS Subsystem
path to the program that you are trying to start or install
C:\Windows\System32\Autoexec.nt The system file is not suitable for running MS-DOS and Microsoft Windows applications. Choose 'Close' to terminate the application.
Solution?
The easiest is simply inserting the Windows XP CD into the CD drive and clicking start --> Run and
enter
In the Open box, type cmd, and then click OK.
At the command prompt, type the following commands, pressing ENTER after each command:
expand CD-ROM Drive Letter:\i386\config.nt_ c:\windows\system32\config.nt
expand CD-ROM Drive Letter:\i386\autoexec.nt_ c:\windows\system32\autoexec.nt
expand CD-ROM Drive Letter:\i386\command.co_ c:\windows\system32\command.com
exit
For
further information about this problem (in English) as well as Microsoft's
instructions about how to add the AUTOEXEC.NT file to your system by
using your XP (operating system) CD-ROM, please visit Microsoft® at: http://support.microsoft.com/default.aspx?scid=kb;en-us;324767
![]() top
top
What does the "X" mean when used to define speed? What is CAV or CLV?
To
play music audio, the CD-ROM drive only requires a transfer rate of 150 KB/sec
to sustain smooth operation. This transfer rate is defined by the industry to be
"1X". Therefore, a 48X CD-ROM drive, means the CD-ROM drive's maximum
achievable transfer rate is 48 times of "1X" (48 * 150 = 7,200
KB/sec).
Because CD discs store data in a tight spiral type track that starts from the
center of the disc and outwards, so the circumference at the edge of the track
is greater than the center. Usually, the track on the edge is longer than about
2.5 times than those on the center, so there are more pits to store data.
When a CD-ROM drive uses CAV (Constant Angular Velocity) mode for reading, the
disc is spinning at the same rate, i.e. if the CD-ROM drive is designed to be
8,000 RPM (revolutions-per-minute), the inner track and outer track all have the
same RPM, but CD-ROM drive can read 2.5 more data on the outer track than inner
track on every single resolution. So, we have a variable speed CD-ROM drive that
reads slow rate at inner track but increases to maximum achievable speed at
outer most tracks.
When a CD-ROM drive uses CLV ( Constant Linear Velocity ) mode for reading, the
CD-ROM drive will control disc's spinning speed to achieve constant speed of the
disc in relative to the PUH (Pick-Up-Head, where the laser beam is shined on the
disc and reflection carries information needed to read data ). In this case, the
CD-ROM drive will actually slow the spinning speed by 2.5 times when reading the
outer track. So, by using CLV technology, the transfer rate throughout the disc
is constant.
What is the relationship between the "X" and CD-ROM drive's spinning speed?
As
mentioned in earlier question, the "X" is defined as how many time the
CD-ROM drive's transfer rate in relation to "1X" (150 KB/sec). To
achieve the 1X performance, the CD-ROM drive needs to spin the disc up to 500
RPM at the inner tracks, and 200 RPM when reading the outer tracks where there
is 2.5 times more data read per revolution.
Therefore, a 20X (4,000 KB/sec) CD-ROM drive using CLV technology, one need to
spin the disc up to 4,000 RPM (20X * 200 RPM/X) when reading the outer tracks,
and needs to spin up to 10,000 RPM (20X * 500 RPM/X) to achieve the same
transfer rate when reading the inner tracks. However, 10,000 RPM is the limit of
a sustainable performance of any spindle motor designed. Therefore, when market
starts to demand CD-ROM drives to achieve "X" greater than 20X, CAV
technology has been introduced to achieve such performance, so the CD-ROM drive
can keep the disc spinning constantly at 10,000 RPM and maintains at 20X (10,000
RPM divided by 500 RPM/X) at the inner tracks and upwards. Therefore, the outer
tracks can reach a transfer rate of 50X (10,000 RPM divided by 200 RPM/X).