|
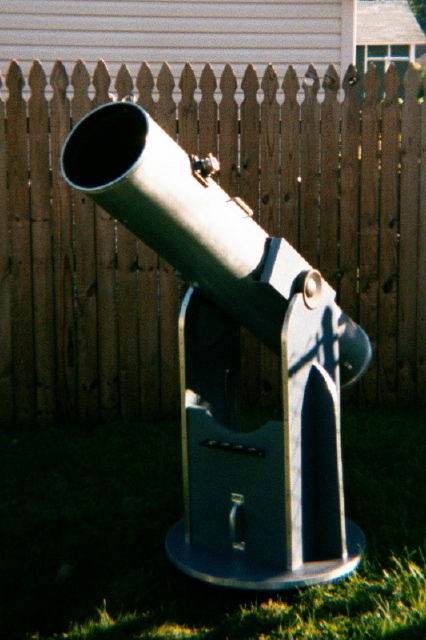
Last spring I finished building an
8 inch f/6 Newtonian Reflector telescope in a Dobsonian Mount. This web page
is one of many concerning this hobby. However, I would like to demonstrate
to the newcomer that there are enough resources on the web about design
and materials to
build a telescope that can perform as well as any store bought model,
and for less money. This project has been on-going since last
year when my daughters Sara and Darcy took an interest in astronomy. I
bought a pair of Meade binoculars (cheap from E-Bay), and we spent many
evenings last year looking at constellations, the Moon, Venus and Mars.
They were both a little disappointed, expecting to see Saturn's rings with only a pair of 8x40 binoculars, and found them difficult to hold steady. Ever since being a child I've wanted to look through a telescope and thinking of the enjoyment and memories it would give us, I decided to shop around for a small, cheap scope. I almost bought a "department store scope", but decided to do some research before making a purchase.
If you browse the web or look through issues of Astronomy or Sky and Telescope , you'll quickly find many vendors offering telescopes of every description, some affordable, others more expensive, and a few costing more than a second mortgage. There are the finished (already constructed) telescopes, telescope building kits, and scopes that can be built to your specifications. Some are small enough to place in a child's lap and others that would require an observatory built around them along with a ladder to reach the focused. I was simply looking for one that would show craters on the Moon, some detail on planets, along with a few star clusters, galaxies, and nebulae. I didn't know the first thing about telescopes, but considering their components, I was convinced that one could be built cheaper than made, and the outcome more rewarding. I chose a Newtonian Reflector* on a Dobsonian Mount* because of it's simpler design and being easier to use for a beginner. |
Reflector telescopes are designed exclusively for astronomy. They deliver more light gathering power for the money than other types, and provide excellent views of all types of celestial objects, from the planets to faint galaxies.
Most web pages out there about amateur built telescopes have photographs showing the different stages of construction. All the construction graphics seen here were done using Strata 3D ® and AppleWorks® since I wasn't sure if this would turn out to be anything I wanted to show off. First we will take a look at the design of a Newtonian Reflector, it's components, and then the various stages of construction. As this page develops I will provide some useful links and possibly a set of construction plans that can be downloaded.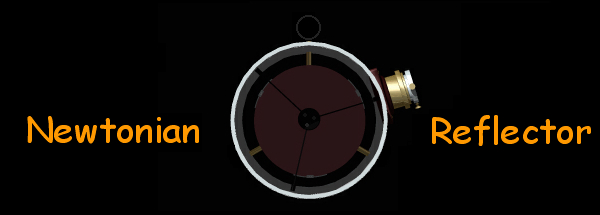
*The reflector telescope, invented
by Sr. Isaac Newton in the 17th century, gathers light from a concave
primary mirror at the bottom of the tube. it reflects the light back
up to a flat secondary mirror near the front, which then deflects it out
the side of the tube into an eyepiece.

Reflectors are economical to construct,
so large aperture optics can be had for an affordable price. Reflectors
with primary mirrors of 6", 8", and larger are typical.
Their light gathering capability
makes reflectors ideally suited to targeting faint deep sky objects such
as nebulas and galaxies, while giving high resolutions of planets as
well.
* Dobsonian
Reflectors are simply reflector telescopes mounted on a cradle-type
alt azimuth base instead of a tripod.
This simple design popularized
by amateur astronomer John Dobson, provides sturdy support and easy "point-and-view"
maneuverability.
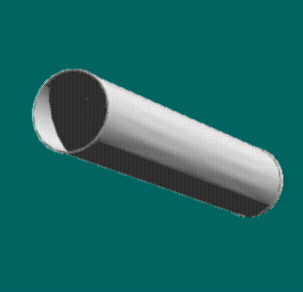
After deciding what design scope
I wanted to build and the size of the primary mirror (according to my
budget), I needed to know how to make the tube, such as diameter, length,
and where to mount the focused and mirrors. I didn't want to start drilling
holes into this thing until I had a good understanding of what I was doing.
Focal Length and Focal Ratio
The diameter and length of the tube
will be determined by the diameter and focal ratio* (f-number)
of the primary mirror, so purchasing the mirrors should be your very first
step.
A lot of vendors sell both the
primary and secondary mirrors as a set. I purchased mine from Discovery
Telescopes which were an 8" f/6 primary and a 1.52" secondary.
The telescope tube should be about
2 inches wider in diameter than your primary:
A ten inch diameter primary mirror
requires a twelve inch diameter tube.
An eight inch diameter primary
mirror requires a ten inch diameter tube.
A six inch diameter primary mirror
requires an eight inch diameter tube.
Focal Ratio* (f-number) x MIRROR
DIAMETER = FOCAL LENGTH = LENGTH OF TUBE
Focal Length* = the distance from
the primary mirror to where the subject becomes focused at the eyepiece.
The focal ratio of the mirror you
select determines how long your telescope will be. An 8" primary mirror
with an f/6 focal ratio will give you a telescope with a 48" focal length.
(Multiply the "f-number" by the
diameter of the primary mirror to get the focal length.) Your tube will
need to be cut to at least the length of the focal length, so you would
have a 48" or longer tube.
An 8" primary mirror with an f/7
focal ratio would have a 56" focal length, and a 56"or longer tube.
You should also consider a few
inches extra length at the front of the tube to keep any unwanted light
from reaching the secondary.
Once you purchase your mirrors and
focuser you will know what diameter tube you should use allowing for
space between the primary's edge and the inside wall of the tube for
adjustment.
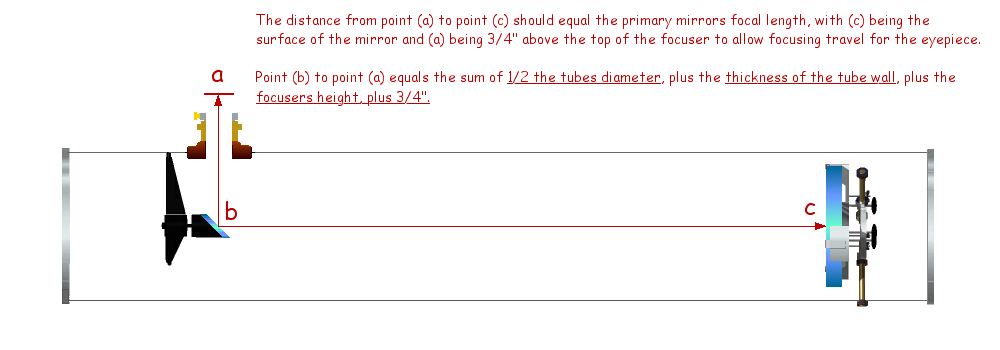
After determining the tube diameter,
you can then calculate the distance from point (a) to point (b) as explained
in the illustration above. Subtract that distance from your primary
mirror's focal length and remaining length will be the distance from
point (b) to point (c).
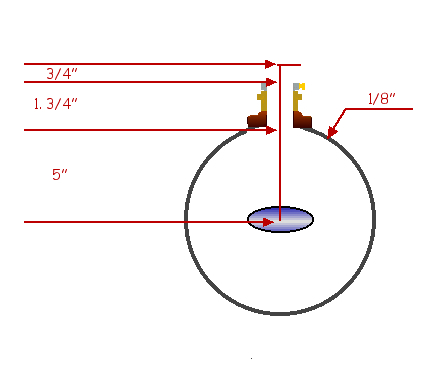
Since I chose an 8" diameter f/6 primary (which can be purchased for around $275.00), I decided on a 10" inside diameter tube 1/8" thick which gives me a space of 1" between the mirror's edge and the inside of the tube wall. This space allows for collimating (alignment ) of the mirror and the "cell" that holds it..........more on that later.
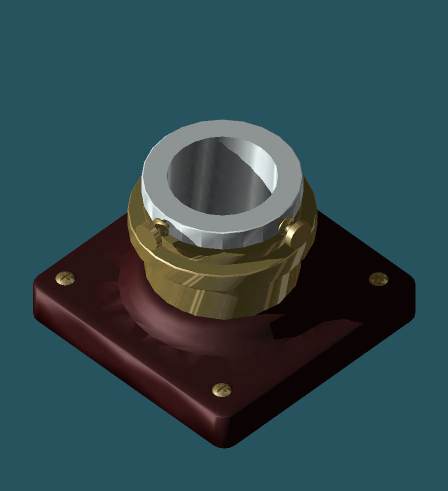
I then set the focuser on the tube making sure it was racked all the way in, and found it to be 1. 3/4" high. I was then ready to add up the figures.
5" - 1/2 the tubes inside diameter
1/8"- the thickness of the tube
wall
1. 3/4 " - the height of the focuser
3/4" - or 1/2 the focuser travel
distance
7. 5/8" total distance from point (a) to point (b).
With my primary having an f/ 6 focal
ratio, I multiplied the diameter of the mirror by 6 which tells me it
's focal length is 48".
Since I already accounted for 7.
5/8" of that distance, I had 40. 3/8" remaining, which would be the distance
from the surface of the primary to the surface of
the secondary or from point (b)
to point (c).
Whatever the focal ratio of your
mirror is rated it will not be exact. If you calculate a 48" focal length
it could actually be 47. 3/4" to 48. 1/4 ".
This is in no way a flaw, it's almost
impossible to manufacture a perfect mirror. The primary will be adjustable
when it is mounted in the tube which we will look at later on.
Now that we have a simple understanding
on how a Newtonian Reflector works, we will begin to look at it's individual
components.
|
|
& Cell |
& holder |
|
|
|
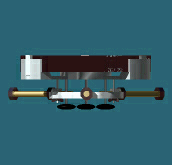
Azimuth Bearing |
Bearings |
Software and stuff |
|
|

|
|
|
|
|
|
|
This page last updated on 11/06/02
top of page