updated May 29, 2005


| Canopy updated May 29, 2005 |
||||||||||||||||||||||||||||||||||||||||||||||||||||||||||||||||||||||
|
|
|||||||||||||||||||||||||||||||||||||||||||||||||||||||||||||||||||||
|
||||||||||||||||||||||||||||||||||||||||||||||||||||||||||||||||||||||
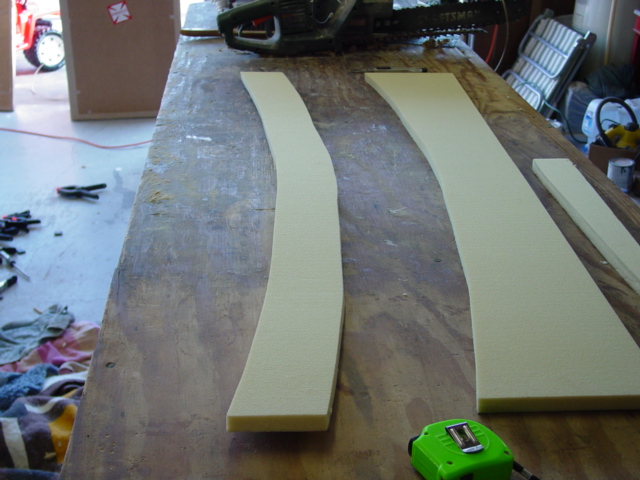
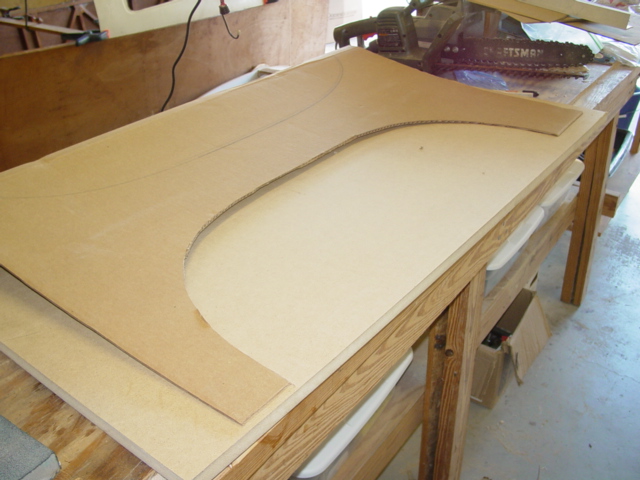
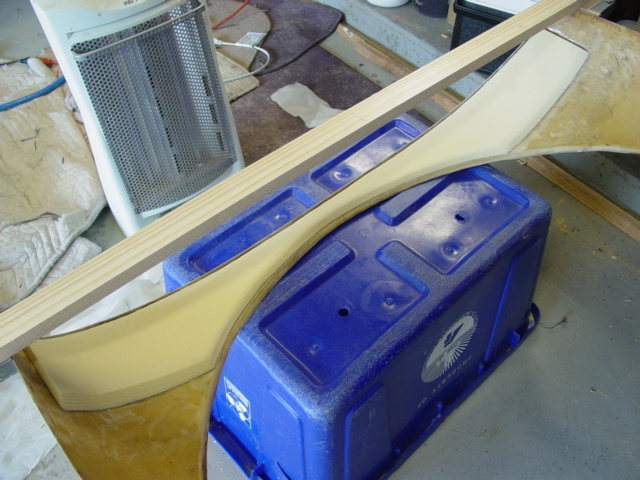
| Once the shape was found, it was transferred to some partical board. | I cut some 1" foam for the "roll bar" in the canopy frame. Note the curve. | |||||||||||||||||||||||||||||||||||||||||||||||||||||||||||||||||||||
| Step 1 was to 'flatten' the canopy to make more horizontal head room. | ||||||||||||||||||||||||||||||||||||||||||||||||||||||||||||||||||||||
|
||||||||||||||||||||||||||||||||||||||||||||||||||||||||||||||||||||||
|
||||||||||||||||||||||||||||||||||||||||||||||||||||||||||||||||||||||
|
||||||||||||||||||||||||||||||||||||||||||||||||||||||||||||||||||||||
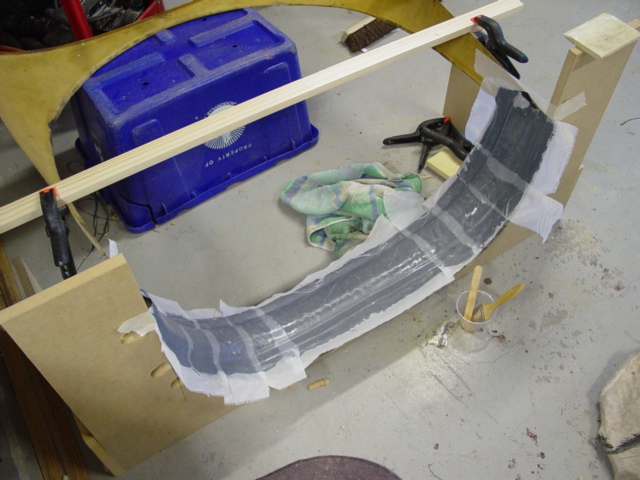
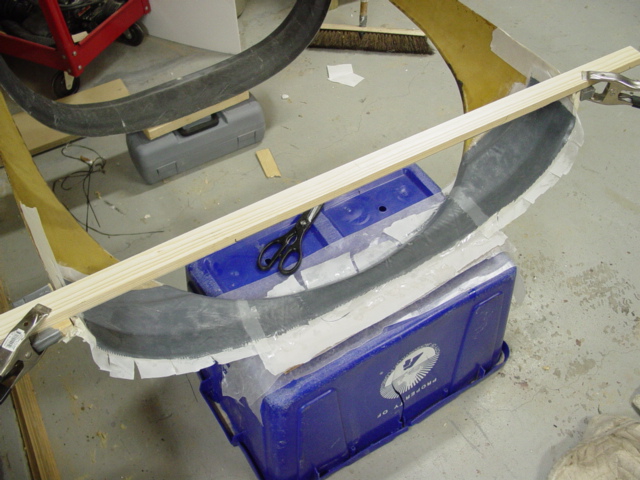
| Once cured, I shaped using a 45 degree block to ensure consistent shape. | After shaping, I layed up 2 layers of Carbon and peel ply. | |||||||||||||||||||||||||||||||||||||||||||||||||||||||||||||||||||||
| I epoxied the foam in place. | ||||||||||||||||||||||||||||||||||||||||||||||||||||||||||||||||||||||
|
||||||||||||||||||||||||||||||||||||||||||||||||||||||||||||||||||||||
|
|
|||||||||||||||||||||||||||||||||||||||||||||||||||||||||||||||||||||
| Once cured, I shaped using the same 45 degree block. | After shaping, I layed up 2 layers of Carbon and peel ply. | |||||||||||||||||||||||||||||||||||||||||||||||||||||||||||||||||||||
| I used 0.50" last-o-foam for the front bow. Cut and glassed in place. | ||||||||||||||||||||||||||||||||||||||||||||||||||||||||||||||||||||||
|
||||||||||||||||||||||||||||||||||||||||||||||||||||||||||||||||||||||
|
|
|||||||||||||||||||||||||||||||||||||||||||||||||||||||||||||||||||||
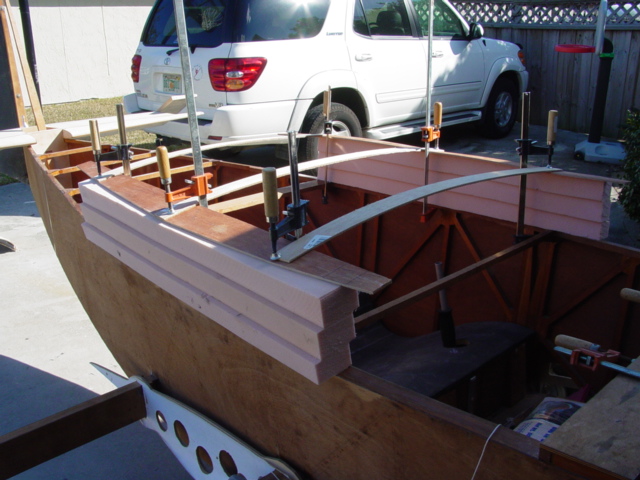
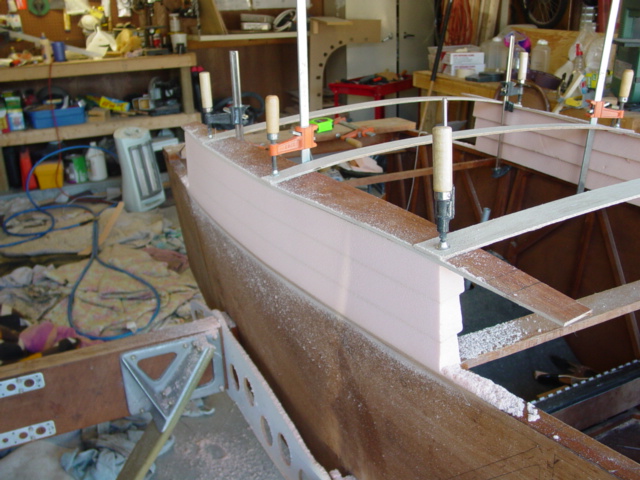
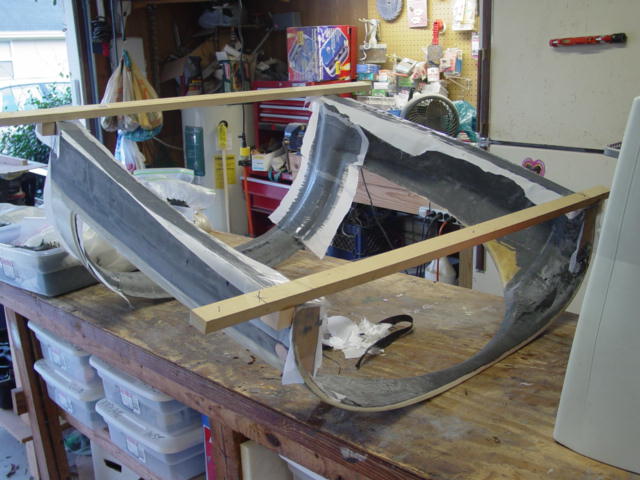
| I stacked 3 layers of 2" foam. The 'stair' effect is due to the angle of the longerons. | I made some templates of the fuse sides to ensure the same curve. I used cross members to maintain vertical level. | |||||||||||||||||||||||||||||||||||||||||||||||||||||||||||||||||||||
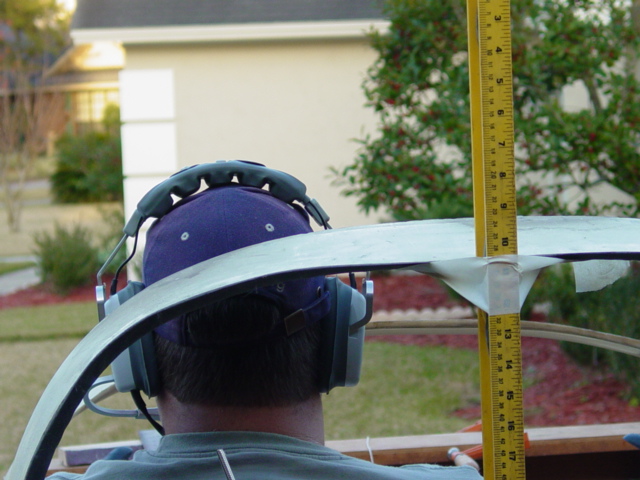
| Once the arches were done, I needed to determine how much to raise the Rand Canopy Fame to clear my 6' body - about 3" | ||||||||||||||||||||||||||||||||||||||||||||||||||||||||||||||||||||||
|
||||||||||||||||||||||||||||||||||||||||||||||||||||||||||||||||||||||
|
|
|||||||||||||||||||||||||||||||||||||||||||||||||||||||||||||||||||||
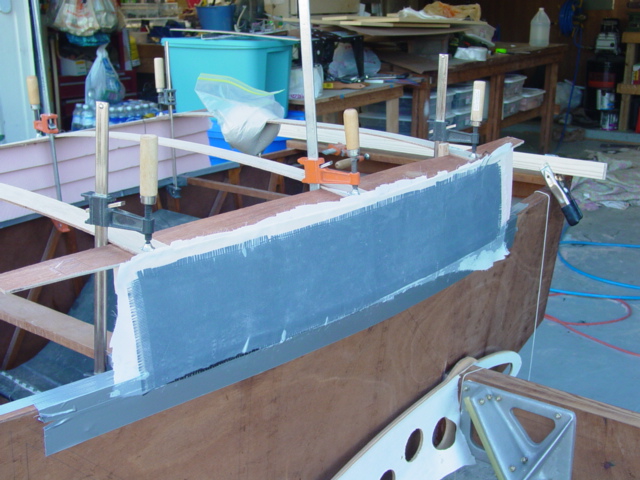
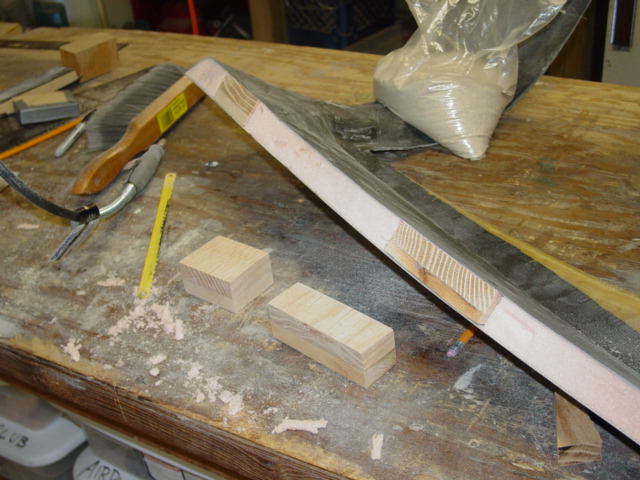
| ....and finished with a sanding block | Once smooth, I layed up a layer of carbon on each side. | |||||||||||||||||||||||||||||||||||||||||||||||||||||||||||||||||||||
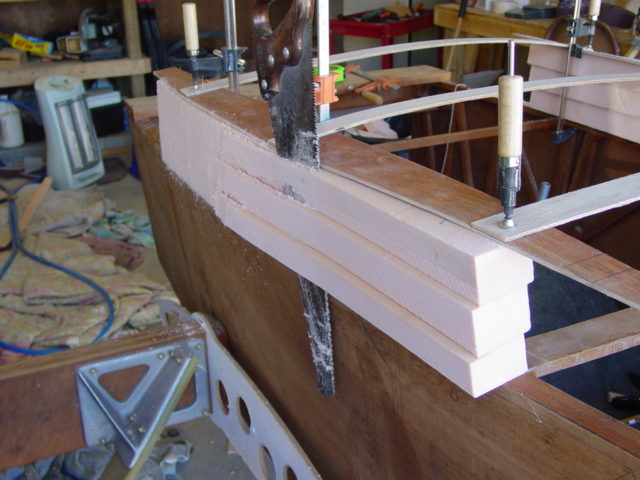
| I used a hand saw to rough shape the foam | ||||||||||||||||||||||||||||||||||||||||||||||||||||||||||||||||||||||
|
||||||||||||||||||||||||||||||||||||||||||||||||||||||||||||||||||||||
|
||||||||||||||||||||||||||||||||||||||||||||||||||||||||||||||||||||||
|
||||||||||||||||||||||||||||||||||||||||||||||||||||||||||||||||||||||
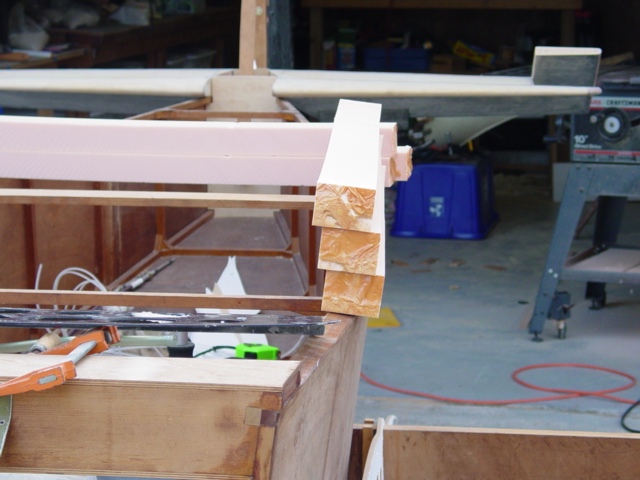
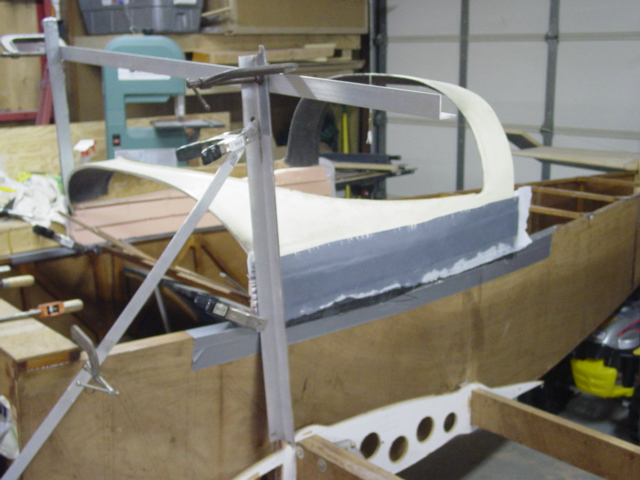
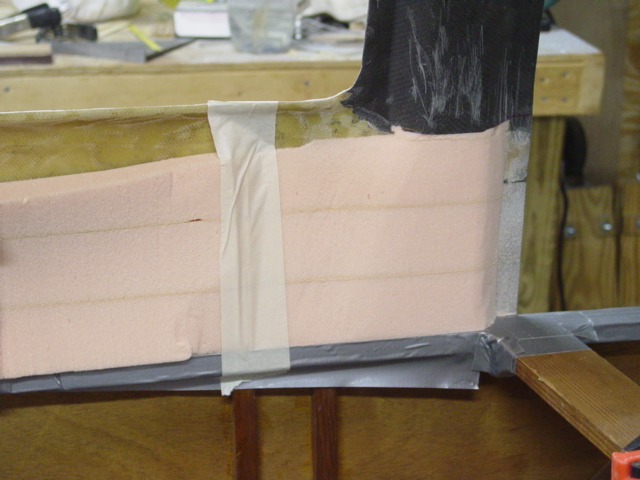
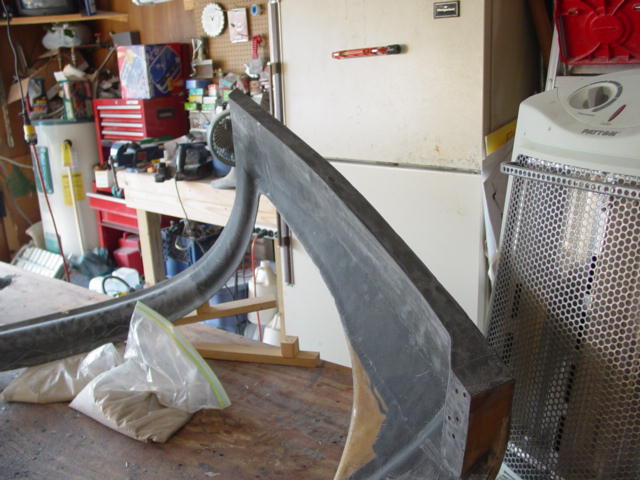
| After trimming more and being satisfied with the angle of frame, this is where I ended up. | I epoxied the exposed foam to the frame and layed up another layer of carbon. The alum is there to keep it vertically level. | |||||||||||||||||||||||||||||||||||||||||||||||||||||||||||||||||||||
| Afer curing, I trimmed carbon away to give the RR canopy frame some foam to epoxy to. | ||||||||||||||||||||||||||||||||||||||||||||||||||||||||||||||||||||||
|
||||||||||||||||||||||||||||||||||||||||||||||||||||||||||||||||||||||
|
|
|||||||||||||||||||||||||||||||||||||||||||||||||||||||||||||||||||||
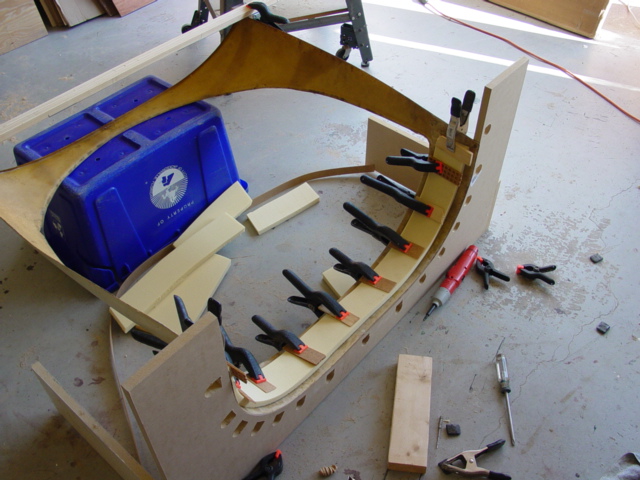
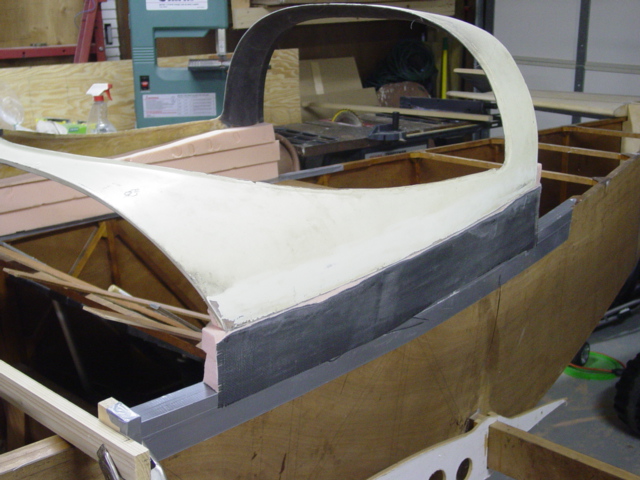
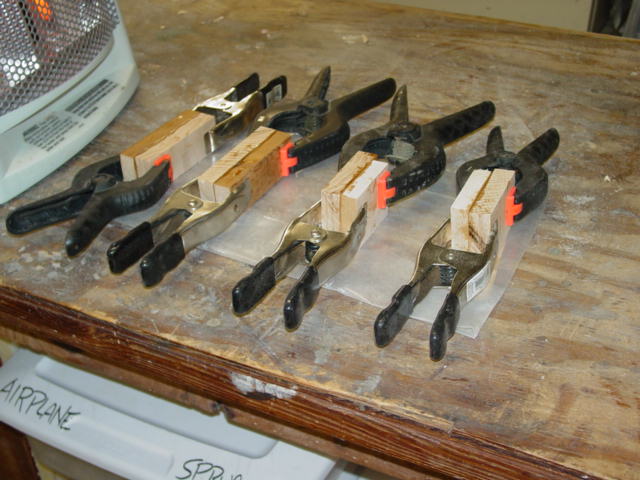
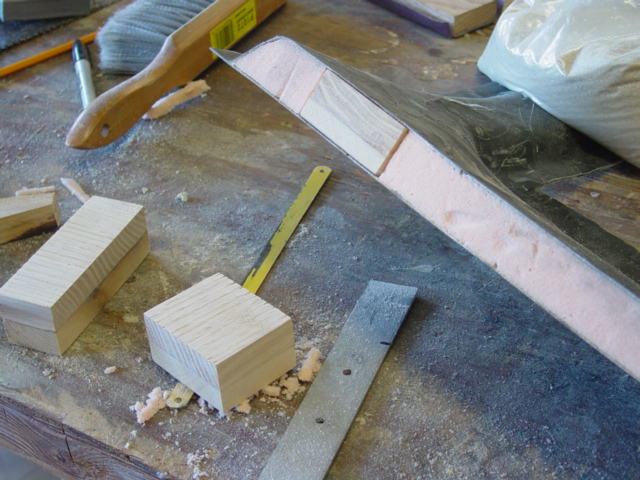
| Once foam work was complete, I needed to insert wood to in key areas to support latches, hinges, and gas struts. | I wanted strong wood for these key areas, so I epoxied spruce and oak together | |||||||||||||||||||||||||||||||||||||||||||||||||||||||||||||||||||||
| After curing, I was able to shape the inside of the frame to give it a nice transition. | ||||||||||||||||||||||||||||||||||||||||||||||||||||||||||||||||||||||
|
|
|||||||||||||||||||||||||||||||||||||||||||||||||||||||||||||||||||||
|
||||||||||||||||||||||||||||||||||||||||||||||||||||||||||||||||||||||
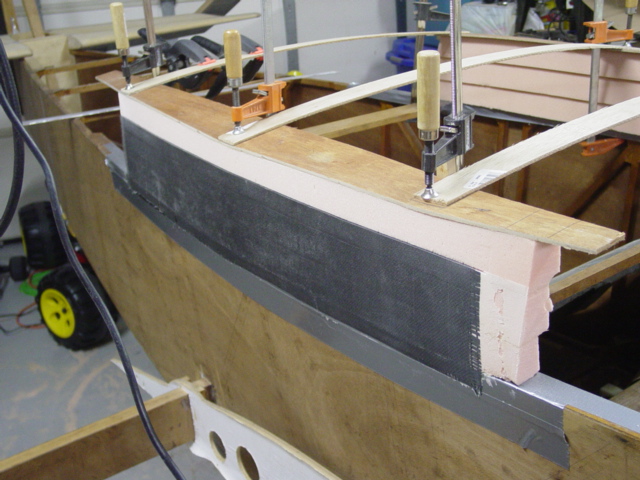
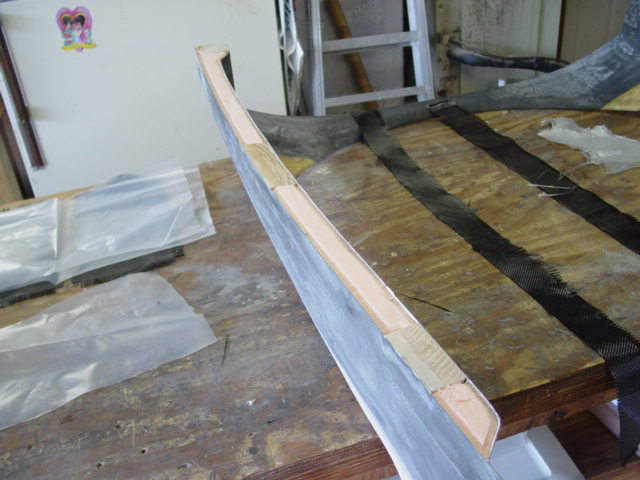
| I epoxied the wood in place and carved out the foam to fill with flox at the joints. | ||||||||||||||||||||||||||||||||||||||||||||||||||||||||||||||||||||||
| I layed up a layer of carbon along the bottom and glass over the front. | ||||||||||||||||||||||||||||||||||||||||||||||||||||||||||||||||||||||
| I shaped the wood to match the curve of the frame. | ||||||||||||||||||||||||||||||||||||||||||||||||||||||||||||||||||||||
|
|
|||||||||||||||||||||||||||||||||||||||||||||||||||||||||||||||||||||
|
||||||||||||||||||||||||||||||||||||||||||||||||||||||||||||||||||||||
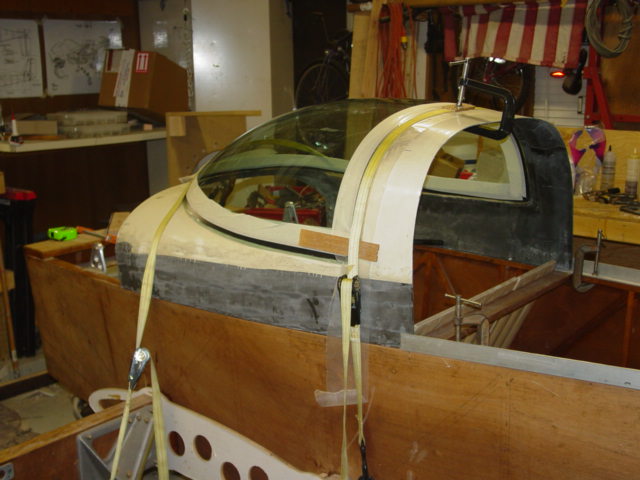
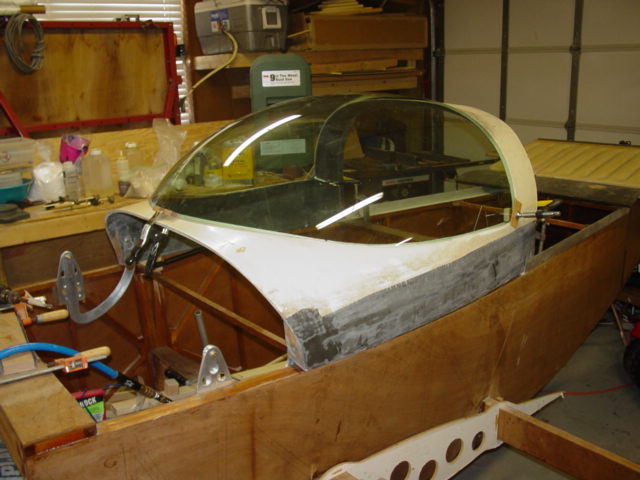
| I trimmed the canopy and test fit it onto the frame. | ||||||||||||||||||||||||||||||||||||||||||||||||||||||||||||||||||||||
| I floxed the canopy in place. | ||||||||||||||||||||||||||||||||||||||||||||||||||||||||||||||||||||||
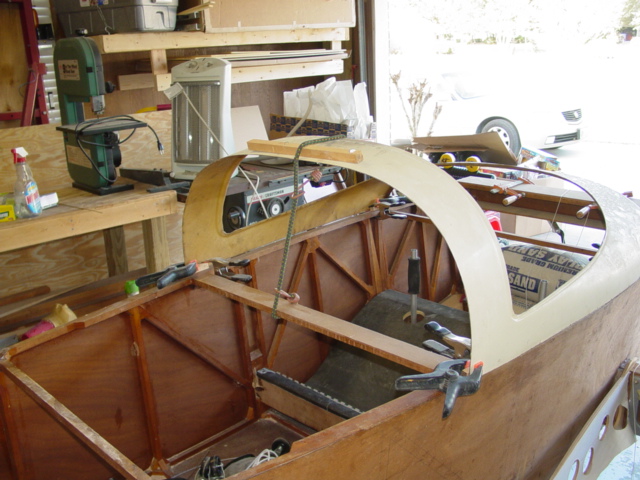
| Here is the finished frame. Not bad for KR work.... | ||||||||||||||||||||||||||||||||||||||||||||||||||||||||||||||||||||||
|
||||||||||||||||||||||||||||||||||||||||||||||||||||||||||||||||||||||
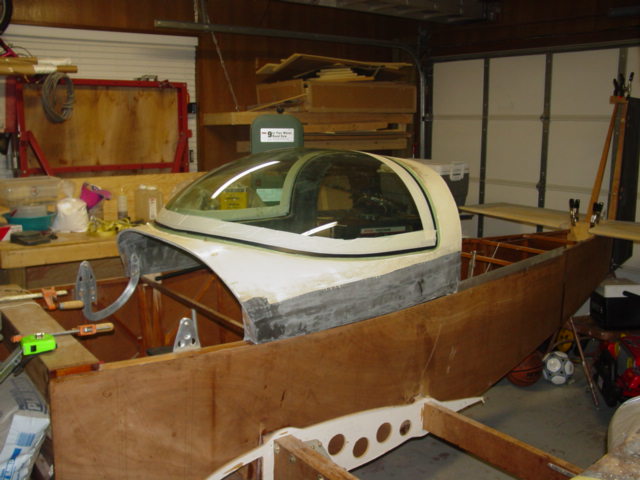
| Here is 90% canopy I still need to add glass to finish the canopy to the frame as well as fill and finish sand the frame. | ||||||||||||||||||||||||||||||||||||||||||||||||||||||||||||||||||||||
| >> Click to see Canopy Hinges | ||||||||||||||||||||||||||||||||||||||||||||||||||||||||||||||||||||||
| Return to Dean Cooper's KR2 Home | ||||||||||||||||||||||||||||||||||||||||||||||||||||||||||||||||||||||
|
|
||||||||||||||||||||||||||||||||||||||||||||||||||||||||||||||||||||||