home | what's new? | bad things | tips | calendar | askCat | resources | contact | guestbook
How to MakeA Wedding Veil |
 |
Materials:
2 beaded hair
combs from Cat Smith DIYing Bad Things
Thread to match chosen veil color
Prepackaged wedding veil from craft store
The reason for the prepackaged veil is basically to save time. You can do your own edging on tulle, but the packaged veil is around $15 and done for you. Also, they have the choices of long or layered, round or gathered. If you want white or ivory, this is the way to go. If you want black or burgundy, you'll have to do the edging yourself. Basically, cut the length and shape you want and turn under 1/4" and then again 1/4" and hem. This is simplest. You could then hand stitch beads or pre-strung beads around the edge. Or ribbon is nice also.
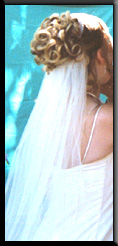
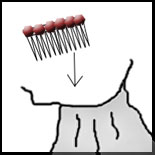
To gather the top of the veil so it fits under the hairstyle and similar to that shown above, baste across 5/8" and a second row 3/4". Wrap the top strings around a pencil or your finger and pull, inching the fabric towards the center. When it is gathered to your satisfaction, basically the length of the two combs almost touching, you are ready to attach the combs. Stay stitch 1/2" across the veil and remove the basting.
 |
Hold the first comb behind the veil. Stitch first around each bead on the comb. Then stitch in and out between the teeth of the comb, attaching the veil to the teeth near the top. You don't want the stitches to interfere when you position the combs in the hair. Repeat with the second comb, and you are finished. | 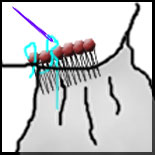 |
Once the hair is done up and in place, just lift the hair and comb in the veil.

Click to subscribe to the Cat Smith DIYing Newsletter!!
home | what's new? | bad things | tips | calendar | askCat | resources | contact | guestbook
Cat Smith DIYing and its contents
are ©2002
Contact the Web Mistress regarding any questions, comments or problems:
DIYgothicCatGrrl