
And, voila, you're done. Go gross out your friends.
| Chemical Burns: Part 2 | ||||||||
|
|
|||||||
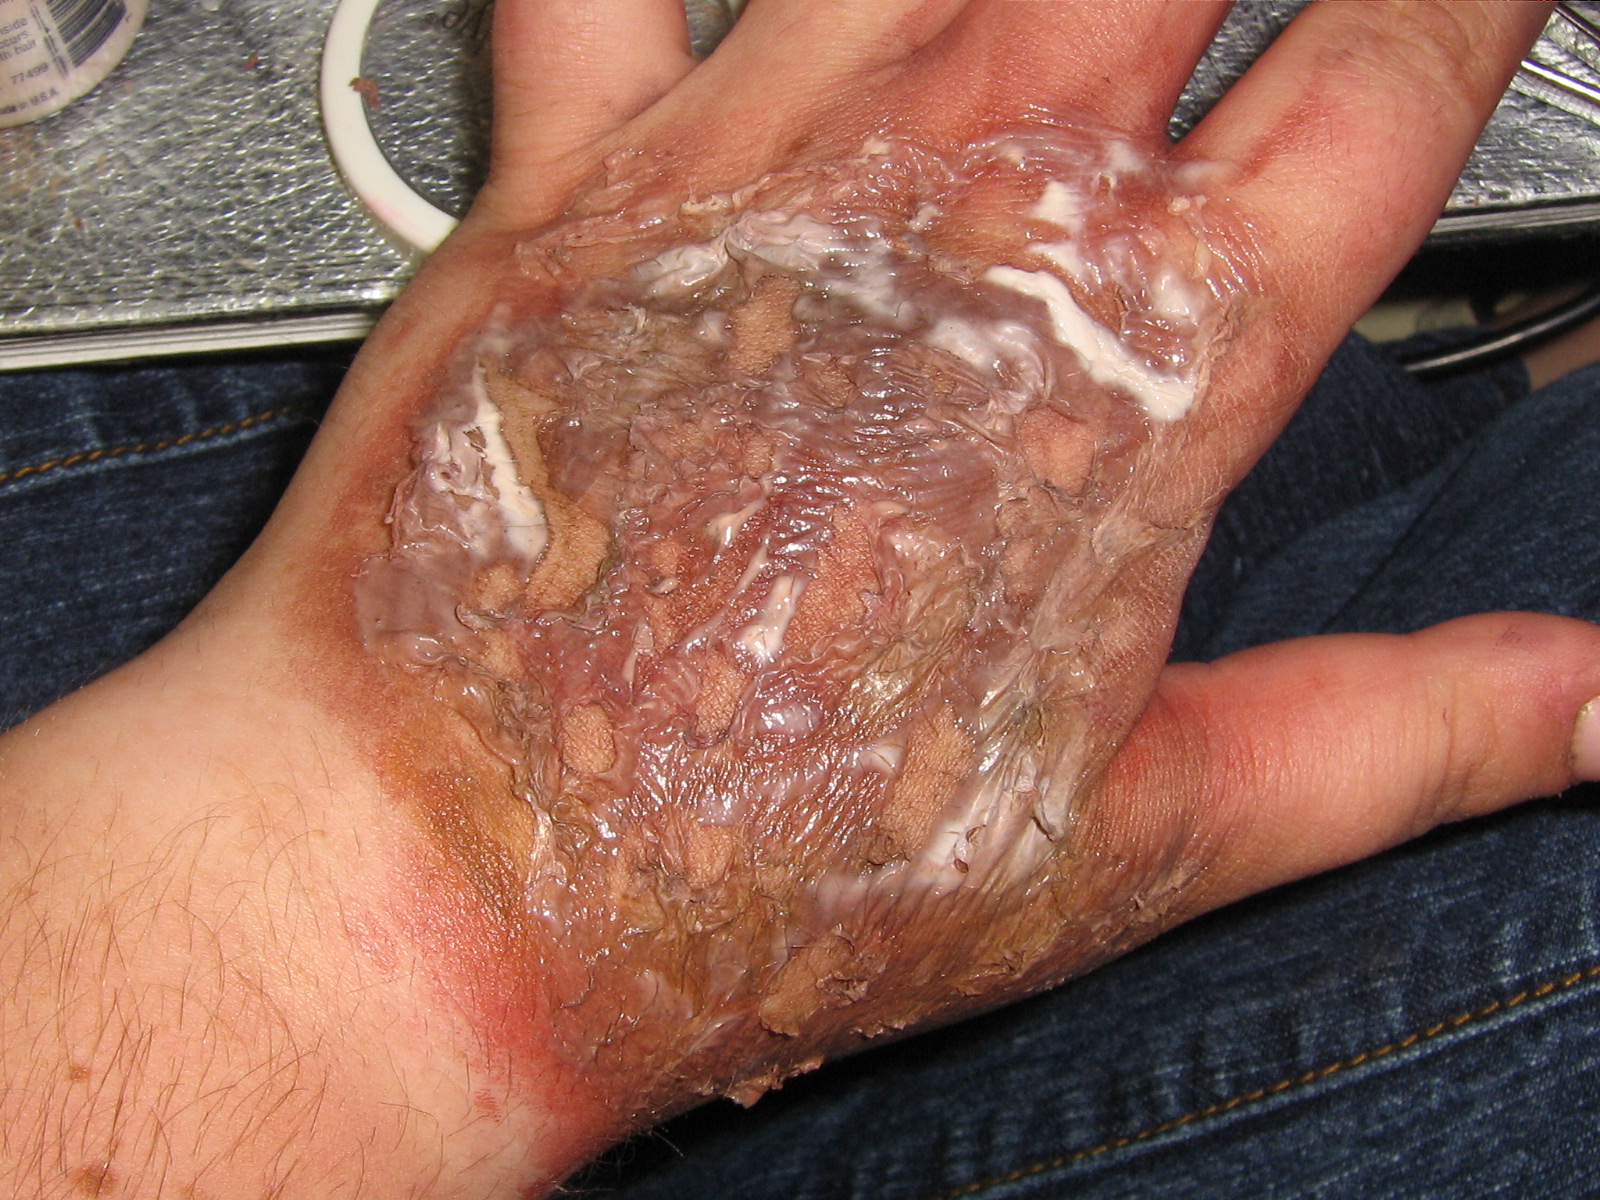
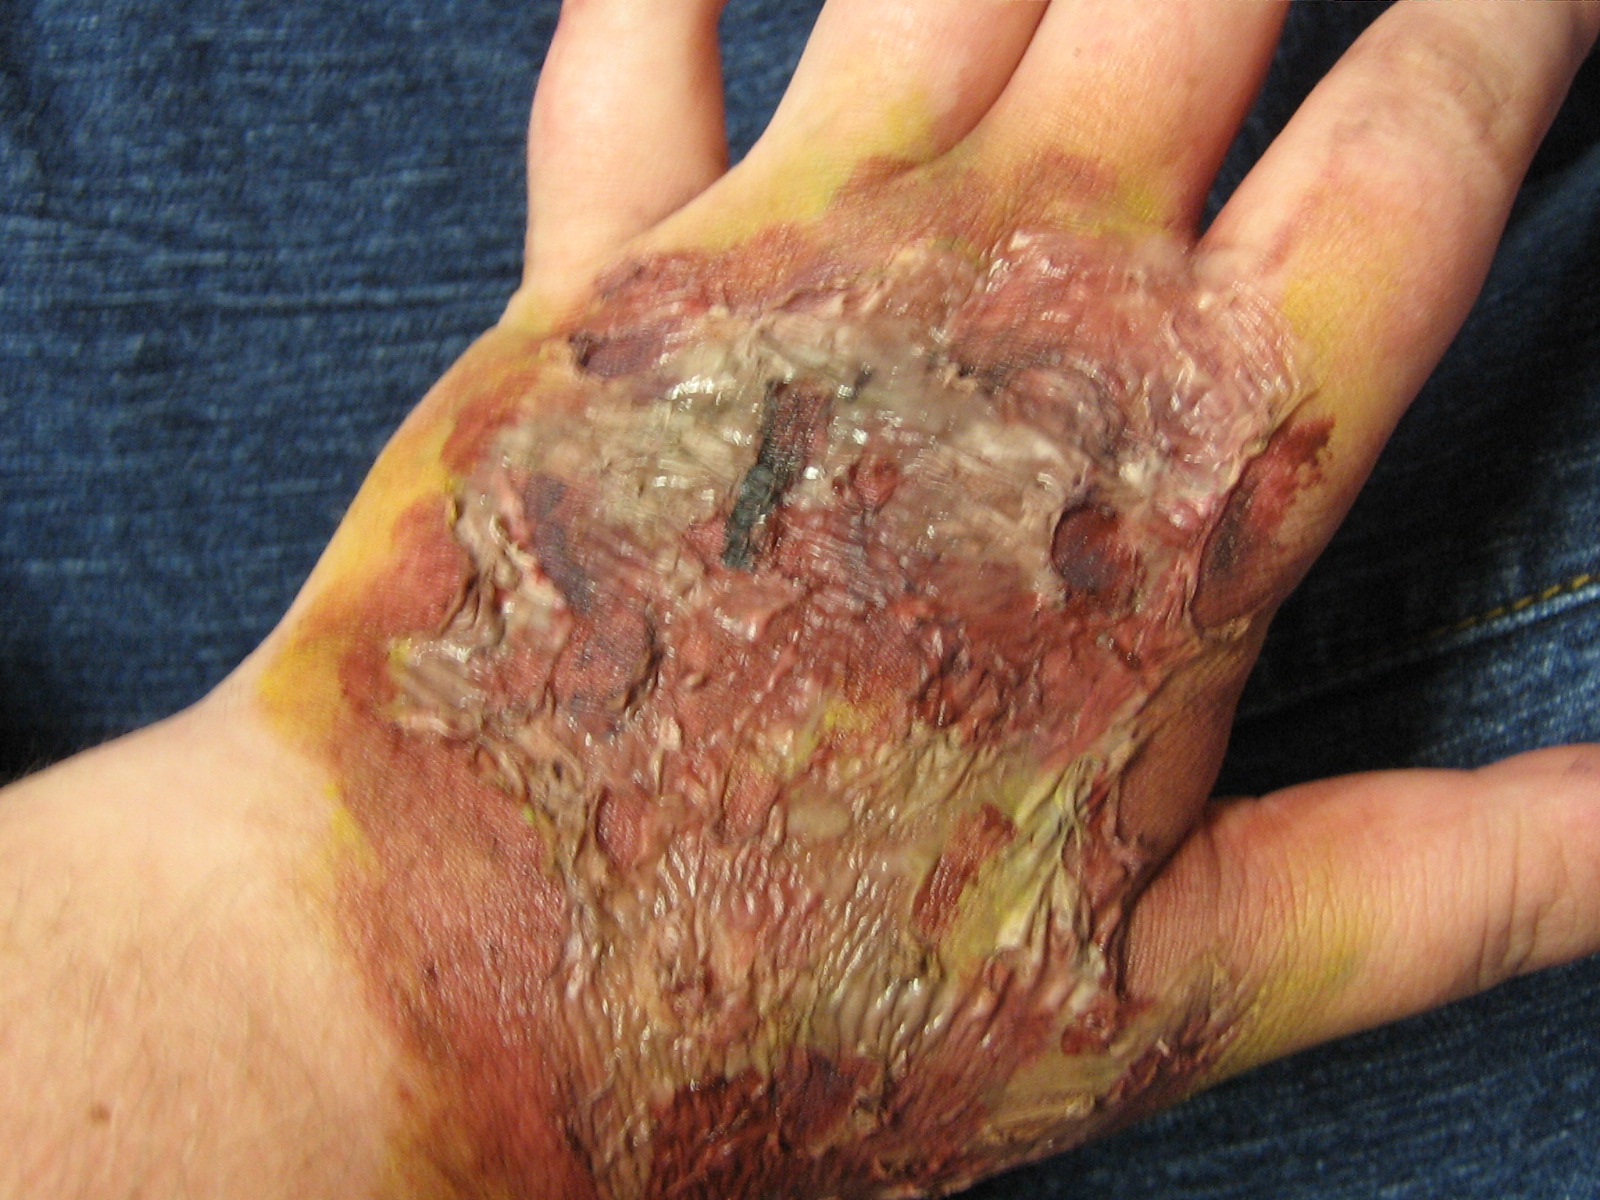
| 9. Your wound should look something like this when dried. I wanted a lot of burns and blisters, so I went crazy with the tweezers. Don't forget to peel up some of the edges to give off a lovely appearance of molting skin. (White latex is where it hasn't dried yet) | 10. Blend yellows, reds and greens around the edges of the burn. | |||||||
|
||||||||
|
||||||||
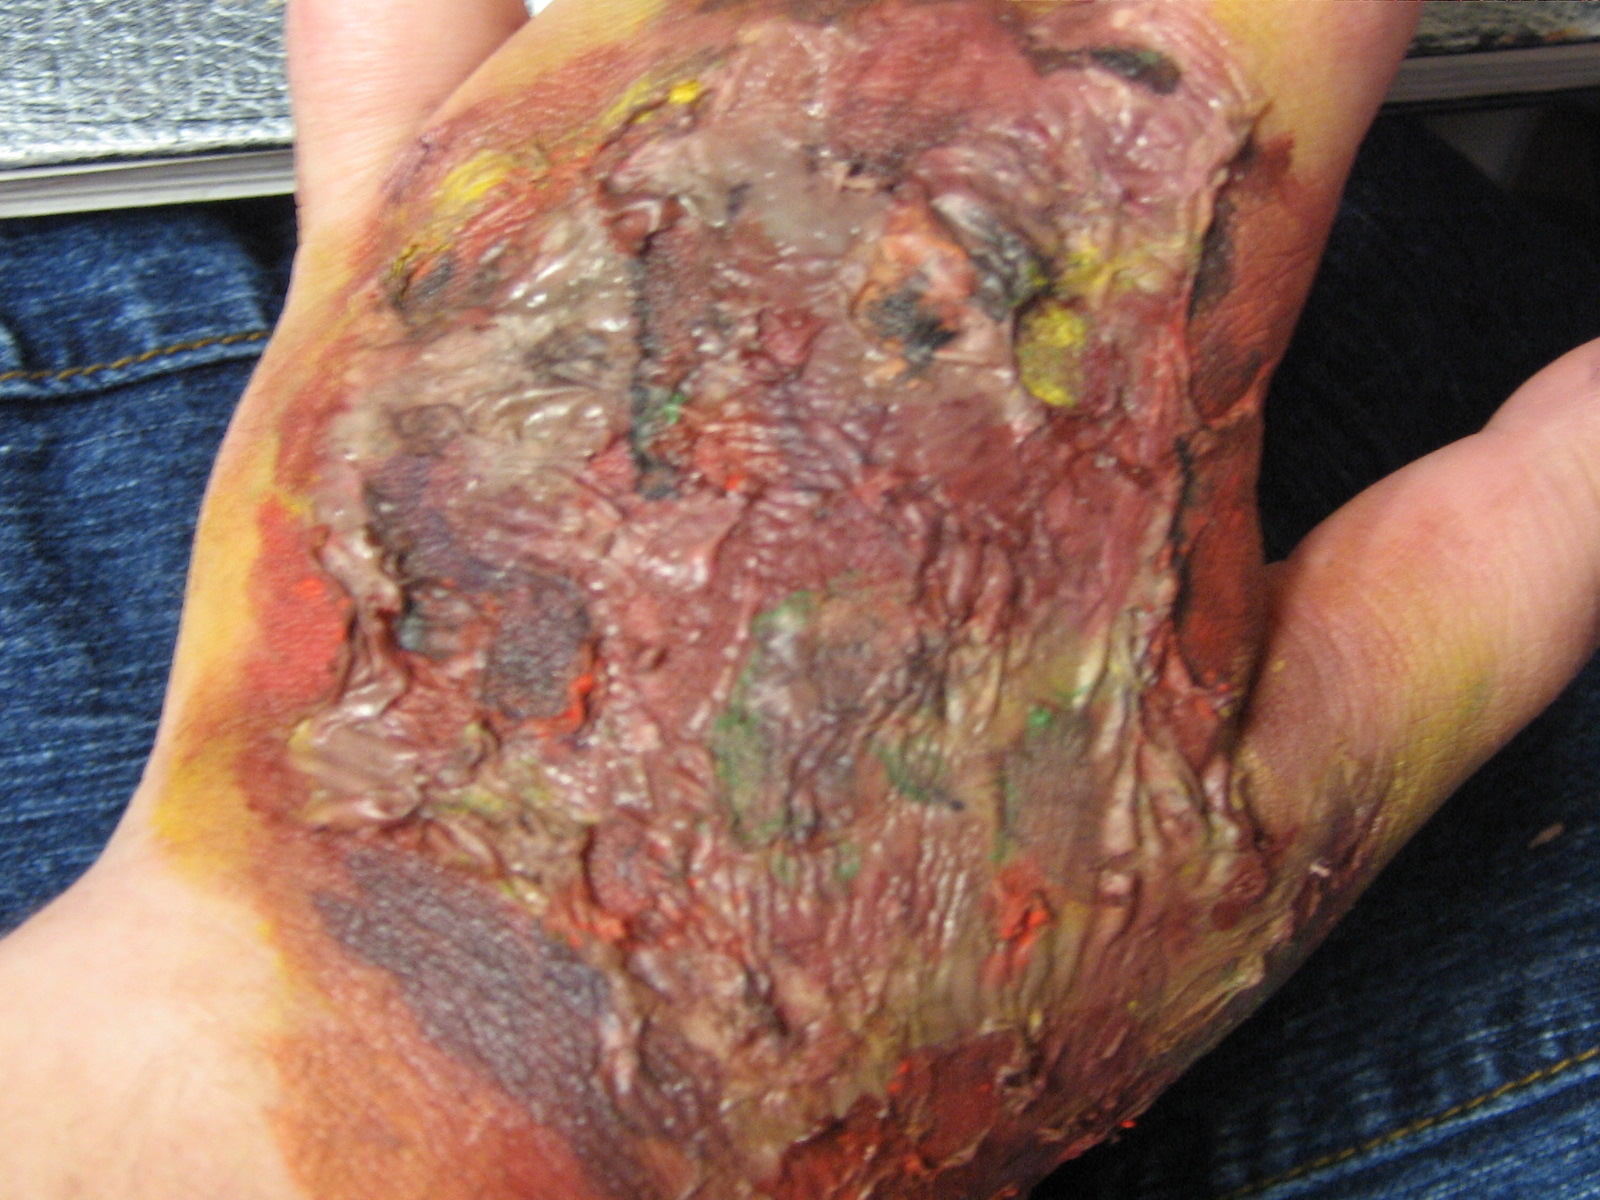
| 12. Your wound should look something like this. Don't forget to blend! BLENDING IS KEY. | ||||||||
| 11. Fill in your open blisters with blacks, purples and dark reds. Add colors over the latex as you see fit. Make sure your brush goes UNDER the edges of the open spots, so it doesn't look like you just filled in some holes. | ||||||||
|
||||||||
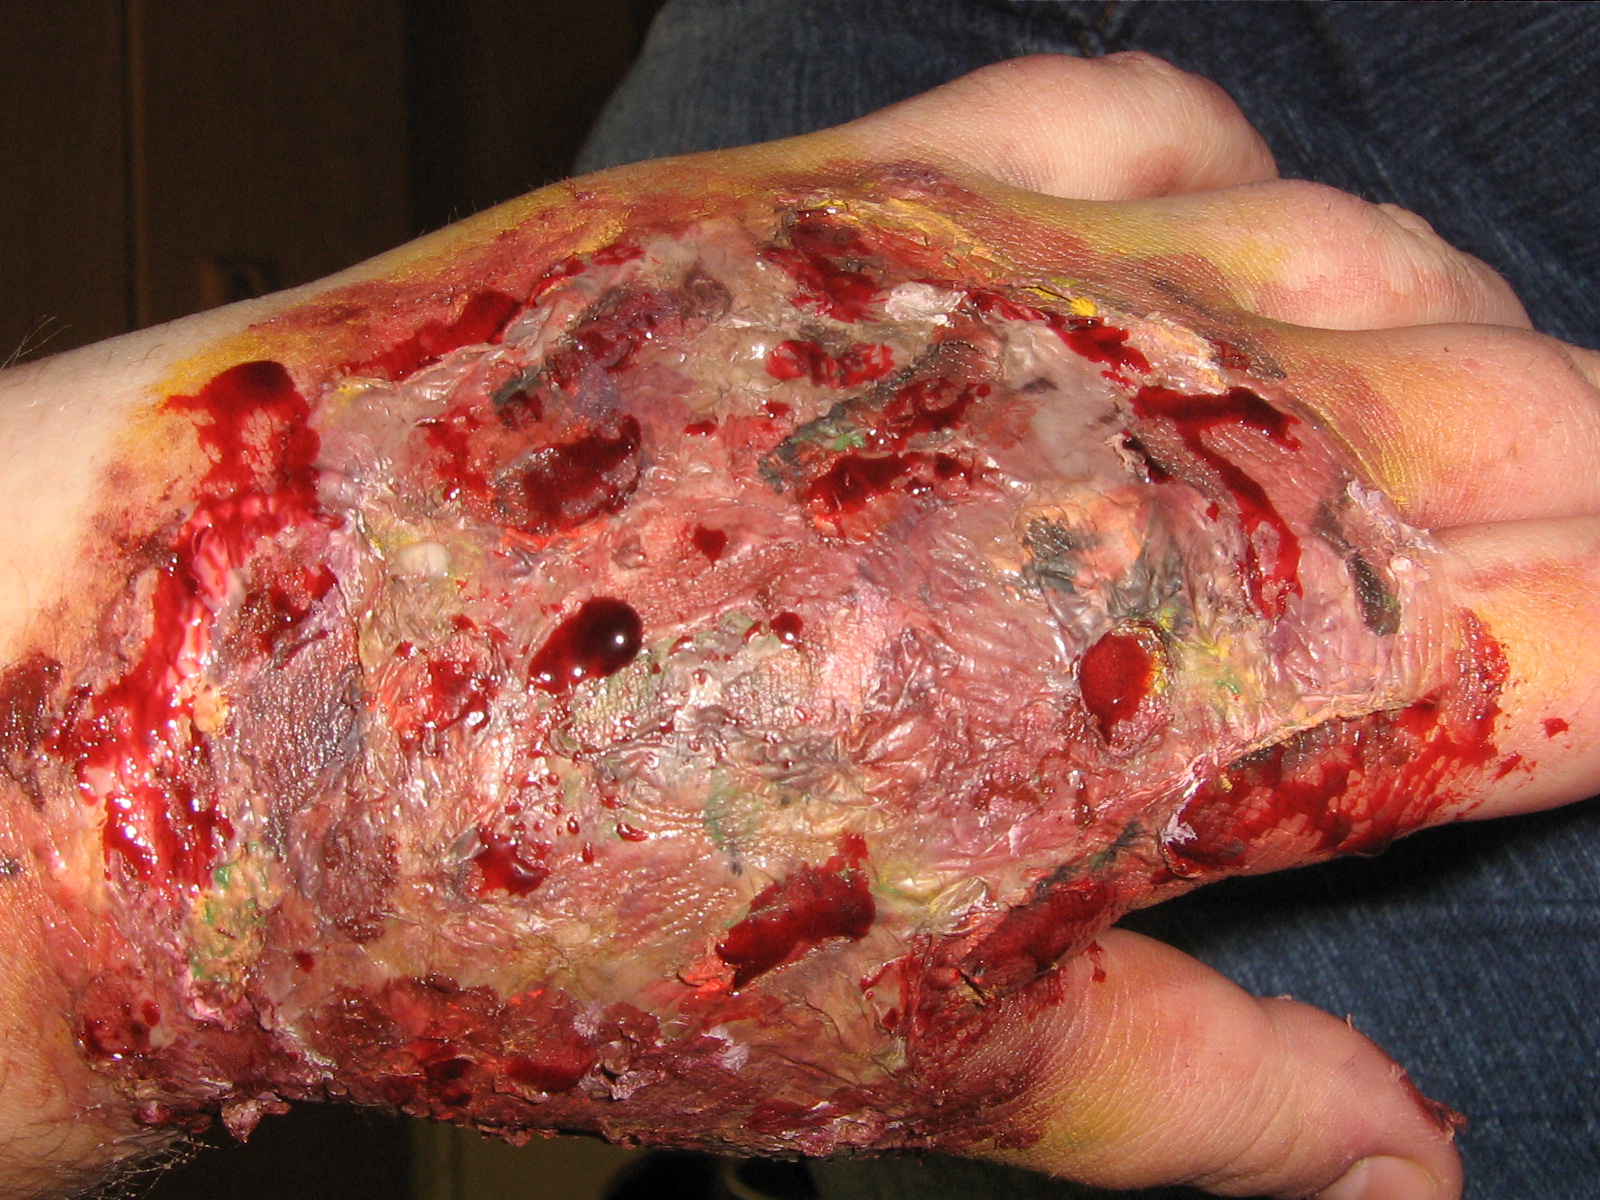
| 13. Fake blood needs to be liberally applied. Stipple sponges are great for a "spurting" sort of appearance, and a thin brush works wonders for getting blood into the blisters. I love Ben Nye stage blood; it's the most realistic looking stuff out there, I've found. And, voila, you're done. Go gross out your friends. |
||||||||