Lesson 2: Simple Text Effects

In this lesson we will look at some of the different things you can do to text,
to make it stand out in your images.


The First thing you will need 
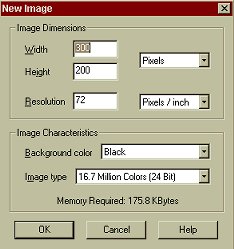
to do is open PSP6. Now we will create a new image.
You can do this by going to the menu, and clicking on File, then selecting New.
Or by clicking on this icon: new image icon
...
A dialogue box will appear. For this example we will make an image 300x200 pixels. With a black background. Make sure your dialogue box looks the same as the one below, then click ok.
...
New image specifications
...
You should now have an empty black image.

Now lets add a layer for our text. You do not have to add a new layer, but if you decide you want to change the background color of your image it makes it easier to do so if you have used layers.
You can either click on "Layers" then "New Rastor Layer" from the menu, or you can add a layer from your layer palette. The Layer Palette looks like this:

layers palette

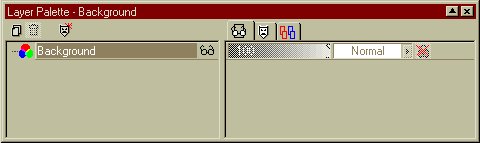
If you don't see the layers palette on your screen, click on this icon: Layers
this turns the palette on and off.

Click on the little icon on the left of the palette that looks like this: New Layer
A dialogue box will appear, the only thing you should need to change is " Name" well call it "text" make sure yours looks the same as this:

new layer specifications

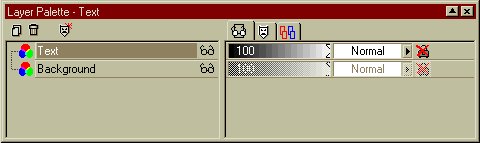
Click on OK. Your Layer Palette should now look like this:

layer palette with new layer added

Congratulations! You have just learnt how to add a layer. Now for the text.

Part 2


This Page © Area52 University 2003

Hosted by www.Geocities.ws

1