Step 3b - Trancoding the movie using Rempeg2
Overview: This shows how to shrink the movie down by transcoding the video using Rempeg2 and then remuxing back the video using Ifoeditor
Program Required:
-Rempeg2
-DVDR Calc (click here to download a copy)
-Ifoeditor
1. First, we will need to create a movie.cffl file for Rempeg2. Open up notepad. In this Notepad, we need to make links to the vob files we created in Step 2.
Make a file that looks similar to this: Your VOB files might be named differently (such as VTS_04_1.VOB), make sure you put in the file names to what yours look like.
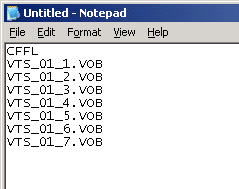
Then save this file as movie.cffl (put the .cffl file extension on it when you save it) and save it in the same folder as the vob files we are going to shrink (in my example, we will save it to C:\Temp\2\movie.cffl ).
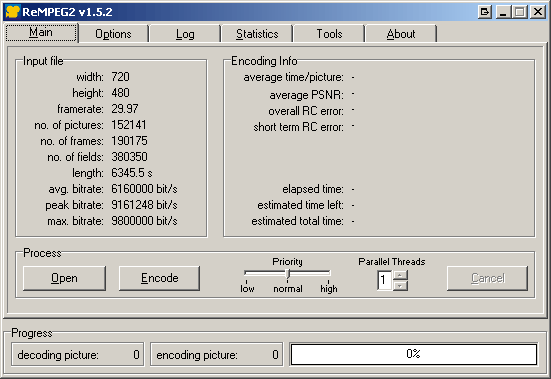
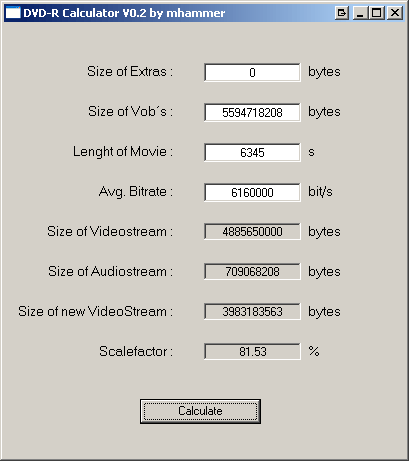
3. Once it finishes, we will need to get some info on the Main tab. We need to find out this info before we can start transcoding the video to put into DVDR Calc to find out our scalefactor:

Avg Bitrate of the movie (from rempeg2, in my example is 6160000 bit/s)
Movie Length (form rempeg2, in my example 6345 seconds)
4. Now open up DVDR Calc and fill in the info we got from Rempeg2.
Size of Extras is always ZERO for this guide since we are only doing the movie. So for my example, the scalefactor we need to change in Rempeg2 is 81%. Generally the lower the scalefactor the more the loss of video quality. I'd say anything below 60% you might want to consider splitting the movie (unless you don't mind the loss in quality).
5. Now that we have the scalefactor, go back to rempeg2 (again, make sure you opened the movie.cffl file in rempeg2). Then go to the Options tab.
Make sure you change these:
Output Resolution: 720x480
Frame Mode: match source
scalefactor: to whatever percentage DVDR Calc found (in my example, 81%).
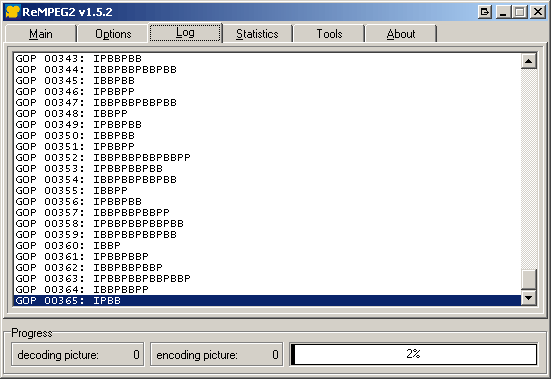
Then go back to the main tab and click the Encode button. Save the file as movie.m2v into the same directory as the vob files (in my example, i would save this file in C:\Temp\2\movie.m2v and hit OK. Rempeg2 will start transcoding the video, this will take quite some time, up to 10 hours. Once it finishes, we will then need to remux the movie.m2v file back with the vob files so we get the chapters and audio.
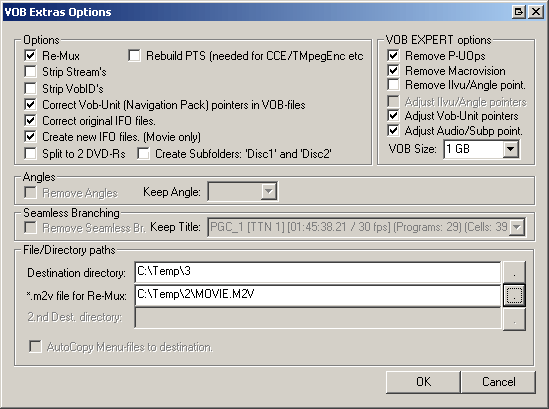
7. Click the VOB Extras button
This time we will need to change these settings around so they look like this:
Destination Directory (where new movie will be saved)
*.m2v file for Re-Mux (the file we created with Rempeg2, the movie.m2v file it made)
Then Click OK. Ifoeditor will start processing the files and create the new movie. This will take about 20 minutes again.