The Image Slicer for First-Time Users
(the PSPX interface is shown in my screenshots)
PSP's Image Slicer allows us to put huge graphics on a web page without causing the page to take forever to load, but using it is not quite so straightforward as the instructions in Help imply. Here's one way to get along with the Image Slicer from the start.*
My difficulties with Image Slicer had to do with where PSP put the slices of my image. I saved the table it made to my clipboard, thinking that I could simply paste it into my web-page HTML file from there. Well, I could and I did, but the table referred to the multiple images where PSP had put them, and that was the main My Documents folder. Then I had to edit the table to remove the "../../"s from all the 'img src' tags, since once my page was up on the web, the images would be in the same folder as the web-page HTML file. And this next may have been a fluke, but when I tried the Save option with the Image Slicer, I was presented with a dialog box in which I highlighted the folder on my hard drive where I wanted the slices to go, but my highlighting and saving didn't work.
It didn't work because the Save dialog box is for saving the HTML file that PSP creates; I thought it was for saving both the image slices and the code. To avoid having the same or similar experience, here's what to do:
If you want a border or frame, make it part of the image that you're going to slice.
Optimize the image before using Image Slicer.
Open your optimized image.
 |
|
|
|
|
|
*Once you're getting along, you can try some of the options listed in the Help file. And for a more detailed tutorial, go to this one by Woven. |
|
|
|
|
|
|
|
|
|
|
|
|
|
|
|
|
|
|
|
|
|
|
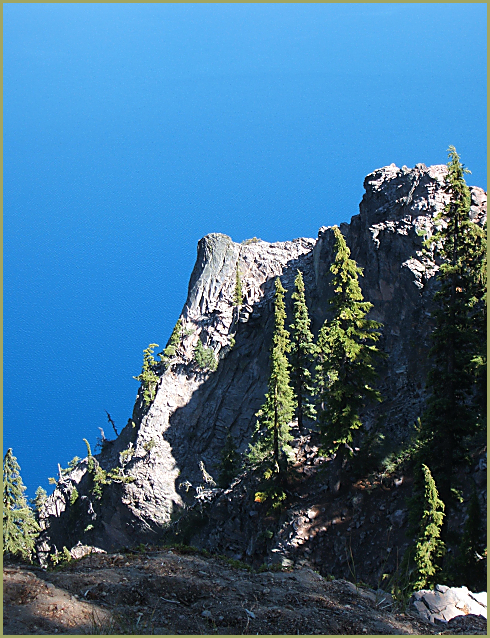
| 'THE WATCHTOWER' FROM THE NORTH, CRATER LAKE NATIONAL PARK | |||
Here are three hints:
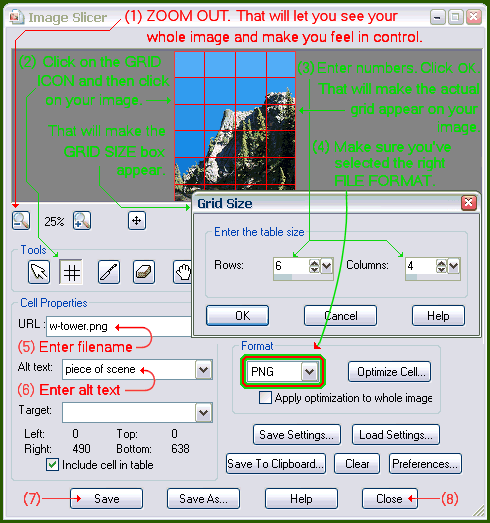
- Determine the grid size—number of cells in your grid—by dividing the original file size (my image is 618 KB; 600 will do) by the size you want your cells to be (I used 25 KB); that comes to 24 cells. The picture is taller than wide, so fewer cells across than down: 4 cells across (4 columns) and 6 cells up-and-down (6 rows) work fine.
- It's an awfully good practice to have the folder structure in your computer mirror the folder structure of your web site; that way your internal references don't have to be edited once you put up your page, and you can check them before uploading your files.
- Where the dialog box says "URL" (step 5), simply enter the name of the file you're slicing. If you keep your web-site images separate from your HTML files online, prefix the filename by the folder-name: mine could be CrLakeImg/w-tower.png. Other uses of the Image Slicer may call for other URLs, but you just want a large image to load fast; keep it simple.
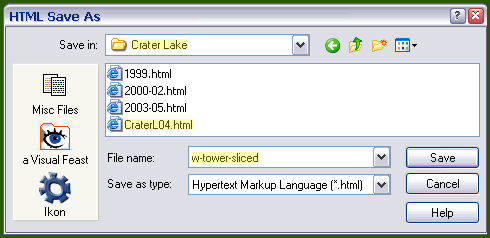
Be sure the folder is the one your web-page HTML file is in. Then enter an identifying filename and click Save.
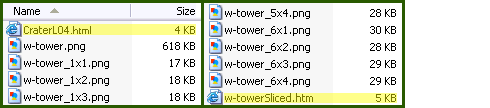
Next, open the folder you just Saved to and see that your sliced-image table (.htm file) and all the slices of the image are where they should be (the bottom screenshot shows only part of the list).
Finally, open the sliced-image file and copy the table PSP made, then open your web-page HTML file and paste the table where you want it. Don't change anything (border, cellpadding, cellspacing, or width) in the first line of the table! (Otherwise the slices of the image will be separated by spaces or worse on your web page.)