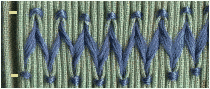
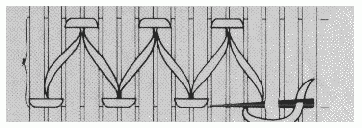
| Zigzag stitches are stitches that climb up and down the pleats in steps, with a connecting cable stitch at the top and at the bottom. (Referred to as top level cable and bottom level cable). The more steps you have in each zigzag, the more elasticity you will have in the finished article. Steps:- refers to the number of stitches made between the bottom level cable and the top level cable. (This will become much clearer when you start doing the trellis stitches.) Space:- refers to the area between two gathering rows. Zigzag stitches stretch more easily than straight stitches and for this reason they are often used for the lower rows of smocking. (This is why the waves in any bishop design get progressively deeper towards the bottom of the design. -they allow the fullness of the material to be controlled as the pleats to fan out.) Zigzag stitches are also ideal for things like Christmas balls where ability to mould to a shape is also important. |
1. Needle Position |
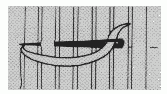
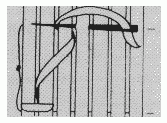
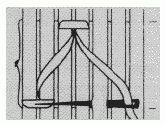
| Remember: Always keep your needle parallel to the gathering threads and perpendicular to the pleats and only pick up one pleat at a time. |
2. Thread position. |
||
|
3. Spacing. |
|
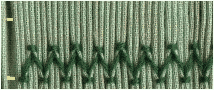
The stitches are spaced evenly between the gathering rows. There may be one or more steps depending on the design and the amount of elasticity required. |
4.Ending off mid-row. |
| Always finish off with a top or bottom level cable stitch if you need to start a new thread in the middle of a row. (Not only is it difficult to restart in the middle of a step stitch but it can also result in untidy work with gaps showing in the stitching when gathering threads are removed.) |
5. Aligning your stitches. |
| If you have trouble keeping your stitches straight, either pleat up with half space gathering rows or draw a faint line on top of the pleats to act as a guide, at the midway point between gathering rows, with a soft-lead pencil. (I don't recommend using a blue marking pen for this as the lines can sometimes reappear at a later date ruining your work. Just ask some of your quilting friends.) |
 |
 |
 |
 |
|
 |
|
 |
|
 |
|
 |
|
 |
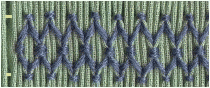
| These are very loose stitches and are made by making a mirror image of your first row of Baby Wave Stitches. |
|
|
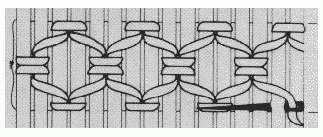 |
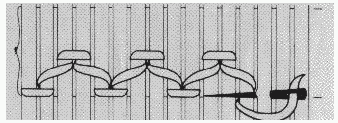
| This is how the diamonds are formed. The cable stitches should touch each other but should not overlap. Each completed diamond will have two pleats in its center. | |