THE SMOCKING INDEX
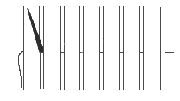
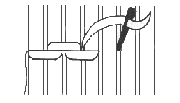
- Always unpick the first three pleats on either side of your fabric (to allow for seam allowances) and tie off your threads at the back. (Keeps your gathering threads out of the way while you work and ensures that they don't come out before they are meant to.)
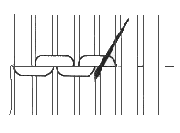
- Tie off your pleats on one side first, two rows at a time. Do not tie off the first gathering row. Always leave this one free. For a yoke style garment, subtract an inch from the finished size, and then tie off the other side in the same manner to this measurement. For a bishop style you need to fan out the pleats into an "almost" circle using a bishop guide for the correct alignment of the seams and center front. This is important or you'll end up with a turtle neck instead of a beautifully sitting yoke. (Been there. Done that.)
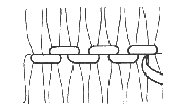
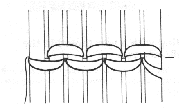
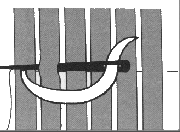
- Remember to redistribute your pleats evenly before you start to stitch. Hold material on the top of, and directly below the pleating and gently tug it on the diagonal. This will straighten the pleats. Then use a comb to align the pleats correctly. (I find the small fine black combs that are made for combing lice out of children's hair are excellent for this purpose.)
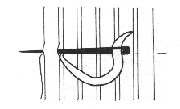
- Don't catch the gathering thread with the needle while stitching....You will have difficulty when the time comes to remove it.
- Do not begin smocking on the first gathering row. This is your holding row. You will use this as guide later when sewing your garment and you need it free to be able to adjust the width of your finished piece.
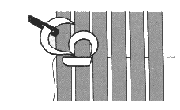
- One last thing (that I had to learn the hard way) is that it is important to count your pleats and make sure you have an even number. Then you mark your center two pleats. The center of your smocking is actually the valley between these two pleats. (I usually tie on a small length of thread loosely.) This gives you a reference point for accurate centering of the smocking design. I have read that you can mark the center of your material before pleating...You might prefer this method... but for me it ends up a whole lot simpler to just count afterwards.(I always ended up counting anyway, just to make sure.)
- The most common thread used for smocking is stranded cotton. Use three strands unless the directions state otherwise. Be aware that all threads have a grain and making sure you sew with the grain will result in smooth, even stitches and thread that doesn't "thin" and fray as you stitch. If you look at the paper bands on your skein, you'll notice a little pair of hands on one side. This is the side you should always pull your length of thread from. Also, to get the fullest coverage with your stitches, always separate your strands and then regroup them before you begin stitching. To do this, cut your length of thread and holding it firmly between your left thumb and forefinger (if you are right-handed), pull one of the 6 stands out with your right hand and set it aside. Remember the grain. Take three of these separated threads and place them together again and then thread your needle and you're ready to stitch.
|