 |
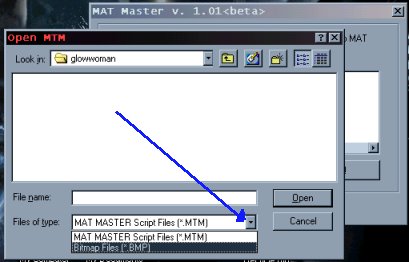
| Be sure to select "bmp" at the bottom of the menu or you won't find your file! |
|
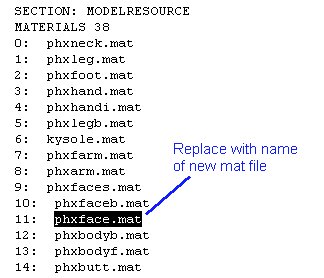
| Once selected, hit "convert" then move your new mat file into Resourse/3do/mat. Next you need to put your new mat file -- in this case, the face -- on your skin. Go back to JKMRES and look under the "3do" part for a good 3do to use (or use one you already have). Open it up using Notepad or MS Word. (I use MS Word, just 'cause that's what I started out with. It doesn't really matter which one you use!) There is a section in the beginning of the 3do that has a list of mat files of various body parts. Find the one you want to replace and type in the name of the new mat file. |
 |
| Ok, now there's one more thing you have to do before you can see your skin. You have to add it to the models.dat. It's located in the "misc" section of JKMRES. Simply add the skin to the list. (The model.dat in this tutorial is a little different looking than the one in the GOO...that's because I've added a bunch of my own skins already). |
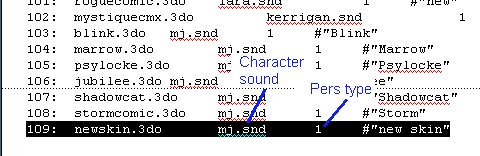 |
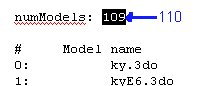
| The second column is the snd you want them to have (you can make your own, too). The third defines the Character (MotS only) as Jedi, Scout, Bounty Hunter, or Soldier. One last thing: be sure to change the number at the top of the models (otherwise, your new addition won't show up). Happy Skinning! |
 |