 |
|
|
|
|
|
|
|
|
|
|
|
|
|
|
|
|
|
|
|
|
|
|
|
|
|
|
|
|
|
|
|
|
|
|
|
|
|
|
|
|
|
|
Duct Tape Corset, Step 2:
Wrapping |
|
|
|
Wrapping tips:
*Cut the tape into strips. Cutting will make the edges neater than tearing. Cut the horizontal strips a little longer than once around the body, and vertical strips only long enough to overlap where they need to. You can use two pieces to make one circuit around the torso as long as you make sure they overlap. This works well for the very top of the corset. If you just pick up the whole roll and unwrap as you go, you may end up with unsightly bulges and/or suffocate the person being wrapped!
*Overlap the tape by 1/2 of its width. Try to be consistent, because the edges will be visible.
*Plan where you want the tape to go. You can't take tape off of the plastic bag without tearing it. |
|
|
|
 |
|
|
|
Prepare your plastic bag by cutting shallow holes for your head and arms. Your head will go through the bottom, and your arms will go through the sides.
|
|
|
 |
|
|
 |
|
|
|
|
If you are an A-cup or smaller, your friend can wrap the whole corset horizontally. Follow step 1 below. Instead of step 2, wrap horizontally from the chest up, and finish with step 3. |
|
|
|
|
|
|
|
|
|
 |
|
|
|
 |
|
|
|
If you have a larger chest, I recommend the following:
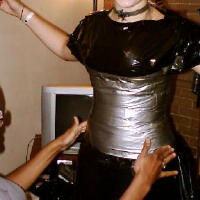
1. Wrap directly underneath the chest, where the breasts meet the ribcage. Continue to wrap the strips horizontally under the bosom as far down as you want the corset. Suck in your stomach and comunicate with your friend to let her/him know how tight you want it. The strips can either be long enough to wrap around your waist, or you can use two strips to go around once.
|
|
|
|
|
|
|
 |
|
|
|
|
|
|
|
|
|
 |
|
|
|
|
|
|
|
|
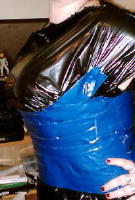
2. Place strips vertically to cover the bosom. Don't worry about making a good edge here; just make sure the strips go up far enough. Make the strips as smooth as you can make them, and keep going all the way around under the arms, and as far up the back as you want.. Smoothing them on from the bottom up helps keep the overlapping edges neat. The pictures on step 3 show how it will look when it's finished. |
|
|
|
 |
|
|
|
|
 |
|
|
|
|
|
|
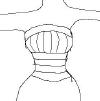
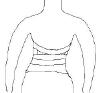
3. Wrap two strips to mark the top of the corset. The front strip will be higher than the back strip, and they will overlap at the sides. Don't worry if they are too long; you can cut them later. |
|
|
 |
|
|
|
|
|
|
 |
|
|
4. Draw a line with a dry-erase marker where you want the corset to lace up, and cut through the plastic bag and the Saran Wrap. You're free! You're free! |
|
|
|
|
|
|
Back to Step 1 |
|
Go to Step 3 |
|
|
|