| Penny Wooden dolls, Peg woodens hold a deep fascination for so many collectors. maybe because they are form an older time, maybe because they range in size from 1/2 inch to 20 inches tall. And maybe because each has a different face, because each painter was different. And just like penny woodens Clothespin dolls hold a same fascination. I have combined both to create either by itself or as a unique doll. It doesn't really matter. Each doll is charming in their own right. But the techniques and enjoyment of them have been lost because of mass manufactured plastic dolls. They were the barbie doll of their day. |
 |
| CDDM Queene Anne Cloth Dolls Ladies short gown Mini wigs for doll Clothespin Penny Wooden Workbook Costumers Manifesto |

|
 |
 |
 |
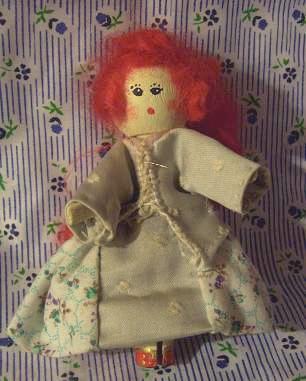 |
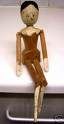
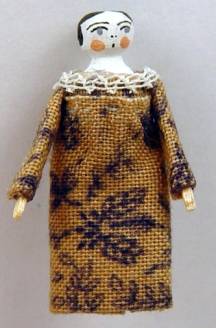
| My Version goes into a few basics that are not often addressed. First it's the manipulating of materials that many just put together. By learning sanding , whittling and drilling you make teh arms and hands. Then comes the staining. Many people just paint. But staining the pieces with a waterbased stain helps to give an antique feel. Then painted using antique colors that often will crackle without the need for a crackle finish. Finally a sealer. But thats not all. What about the costume. Since each doll we make has it's own personailty we can tailor using a variety of resources for the costume. I saw in the one I have here a short Caraco and great skirt over very full bloomers. The detail work in fine button hole accented with tiny tiny seed beads. The materials are vinatge as well. All in all the doll will take about 7 days or more to complete. But it's a jumping off point to the next doll, which is another assemblage of pieces from the Lowes. The doll shown above is 90 percent actual size. So lets begin. |
| Materials. For the most part Materials can be found at AC MOORE, JOANNS etc, MICHAELS, or even HOBBY LOBBY.. You will need one package of doll pins, 1 package of the 1.5" or 1.75" or 2 " diameted doll head bead. You can tell which one they are by the single hole drilled part way on the bottom and the slight flattening of the ball at that point. Antiue colored white, red, gold and black paints. I prefer Apple Barrel or PLAID products. But DELTA ceramcoat is excellent if you can find it. Sand paper and water based stain. Ths is amust. If you choose to use oil based you have to dry your pieces for longer so that the paint will adhere properly. Stain with an oil base prevents any other type from sticking. Like putting a bandage on a wet or damp wound. It won't stick. So make sure that your stain says water based. And finaly Barge Cement. Why barge cement? I disocvered it for my puppet making and love the way it holds. Of course if you like tacky glue or glue gun; use those. I just prefer Barge. It may take you a day or two to gather these basics. Lets go onto teh next steps. If you turn to your workbook wither as PDF download or paper book, you will see graphics and illustrations on what you are going to do. Follow those instructions. Here are some hints we have gathered since the booklet was written. *Make sure that you make the ball top on the clothes pin kept round. Many students had them beveld in an oval and it didn't fit flush. To see where you need to work it apply chalk dust to the inside of the doll head and insert. Where the head touches will let you know eher you have to work on the item so it fits correctly. More will be added as student make the doll. Onto the next page. |