 |
Making Japanese Garden Lanterns from ConcretePart I - The Concrete and Mixby Herbert Thornton |
|
Concrete Japanese garden lanterns sold commercially are often much despised. I think this is because so many of them have been cast in one piece from rubber molds and have rather smooth, powdery-gray surfaces. The difference between them and an old, weathered lantern made from separate pieces of cut stone is painfully obvious. It is though, possible to cast concrete lanterns with a more pleasing appearance. To do this you need, of course, to devise suitable molds. You also need to use the right kind of concrete and to pay particular attention to the surface finish of each piece that you have cast. I have given up hopes of discovering a quick way to persuade moss or lichens to grow on a lantern. The answer seems to be time, shade and dampness. My oldest lantern sits in these conditions and after five years is only now just starting to take on a green tinge. PART I THE CONCRETE AND MIX The best concrete that I have found for casting lanterns comes in bags and is called topping mix. It is, I think, a mixture of sand and cement. The mixing process sounds, of course, simple enough - you just add water to it and mix it. Two things though are supremely important when you mix it: the mixture must not be sloppy - just the opposite in fact - and you must mix it thoroughly. The instructions on the bag will give you some indication of the proportions of dry mix to water, but be prepared to adjust this as the mixing proceeds. In particular do not aim at being able to 'pour' the mixture. Concrete mix that pours will be a failure - the resulting concrete will be far too weak. Mixing concrete can be back-breaking work unless you are making a very small lantern when a bucket and a trowel is adequate. An electric-powered concrete mixer not only makes the work a lot easier, it helps you get the mix right. You may be surprised how the mixture can get more sloppy after the mixer has been going for a few minutes. If it does, add more dry mix, a little at a time, until the mixture is more like a stiff porridge. |

|
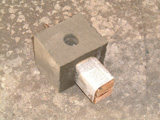
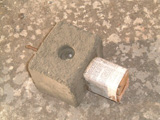
The timing of the removal of your cast from the mold can be tricky because you must remove the cast from the mold after it has set so as to be reasonably strong and not easily break apart in your hands, but before it has set too hard to be rubbed down so as to get a textured surface. I have found that the time needed in the mold before the rubbing down can be as short as 12 hours and as long as 20 hours. Much depends on the temperature. |
|
The strength of the concrete is even more critical if you are casting a pillar. Lifting a pillar by raising it at one end can easily cause it to break in the middle. Rather than trying to lift a pillar out of its mold it is better to leave it lying there. Remove the sides of the mold, and rub the piece where it lies. It is also better to cast a pillar with a metal reinforcing rod embedded down the middle of it for increased resistance to breakage. |