 Figure 1. Pre drill
holes and attach hinge, cleat lid nails first, then attach hinges to the
back. Figure 1. Pre drill
holes and attach hinge, cleat lid nails first, then attach hinges to the
back. |
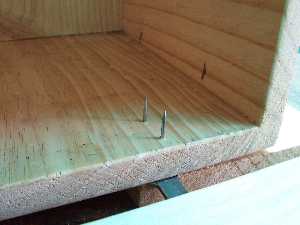 Figure 2.
Nails from back of box, place nail heads on anvil, prop up with wooden
blocks. Figure 2.
Nails from back of box, place nail heads on anvil, prop up with wooden
blocks. |
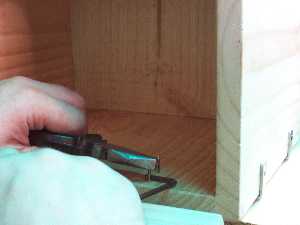 Figure3. Place metal
rod behind nail and use pliers to bend over tip. Figure3. Place metal
rod behind nail and use pliers to bend over tip. |
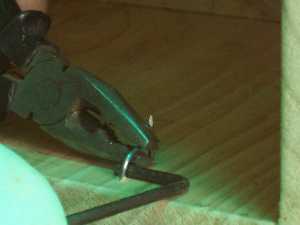 Figure4. Use pliers
to bend over rest of nail. Figure4. Use pliers
to bend over rest of nail. |
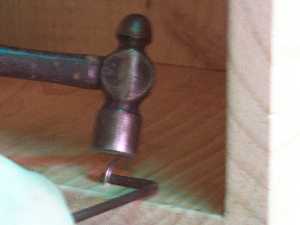 Figure 5. Use
small hammer to bend nail over metal rod. Beware of marking wood with metal
rod. If metal rod gets stuck under nail just tap on end with hammer. Figure 5. Use
small hammer to bend nail over metal rod. Beware of marking wood with metal
rod. If metal rod gets stuck under nail just tap on end with hammer. |
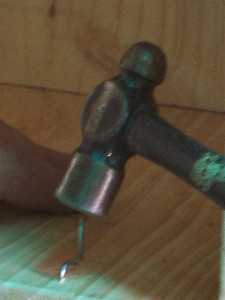 Figure 6 Use small hammer
to bend down into wood and then make flush with surface of wood. Figure 6 Use small hammer
to bend down into wood and then make flush with surface of wood. |
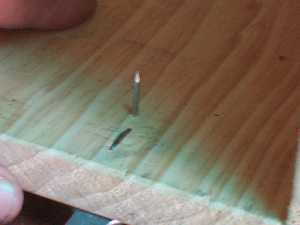 Figure 7 The cleated
nail compared to the uncleated. Figure 7 The cleated
nail compared to the uncleated. |
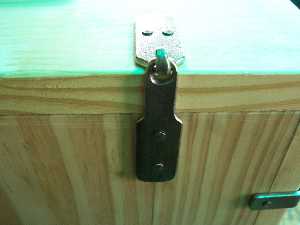
Figure 8 The completed attachment of a handle. Note: a loop of wire
was used instead of nails.The hole through the lid has to be big enough
to accomodate two pieces of the wire. |
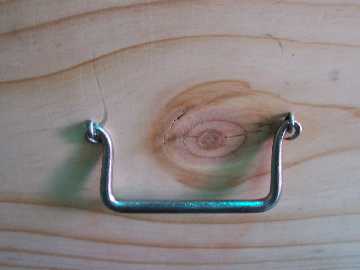 Figure 9. The
attachment of a handle to the top of a box using wire.
Figure 9. The
attachment of a handle to the top of a box using wire.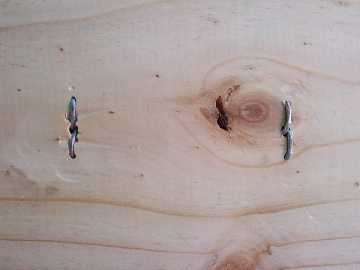 Figure 10.
The interior of the lid in figure 9. showing how the wire is thread through
the hole and then cleated over in the same way as the nail.
Figure 10.
The interior of the lid in figure 9. showing how the wire is thread through
the hole and then cleated over in the same way as the nail. Visitors to this page