| Making a Bump Map |
| After I posted a link to Tip #1- Managing Scene Size on the Caligari trueSpace forum, there were some requests for me to show how the bump map I used was made.This tip is a response to those requests. The bump map in question was made to look like strips of rubber tire riveted to a frame. While not detailed enough to fool the Michelin Man (see my "1001 Creative Uses for Torii" tutorial ) it is effective enough to convey a concept and keep scene size in check. I started out with a new file in Paintshop Pro 6 (any decent graphics program should have the tools used in this tutorial) that was 1" wide x 12" tall; based on the "real" dimensions that each strip would be: 10" x 12 feet (or 120 inches). I did a gradient fill with black and white, with the settings shown in Fig. A: |
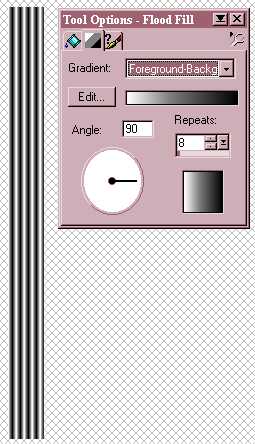 |
| Fig. A |
| Next I needed to add a little bit of wiggle to the strip, so I applied the wave deformation as per Fig. B: |
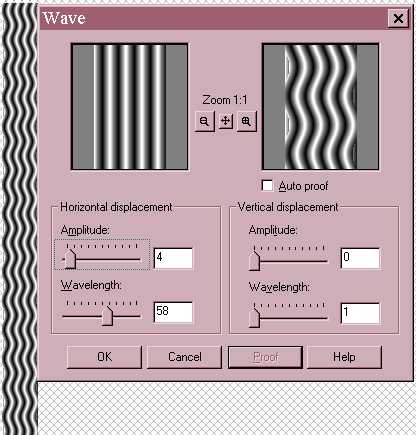 |
| Fig. B |
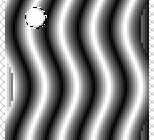 |
| For the rivets, a circle selection filled with white (Fig. C). A sunburst/circular gradient with white in the centre out to black on the edges would be even better for creating the illusion of height, but since there would be no close up in my project I opted for plain white. |
| Fig. C |
| The white disc is copied, pasted as a new selection (CTRL-E) and positioned four times to represent my five rivets. I also added a black line (4 pixels) with the line tool down each length to simulate a space between each strip (Fig.D), once tiled on the object in trueSpace. Saved the image as a jpeg for use as a bump map. |
 |
| Fig. D (rotated to save page space) |
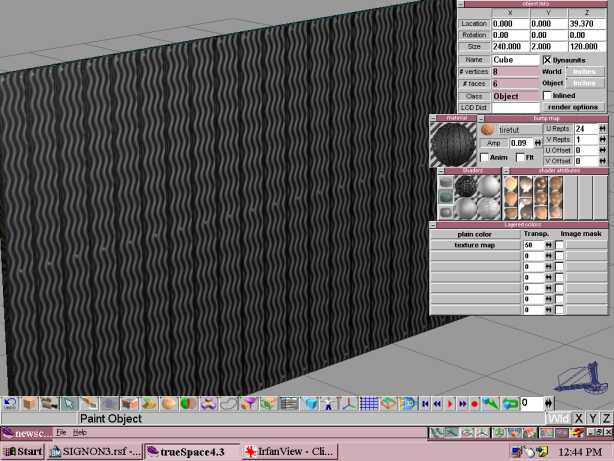
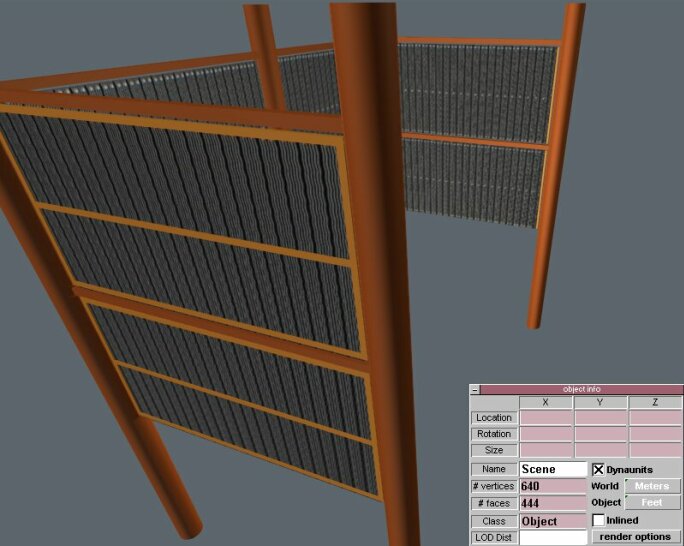
| I can now apply my texture to the "panel", which has a cubic UV space applied. You can (kinda) see the settings I used in the picture below: |
 |