
About making my snowboards
History of one in particular
Woodturners do do other things. So here is a bit about the snowboards that I have built. This one made in 1987 - it looks pretty beat up and rightly so.
History of this board. In 1987 Burton was still offering boards with skegs in the middle, so that gives you an idea of the state of the industry. Some of my school shop students came to me and showed me a copy of World magazine with some kids riding "snowboards" with rope tethers down snowcovered hills and asked whether they could make some themselves. I agreed and we made some plywood sleighs, painted and heavily waxed to slide on the snow. The kids had fun but there was little control and mostly people just fell off and hopped back on as they descended the hill. Hanging on to the tether kept the sleigh within reach. Then a friend showed me a plywood board with water ski bindings. I made some bindings from old inner tubes and tried it out. It looked promising and I found a supplier who had wide PTex and ski edges. (I made some boards using ski edges that had been salvaged from old skis first - these edges were screwed to the wood core with umpteen small screws - so I figured that was what I had to do to attach the edges.) I made the first bases from clay, graphite and epoxy mixed together to form a paste - this was very durable but required frequent rewaxing to keep slippery.
I had a tour of a cross country ski factory and got the idea that it would be fairly simple to use that technology and make a snowboard.
Bending the wood cores was a bit difficult so I used aluminum sheet, bent in a roller for the tip and tail. The edges were covered with a epoxy/porcelain clay mix.

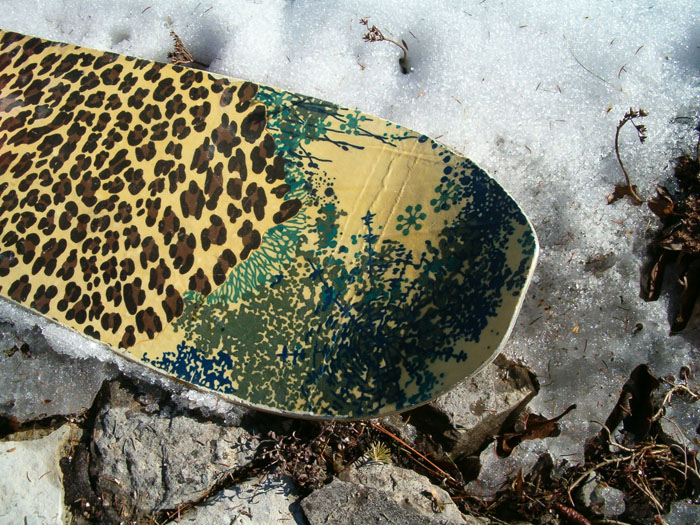
Here you can see what the board looked like. The bindings are a bit far back but that was what was used back then, probably from the initial stages of standing on a board without any bindings, and mostly in powder. This board went with me to the Wasach Mountains near Salt Lake city in Utah and turned out to be a great board for those conditions - lots of powder at the time (March, 1989)
Here are some details of the construction. All pretty low tech as I simply drew the pattern on paper, made sure it was symmetrical by folding the paper length wise and cutting out with scissors. The boards were laminated by hand without any vacuum or press. The wood core had camber induced by first bending it against some timbers, then wrapping it in wet cloth and heating it with an iron, so the core had a camber while the glass and epoxy was applied. With this board the nose was not bent up enough for my liking after I had applied all the glass etc. so it was put in a clamp and bent after layup - that is why there are some grooves in the top just behind the nose. The decorations in the top are due to using dress fabric as the last lamination.
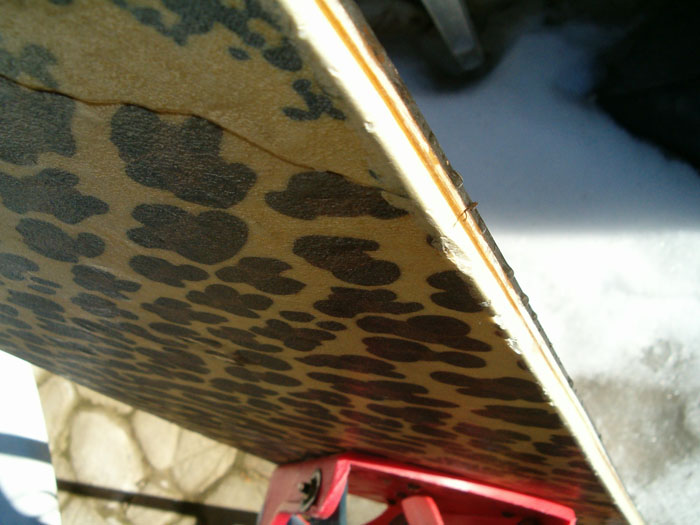
This picture shows the edge - a bit ragged after much use - the white material is epoxy mixed with porcelain clay, routed to profile after the lamination.
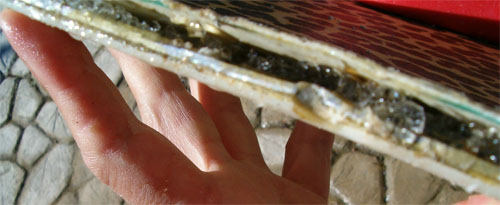
Unfortunately the tail of the board eventually delaminated. It got stood up too often. Happens to older guys you know.