 |
|
|
|
|
|
|
|
|
|
|
|
|
|
|
|
|
|
|
|
|
|
|
|
|
|
|
|
|
|
Disk Brake Conversion. |
|
|
|
I have recently done a disk brake conversion to my exa, using parts of an et pulsar. The conversion was pretty straight forward with everything bolting straight on. Below are all the parts you will need. I changed everything, booster and master cylinder included, i have seen people just retain the stock exa ones but im not sure if the biasing is the same, if somebody knows please email me. |
|
|
|
 |
|
|
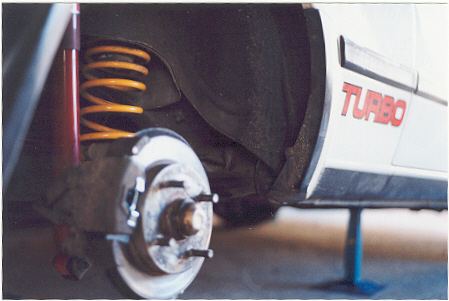
Right: Disk brakes, sway bar, rear calipers and hand brakes lines, booster (not shown), master cylinder, all brake lines and a bit of patience. |
|
|
|
|
|
You may note in the picture above that there is a swaybar, on an exa, there is infact no swaybar. firstly i removed the calipers, rotors and swaybar from the lower control arm. I then proceeded to unbolt the existing drum brakes.
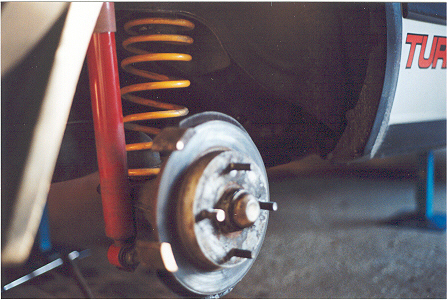
When i had got all the drums off i started bolting up the disk brake control arms. They bolt perfectly into the position of the old ones. While i had the rotors off, i took the opportunity to give them a bit of a sand to get all the surface rust off them, cleaned and repacked the bearings and put them back in (believe it or not the wheel bearings in the disks are the same as in the drums)
I then fitted them back onto the control arm. After hooking the suspension and sway bar back up i put new pads in the calipers and put them on. The brake line runs exactly where the old one was, and the hand brake line is the same. Hook the cable up and tension it a bit. |
|
|
 |
|
|
 |
|
|
|
|
|
|
without caliper with caliper |
|
|
|
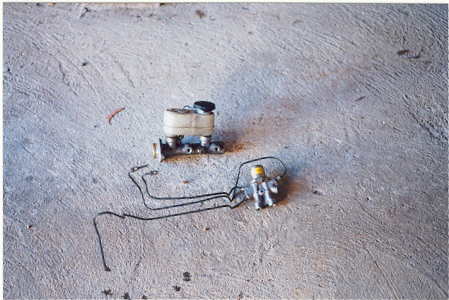
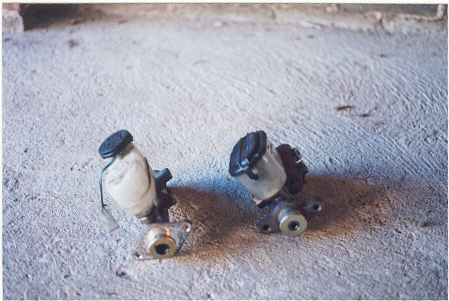
Well that was the easy part, now i had to remove the old lines, the booster and master cylinder. As you can see in the picture below, the master cylinders are different, the standard exa one has only two outputs which run into a splitter box, the et however has four outputs, meaning that all four brake lines have to be run. The boosters are also different, the et booster is twisted slightly to one side, so if you use the exa one, the resevour will be on an angle. Changing the booster and master cylinder are easy, but running the lines is not.
To run the lines from front to back you will need to unbolt the front swaybar, and the plate that anchors the lower control are (all on front drivers side). after you have done this it is just a matter of weaving and winding the lines up to the booster, trust me it isnt as easy as it sounds. Then the front two lines have to be run, the drivers side is simple as it is only a few centimeters long the passanger side isnt. |
|
|
|
 |
|
|
 |
|
|
|
|
Left: both master cylinders, left exa one, right et one. note diffferent outputs.
Right: exa master cyl and splitter box. |
|
|
|
|
|
|
|
|
|
Well, all this said, once it is all bolted up you have to get it working. Bleed the brakes, and then take it for a run. Dont expect it to be perfect first drive, remember the lines were totally dry. Give the brakes another bleed to get that little bit of air out and adjust the hand brake up.
That is about all you have to do. So good luck.
|
|
|
|
More >> |
|
|
<< Back |
|
|
|
|