
tutorials
introduction
Before acquiring your model kit, let's see the grades available.
- Perfect Grade
The Perfect Grade is the largest of all the model kits with the scale of 1/60, about 30cm tall. It offers more detail and complexity but would take some time to assemble considering the sheer number of parts. I only recommend this if you are experienced with plastic models or if you simply have deep pockets - this thing ain't cheap, well above \10 000.
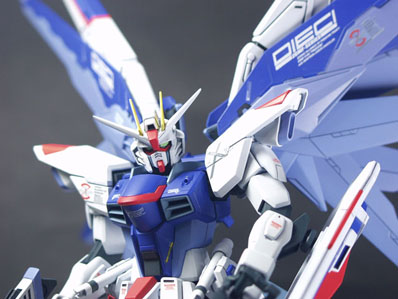
- Master Grade
Personally I like Master Grade the most because it is decent sized 1/100 scale which is about 15cm tall. MG has good detail and pose-ability, all in reasonable price tag. Most MGs are around \3000 to \4000, but there are exeption for models like EX-S, sazabi, etc.
- High Grade Universal Century
Hight Grade is the smallest gunpla model kit offered, 1/144 scale stands about 10cm. Compared to MG, the articulations are quite limited, that means less kick-ass poses. HG has little detail but professionals can mod them into works of art.
There are actually more grades offered by bandai but I'm just going to list out the main model kit grades. There are also pre-assembled gundams like the Gundam Fix Figuration series and the HCM Pro series. GFF are expensive for 1/144 scale model and I only recommend if you either have money or you just don't want to bother with assembly. But actually pre-assembled models take away the whole point of this hobby, that is modeling. Now I should mention that models are meant to be posed in cabinets, so don't play with them or you would probably end up with loose joints. However, if you're absolutely unable to control the urge of immersing yourself into the world of fantasies, then get an HCM Pro instead, which is meant to be as a toy.
Now the list below basically visualieses the whole process involved in model making. Weathering is entirely optional, only neccessary if you want to bring some sense of realism or you are making a diorama.
- Assembly
Cutting parts from runners and then snap fit them together according to the manual. This process may take up hours or days, depends. - Modding, sanding
Modding could mean modifying the looks or fixing plastic defects such as uneven surface or seamlines. - Priming
Optional but recommended. Provides base coat and make paints stick better to the model. - Painting
Need I say more? - Applying decals
There are sticker type, dry-transfer and water slide decals. Though some might say the water slide decals are the 'real' decals. - Weathering
Snow, mud, rust, etc. using techniques like dry brusing - Finishing touches
Some things to do before putting your model into display.
tools
Some essential tools of plastic modeling, I'd take some pics of my tools but I cannot do so at the momment. If you aren't planning to paint your model, you would only need the knife, side cutter and sandpaper for assembly.
- Hobby knife
I would recommend getting those hobby knives which are meant for plastic modeling but alternatively you can use penknife or other knives that are capable of cutting through plastic. I am using Olfa Art Knife that came with 25 spare blades, quite statisfied with it
- Side cutter
Cutting parts from runners, any side cutters will do. If you're an enthusiast you might want to get hobby branded ones like Tamiya. - Sandpaper
You'll need various grit of sandpaper, get #400 or #600 and finishing with #1000. For waterslide decals, you might need #2000 sandpaper. - Masking tape
Useful for painting, the tape is used to mask parts you do not wish paint to stick. - Cutting Mat
Get one if you don't want to damage your precious table from your knife. - Cement
Also known as plastic glue. Either way, it melts plastic to join multiple parts. - Putty
To fill holes and other stuff. - Tweezers
Some parts and decals are just difficult to pick up with hands.