Rubik's Magic I
Solving the Linked Side
 |
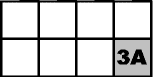
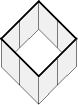
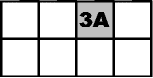
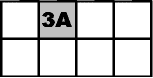
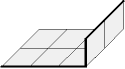
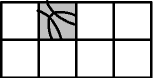
| Triple-Arc Tile
|
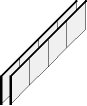
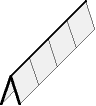
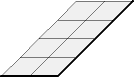
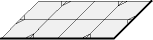
Before performing this solution, you must first form the puzzle in the 4x2 rectangular shape. I am not going to supply that kind of info; I just don't have that kind of cyber-space. You must also recognize which side is the Linked Side, but that part's easy. There is only one Triple-Arc Tile, and that tile happens to be on the Linked Side.
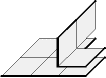
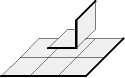
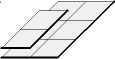
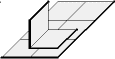
1: Get the Triple-Arc Tile off any Corner
Even though the diagrams show the tile starting and landing on particular spots, use the moves below if (and only if) the Triple-Arc Tile appears in any corner. But first, make sure that you are working on the side with corded corners, which may not necessarily be the Linked Side. After finishing the moves, you may have to flip the puzzle over to view your progress on the Linked Side. Of course, if the Triple-Arc Tile is already in the middle section to begin with, then skip these instructions.
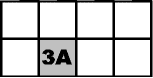
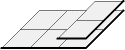
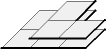
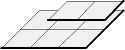
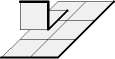
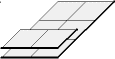
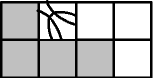
2: Move the Triple-Arced Tile to its Correct Spot
The correct spot for the Triple Arc Tile is in the middle section, at the upper-left edge. If it appears on the bottom side instead, then merely rotate the entire puzzle 180 degrees, and the Triple-Arc Tile will then be on the top side. If it appears on the upper-right edge, then use the moves below to shift it to it's correct spot. Once again, make sure you are working on the side with corded corners (which may not necessarily be the Linked Side).
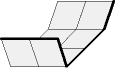
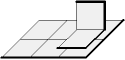
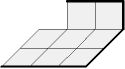
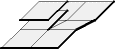
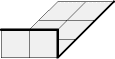
3: Rotate the Triple-Arc Tile in Place
By now, all tiles on the Linked Side should now be in place. However, the Triple-Arc Tile must be rotated until it looks like the diagram above. You may have to repeat this series of moves three times before the Linked Side is solved. Always make sure you start off by working on the side with corded corners before doing the series, and before repeating the series.
What does this sequence do? It rotates 4 tiles clockwise, and the other 4 counter-clockwise. If you have to repeat this sequence, you may have to flip the puzzle over (between repeats) to check on your progress.
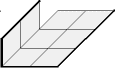
3a: Shortcut... a quick 180
The move below rotates the Tripe-Arc Tile in place by 180 degrees. Why was this shortcut added? Because it regularly occurs half the time! In this case, you must work on the Linked Side, regardless of the cord patterns. Because of that, there are two sequences below; but you can only use one of them, not both. If the Linked Side side has corded corners, then do the first sequence only; if it does not, then do the second sequence instead.
Corners WITH cords:
Corners WITHOUT cords:
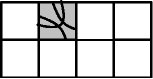
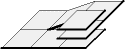
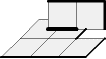
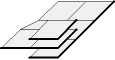
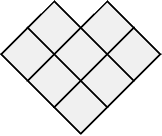
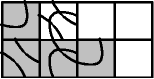
4: Fix the Four Neighboring Tiles
The Triple-Arc Tile should now be correctly rotated in the correct spot. But what about the neighboring tiles (shaded in gray in the diagram above)? Carefully study the Triple-Arc Tile and neighboring tiles...
 |
|
 |
|
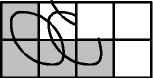 |
| discombobualted |
|
|
|
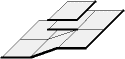
almost finished |
If the puzzle looks discombobulated, then you must do the moves below. Otherwise, if the puzzle looks like it's almost finished, then you can skip this step.
...followed by these moves:
5: Final Transformation & Solve the Puzzle
At this point do not worry about corners with or without cords. By coincedence, the Linked Side happens to have corded corners at this stage anyway. Now that 5 pieces of the puzzle are already solved, then transform the shape to fix the other 3 tiles, and the enrtire Linked Side is solved!