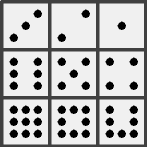

Flip the entire puzzle over to the other side, the side with the black pips. This will be the new front face for the rest of the solution. Solve the black pips (with the light background) counting from right-to-left; in other words 3-2-1 for the top row, 6-5-4 for the middle row and 9-8-7 for the bottom row.
Why is this side solved backwards? Because you have to solve both sides so that the matching number of pips are "back-to-back" for each tile. If you had X-ray vision, you could easily see that the tiles of the solved side (which is now the new back face) are at a mirror-imaged state.
 |
Because all the black pips are already on the new front side, there are no more knock-downs or move-ups to worry about. Anyway, to solve the #1 tile: Merely rotate the front face until the #1 tile is at the upper-right. Throughout the rest of the solution, make sure that the #1 tile is always at the upper-right before solving another tile. |
It is now time to introduce yourself to another move that you have to memorize:
R F+ R F- R |
 |
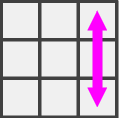
What the move does:It swaps the two corner tiles on the right column, |
This move will be used in first 3 steps only, which are geared toward solving the CORNERS.
Case I:
The #3 tile is at the |
Set up:
Rotate the front face |
Do the move:R F+ R F- R |
And then rotate 
...until the 3-1 tiles |
Case II:
The #3 tile is at the |
Set up:
Rotate the front face |
Do the move:R F+ R F- R |
And then rotate 
...until the 3-1 tiles |

The last 2 corner tiles |
Set up:
Rotate the front face |
Do the move:R F+ R F- R |
And then rotate 
...until the 3-1 tiles |
It is now time to introduce yourself to yet another and another move that you have to memorize:
R F2 R F2 R F2 |
 |
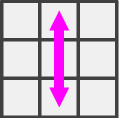
What the move does:It swaps the two edge tiles on the middle column, |
R F+ R F+ |
 |
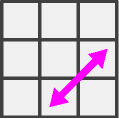
What the move does:It swaps the right-edge tile with the bottom-egde tile, |
These moves will be used in last 3 steps, which are geared toward solving the EDGES.
Case I:
The #2 tile is at the |
Set up:
Rotate the front face |
Do the move:R F2 R F2 R F2 |
And then rotate 
...until the 3-2-1 tiles |
Case II:
The #2 tile is at the |
Set up:
Rotate the front face |
Do the move:R F+ R F+ |
And then rotate 
...until the 3-2-1 tiles |
Case III:
The #2 tile is at the |
Set up:
Rotate the front face |
Do the move:R F+ R F+ |
And then rotate 
...until the 3-2-1 tiles |
Case I:
The #4 tile is at the |
Set up:
Rotate the front face |
Do the move:R F2 R F2 R F2 |
And then rotate 
...until the 3-2-1 tiles |
Case II:
The #4 tile is at the |
Set up:
Rotate the front face |
Do the move:R F+ R F+ |
And then rotate 
...until the 3-2-1 tiles |

The last 2 edge tiles |
Set up:
Rotate the front face |
Do the move:R F+ R F+ |
And then rotate 
...until the 3-2-1 tiles |
Rotate one of the faces (either front or back) so that all the individual tiles are back-to-back with each other. In other words, make sure that the #1 tiles are back-to-back, the #2 tiles are back-to-back, etc. Afterwards you can declare yourself as "Lord of all Carcassonne".
I do not own a Rubik's Domino, and becuase they are horribly expensive anymore, you may not own one either. But you can solve one by manipulating a regular Rubik's Cube using the following restrictions: