|
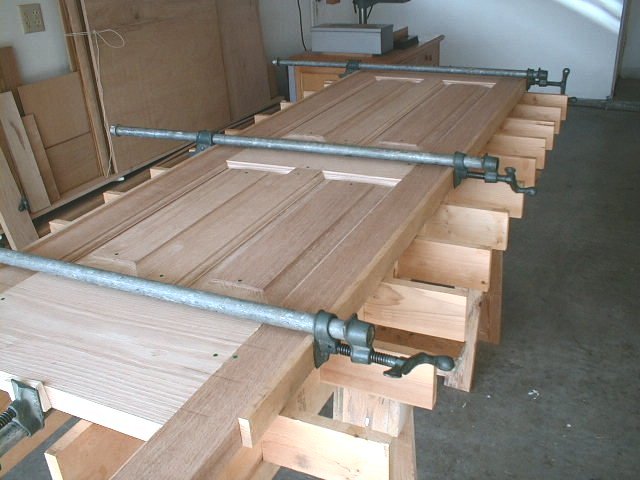
Getting Ready for Glue After the mortises have been made, and all of the profiles are sanded the next step is to make another inspection of the parts. Gather all of the parts on the assembly table and put them in the places they go with the proper face up. This is where those green dots are used again. Also get the cauls for the side of the assembly, two small pads for the long clamp, and about two pints of glue. Place the clamps you will use at the rail locations under the table ready for application. Practice makes perfect Make trial assemblies until you are confident that you can get all of the pieces together in a very short time. Allow yourself about 10 minutes to get all of the parts in place and the clamps on. During the final assembly is no time to find out that the parts don't fit!
|
|