Restoration of my '67 Beetle
"Noodles" page 2
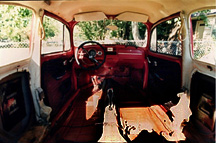
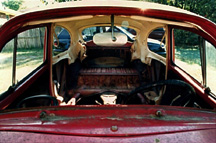
These are front and rear shots of the interior. I have a Cannon Eos camera with a 20mm to 35mm zoom lens. It is great for wide angle shots like this. All of the seats and tar board have been removed and the floor pans and heater channels have been coated with Eastwoods Coroless (a magnificent rust converter/sealer).
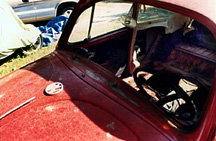
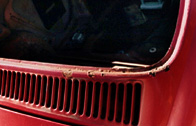
Here is a look at the front window and trunk. On the left you can see that the car could use a good washing! On the right you can see why I removed the windows. Volkswagens have drainage holes in the corners of the front and rear windows. When the car goes around a corner the water under the rubber seal slides to one side or another and out the drainage hole. Noodles had been left sitting for so long that the water never had a chance to drain and just sat in one place for 3 years. On the right you can see the results. All of the rust was under the window rubber. Unfortunately the rust was bad enough to enlarge the drainage holes as well. I will have to make up some kind of patch or try and weld up the holes before the car is stripped and painted.

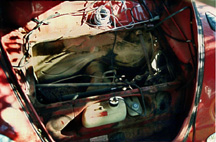
This, for those of you who cant tell, is the trunk. After I got the car I bought a new battery, gave it an oil change and tune up, but I couldn't get the car to start. I found the problem when I removed the gas tank to clean it. It is very hard to see in the pic on the right, but the fuel hose had rotted off the tank, it wasn't even connected anymore! I made a trip to my local VW shop (Roy Rogers foreign auto parts) and picked up some fuel line. The next day, Oct. 31st to be exact, my wife and I crawled all around and underneath the car attaching new fuel lines. I ran to the gas station, got 2 gallons of gas and after a minute or two of cranking the car sputtered to life. It was so exciting to see Noodles finally running. I guess Holloween was the right night to bring back my car from the dead!

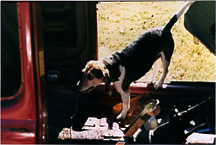
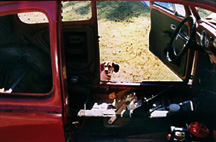
Here are a few shots of our very inquisitive beagle. Her name is Sandy and she is busy checking out the newest addition to our household.
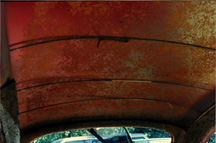
Here are some more pics of the interior. As you can see the steering wheel and gauges all look fantastic. However, the speedometer cable has broken and my brother does not remember the speedo working so well before it broke. The gas gauge does not work and will need a new wire, the old one was cut in half. I don't know if the sending wire can be replaced but I still have faith that both gauges can be fixed. On the right you can see the roof. The original headliner was full of holes (see 67 restoration page 1). My wife and I set to cutting out the headliner which is not as easy as you may think. We saved all of the material we could and plan on using it as matting for our before and after bug pics. The hardest part of removing the headliner is the very front and back. It attaches to wooden bows that slip up inside the roof. Believe me these are very hard to remove. The metal rods running from side to side are what support the headliner. If you remove your headliner DO NOT just start ripping it out. These rods are very important and can be reused with your new headliner. We also saved all of the original horse hair sound deadening between the roof and headliner. I haven't decided if I will reuse it or go for something like Dynomat.

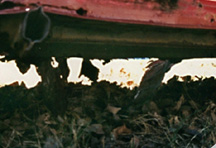
Here are some more rust pics. On the left we have more of the drainage hole rust. My brother also had the car painted without treating the existing rust. The results are several rust bubbles which have "popped." There are a few right above the air intake but not quite in the widow channel. The rest of the rust is in the window channel from improper (no) draining. On the right is the bottom of the passenger side heater channel. This baby is completely rotted. You can see that the jacking point has actually deformed the heater channel from where someone jacked up the rusted car. The flaps hanging out from the bottom of the car are part of the passenger side floor pan.
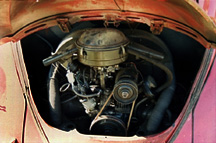
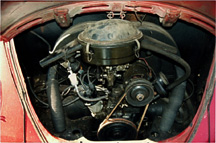
And of course this is the engine. Right now it is very crusty and oily. When I first opened the engine lid to have a look I found 2 hornets nests. I got rid of those in a hurry! The engine does run but I am going to remove it to paint the car. I also may rebuild it. I haven't decided yet but I do know I want a dependable daily driver.
| Add your text here |