Wiring the Doors for Relayspage 3 of 3 (revised 12/1/99)
The relay assembly ended up being done twice! The problem wasn't with the operation of the original assembly, but with the physical space that it required. The area where the original assembly was mounted was needed when I did the Vintage Air installation. At the end of the page, I'll add a photo of what the final version looked like.
At the bottom of this page will be a summary of things that were done in the final configuration and little bits of knowledge that I picked up.
Here is where it all comes together and a whole bunch of questions get answered.
The first thing to answer is why I'm not just wiring up the power window switches like the factory. Why the dang relays? First you have to know how the factory does it.
The factory wiring has voltage to the door switches at all times (that the ignition is turned on). When you work the switch, the voltage then goes directly to the motor. This means that the large amount of current that the motor needs has to go through the switch. This is why the switches don't last very long! This also means that the switches have to have large wires to them. When you want to roll down the shotgun window with the switch on the drivers door, the large wire has to go from the drivers door all the way to the motor in the shotgun door.
One of the things that I was out to do is have the alarm system roll up the windows (and lock the doors). To do this you need a special unit that you can buy from an alarm company that does two things. One is that it has a timing circuit that allows enough time for the window to close if all the way down. Another thing that it does (and it's REAL important) is monitor the current to the motor to "sense" if the window is up (and the motor is straining). This prevents the motor from burning up by not trying to roll up a window that is already rolled up!!
If I used the factory method of wiring, I'd have to have additional large wires running into the doors from the alarm control assembly.
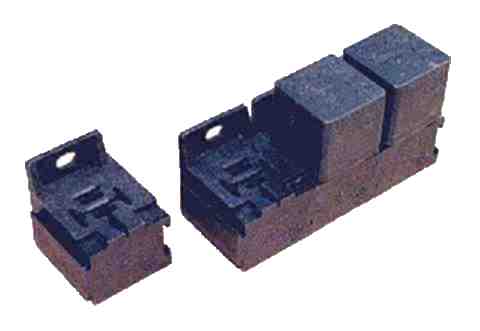
What I did was get some relays (Bosch) and mounting blocks.
I wired the input to the switches in the doors to ground (and not power). The relays will have power wired to them and when the switches are worked, they select (or "operate") the relay. The relay then sends the voltage (through a large wire) to the motor. I can attach the alarm unit to the output of the relay.
I wanted the relays to be in an assembly that was easy to service if any of the relays go bad. I chose to mount a total of 8 relays into the assembly. Each door window requires two relays (up and down). Two relays will be for the door locks. Two relays are just extra and may be used as an ignition disable.
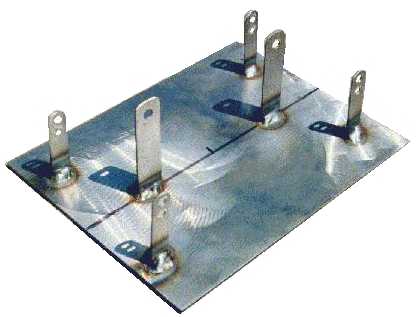
I made up a bracket that would hold the relays and also "buss" strips for the electrical connections.
What this photo doesn't show is that I latter added brackets for a third "buss" strip.
The reason for the thin "towers" is that I needed room for all of the wires. Once the whole thing is wired, I can unbolt the hardware from the metal bracket without disconnecting the wiring.

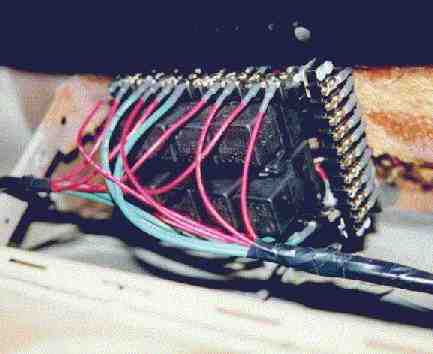
I wired the complete assembly on the work bench and kept notes as to what had to get connected to the buss strip once the assembly was mounted in the car. There are only 6 of the relays installed here and I hadn't added the third buss strip yet. All of the wiring is where it can't be seen except for those two green wires.
I added the third buss strip and wired it up to the "extra" relays. Then I mounted the assembly behind the glove box (does anybody really put gloves in their glove box?).
Then I hooked up the wires from the doors.
I hooked up power to the assembly and everything worked!!
Now all I have to do is mount the glass in the doors. I can't do this until I mount the wind wing assembly. I can't do that until I paint the car due to the rubber piece at its base resting on the paint.
Wes.
Summary and notes;
Dang, this was originally written sometime around September 1997!! It's now December 1999. The car has been on the road for almost a year now and the current setup works great. When I hit the alarm transmitter, the doors lock and the windows roll up. Cool and hardly a standard option for a 64 wagon!
Over the years, Chevy has used several different methods of doing power windows. Some time around 72, they went to a style where the motor is mounted down low in the door and it works a rotating screw type cable. I think that this this type would be easier to retrofit (but I've never tried). You can't use the newer type on an older car (without major work).
Although there is different gearing on the assemblies, I believe that the motors and their drive gears are all the same (except for the tailgates on wagons). If you remove the motor, clamp down the arm or the spring will "zing" the arm where you can't get it back together!!
The Oldsmobile assembly had gearing that was too fast! I went back to the junk yard and found assemblies from a 67 Buick Skylark. The Buick assemblies were not as simple to mount due to the location of the nut-serts on the mounting bracket not matching the indents on the door inner panel. I ended up welding a flat piece of steel on the assembly after spot welding nuts in a location that would work. Then the arms were cut off the Oldsmobile units and welded on the Buick ones.
There were two problems with the relay assembly. The first was that I wanted to add a fuse block for the door functions. The second problem was that it took up space that was required by the Vintage Air unit that I added.
I got a fuse block assembly from Painless Wiring and built a totally new relay mounting bracket so that it was longer and thin. Then the new assembly was mounted just below the lip where the glove box door mounts. (I'll add a photo latter)
Back to the "Murphy" page
Back to the index page of my personal home page
I can be reached at: