running the wires to the door
page 2 of 3 (revised 12/1/99)
One of the nice things about this being my PERSONAL site is that I can list the name of companies that have pissed me off.
The problem was that I saw that the "factory" boots were listed in the YEAR ONE catalog, but they wanted 59 bucks each.
I then went and started making phone calls to see if there was any reason for the "factory" pieces being that costly. When I called YEAR ONE, I was told that just was the price. After calling and looking some more, it ends up that the price in their catalog was correct, however, it was for two!! The guy on the phone didn't know it was wrong and wasn't interested in checking it out!!
Here is the lesson to be learned, if a price seems wrong, look up the price from another supplier! There is almost always another supplier that has the part you need!
On with the story.
The factory rubber boot is rather strange in that it is a molded piece with three grommets on it! One grommet fits on the door, one goes on the door jamb, and the last one goes on the kick panel inside the car. All three grommets require a different size hole!
Chevy knew that I was going to do this project and there are index "divots" where the holes belong. These look like little dings in the panel and are there so that when built at the factory, the holes are correctly located.
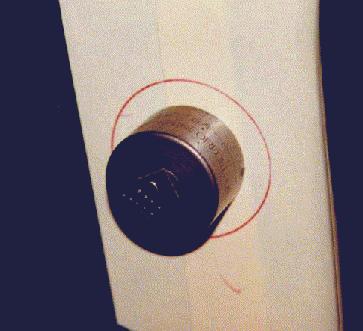
To drill the holes, I had to remove the fender. You still can't get a straight shot at the door jamb and using a hole saw is out of the question! What I did was put masking tape in the area, mark a circle that is the correct size, drill a small hole, and then use a "chassis punch". (you can find out what a chassis punch is in the "cool tools" section at the "Team Chevelle" website, within the "technical reference" section)
I then used a die grinder with a carbide grinding bit to open up the hole to the size marked on the tape.
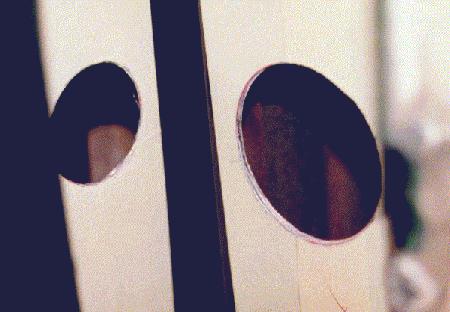
The hole on the left in this photo is the edge of the door. The hole on the right is the door jamb (on the body). I had to also do the same thing on the kick panel for that third grommet.
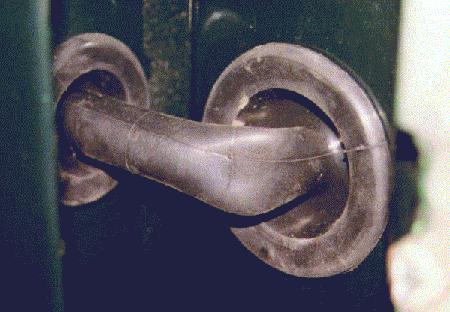
This is the grommet in place and you should note that nasty kink in it. The wires are not through the tube at this point in time.
I installed the boots and found that there was no way to feed the wires through (I tried everything). I had to remove the boots, feed the wires, and then reinstall the whole assembly!
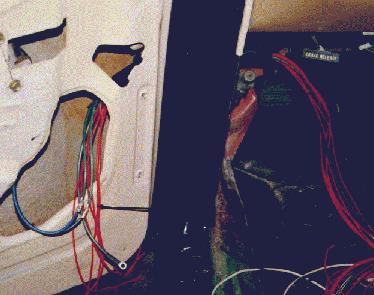
Here is the drivers side with all of the wires in place. There are a total of 9 wires going to the drivers side!
There is something that should be noted here, I'm wiring up the switches different than Chevy would. The "stock" wiring would have voltage to the control switch and I chose to have the switches grounding instead. The switches work relays that in turn power the motors. By doing this, the wiring to the switches can be smaller in gauge due to not having to directly power the motors.
Two of the wires will go to the power door locks.
There is a large gauge ground wire due to my wanting to make sure that the door assembly was properly grounded.
The wires (from the relays) that power the motors are large gauge.
I'm now farther along!! Now I have to figure out how to make up the relay assembly!
Regards... Wes.
To the last page about the power windows
Back to the index page of my personal home page
I can be reached at: