Modifying And Mounting Power Window Regulators
(first version, '70 Oldsmobile wagon)(page 1 of 3) (revised on December 1, 1999)
Note; I ended up doing this conversion twice due to the assembly from the Oldsmobile working too fast. The second time around, I used the assembly out of a 67 Buick Skylark! I don't recall taking photos the second time around. If I can find them, I'll post them. The wording on this page (and the others that cover the conversion) is referring to the original Oldsmobile assembly!!
On the last (of three) pages, I'll add a summary on what was different in doing the Buick Skylark assembly and some other general notes.
Dang, it may not be a Lexus, but it should have power windows! The cup holders may come later.
Part of the reason that I want to have power windows is that I want the alarm system to roll up the windows and lock the doors.
There are kits that can be purchased for this conversion, but the simple fact of the matter is that I'm just too cheap to shell out the $350 to buy one. Of course the good thing about one of the kits is that all of the parts are new. But hey, I love a challenge!
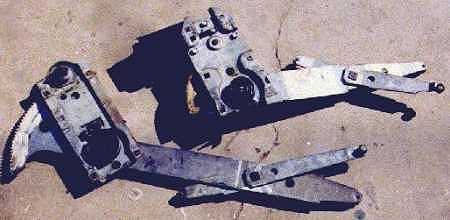
I turned Snarfy (my parts dog) loose in one of the junk yards and what he found was that the regulator and motor from a 70 Olds Vista Cruiser (front windows) looked like they could be modified to fit. Keep in mind that even Snarfy couldn't locate the rare factory units! The units, with motors, only cost $28 per door! He also located the required switches for the doors. A double switch for the drivers door and a single switch for the shotgun door.
I checked the fact that the motors worked and also checked the switches.
The arm on the power regulator would have to be modified due to it's shorter length. Plus the angle was different. The simplest solution was to cut off the arm of the original unit and weld it onto the power unit. In order to figure out what angle to weld the arm on at, you have to set both assemblies are in the "up" position. I placed the original unit on a large piece of cardboard and marked the angle of both the mounting bracket and the arm. Then prior to welding the arm on the new assembly, I placed it on the cardboard and matched the angle. The distance should end up being the same as the original measured to the rotating point where the spring is attached.
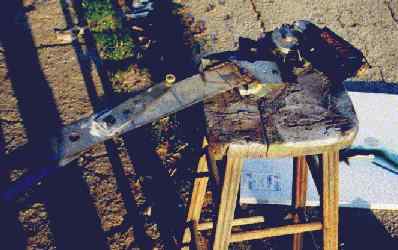
Here is the old arm, welded on the power unit. (bad photo!)
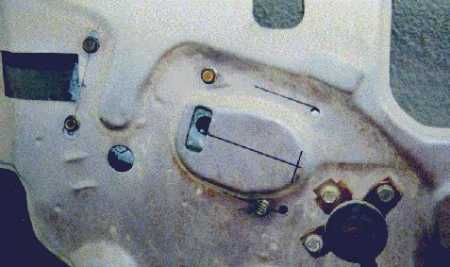
The next thing was to figure out where the new holes would have to be drilled in the door panel for bolting in the power unit. I took measurements off of both the original unit and the power unit. All of the measurements have to be referenced to the pivot point (where the spring is)! I then transferred the measurements to the door panel such that the pivot point was in the original location.
And there it is, all bolted in place!
It's getting there!! Now I have to figure out how to wire the thing up!
Caution;
There are several configurations of power window mechanisms! Some have the motors up, and some have the motors down. The real reason for the caution here is that there are also different "driven" gear sizes. This is a function of the regulators arm and the weight of the window.
If the driven gear is smaller, the window will go up faster due to the motors running at a constant speed. The longer the arm, the faster the window will go up.
It ends up that now that the window is in place, the glass goes up a little faster than I'd like. I'm going to live with it for the time being.
The option would have been to use the rear door mechanisms which had the larger gearing. I would have had to swap them side for side in order to get the motors pointing downward. The potential problem here is that the motor is farther from the springed pivot point and may be too close to the factory location of the control switch.
Regards... Wes.Go to page 2 of the power windows
Return to the index page of personal home page
I can be reached at: