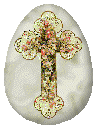
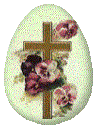
Easter would
not be complete without mentioning Ukranian Easter Eggs. These eggs
are famous world wide and know for their beauty and intricate work.
The making of pysanky has been passed down from generation to generation
and is a highly complex and symbolic art form in Ukraine. These
eggs are not painted, but produced by a complex wax-resist dying process.
Ukranian children love learning the art and skill of decorating eggs.
This is an art which takes years of practice to perfect.


The reason
for making pysanky is to give them to family members and respected outsiders.
It is said that a gift of a pysanka is the gift of life, as the egg is
never blown but remains entire all it "life." The design and color
on the pysanky have one or more symbolic meanings. Normally the egg
is placed in a small basket with plastic grass when given as a gift.
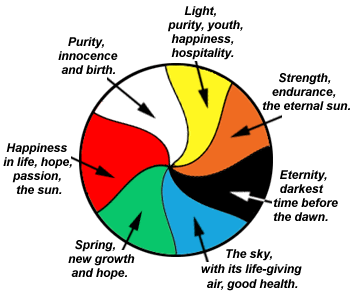
The designs
on a pysanka are Christian symbols but they also hold an additional meaning
for many older Ukrainian. Their is a strong national association
and many feel it represents the hope of a free Ukraine. Normally
when someone is demonstrating the art of making a pysanka, they will dress
in the traditional costume of Ukraine.
An instrument
called a kistka is used in creating Ukrainian Easter eggs. They create
the design by dipping the kistka in was and drawing on the egg. The
egg is then dipped in a yellow dye bath. The same procedure is used
as previously but instead of yellow dye it is dipped in a rye dye bath.
The wax is melted in the flame of a candle and wiped off. This leaves
the egg red with a white and yellow design. This process can be repeated
as often as required for more complex designs. When using the dyes,
the colors are used in order of light to dark. This is done for symbolic
reason as well as mechanical reason. The darker colors represent
the heart and the order of dying represents the triumph of heart and faith
over intellect. Once completed the eggs are brought to church on
Easter Sunday where they are blessed by the priest. They are then
ready to be given as gifts. Normally the person receiving this gift
gives it a place of honor where is displayed in a prominent area.
Many times brandy snifters are used as holders for these eggs.


The Art of Making Ukranian Easter Eggs
Smooth, fresh
eggs at room temperature
Writing tools
(straight pins stuck into a dowel, cork, or pencil eraser)
Wax (equal
amounts beeswax and paraffin)
Wax warmer
(candle heated container)
Egg dyes (prepared
according to package instructions in containers large enough to submerge
eggs)
Paper tissues
or soft absorbent cloth
First prepare the egg by "blowing" your egg before painting. Once the contents of the egg are removed, rinse the shell and prop the egg up to dry.
It is best to decide on your design to use and practice drawing it on paper before applying was to the egg.
Melt the wax. Once the wax is melted you must work quickly to prevent the wax from hardening. Using a pin or other such instrument, dip the head into the melted wax and apply it to the egg to create your design. A small dot will form on the egg where it has been touched by the pin.
Normally one to three colors are used per egg. Always go from the lightest to the darkest dye color. Once you have completed the design place the egg in the first dye solution several times until the desired color is reached. The longer the egg remains in the dye the deeper the color will be. Remove egg from dye and blot dry with a soft cloth. Once the egg is dry, you can apply additional wax designs and repeat the color process with a darker dye. You repeat the precious process for each color used.
After you have finished with the last bath, remove the wax by holding the egg, a small section at a time, against the side of a candle flame for no more than 5 seconds to melt the wax. As soon as the section appears wet, blot with a clean soft cloth. Continue in this manner untill all the wax is removed. Do not hold the egg over the tip of the flame as carbon will collect and darken your design.
To preserve
you egg it must be varnished. Use a clear varnish and apply 2 to
3 light coats, allow the varnish to dry completly between coats.
Index
Home Page


This page hosted by