Engine

Thoughts
from before we left, during the months before Jeep Safari 2000..
We can't wait for this trip.
The Bronco has undergone alot of changes since the 1st of January.
New 600 watt Kenwood, sound system,
is really cranking out the tunes, to match the engines power.
New Pro Scat Racing seats, that
are unbelievable to sit in. A full roll cage is going in next week
Feb 14th, to tie in with the roll bar, the entire cage will hold air pressure,
as does the roll bar. I owe a ton of thanks to my daughter Kiera
who was by my side during the whole process tirelessly working on it at
all hours so that we would be ready in time. My son also pitched
in when he could tear himself away from his skateboarding. He is
only 10 years old though so I don't blame him for his lack of interest.
GRIN
Update:
Roll Cage finished February 16th..
It is bitchin...
The engine will be pulled shortly
after that , approximately March 1st , for new bearings, seals, etc..
Due to a filter failure from a
" SYSTEM ONE " reusable oil filter.The screen broke, and allowed contaminants
to enter the oil system, causing a loss of oil pressure ! If you have one,
get rid of it now..
While it is down, I am going two
steps up, in the cam department, to give me a little more high end power,
as there is so much low end power that it is ridiculous. I am going
from a 260 degree Cam, to a 268 Competion Cams camshaft. I was supposed
to be running an Isky cam, but they were 3 weeks behind, and we couldn't
wait any longer. I am also ordering a new higher pressure fuel pump,
from Holley that comes with their larger 600 cfm Projection Units, as the
original one, cannot keep up with the fuel/horsepower demands of this engine.
Warns new high strength alloy
axles are also being installed, before Moab. I hope that they do
the job ! I am tired of breaking front axles in Moab. It's
the only place that I do it, but it does get old. That famous cracking
sound is one that I don't like at all.
Okay, that was then, this
is now!
The
engine is being rebuilt and will be installed by the 20th of July.
I
did
not get a chance because of time and money constraints to rebuild the motor
myself before Jeep Safari 2000. Consequentley the motor gasped it's
last in the middle of Hwy 80 just 15 miles shy of Winnemucca Nv. The oil
pressure suddenly went from 28 pounds to 0 in about 10 seconds..Something
let go, and I had to kill the motor. We were returning from a fantastic
trip, and a great Jeep Safari, in which I was filmed for a tv special,
called Doug Miller Outdoors, that runs every Sunday evening in the Utah
viewing area..I also made some very tough climbs in front of roaring crowds,
that made all of the hard work leading up to the Jeep Safari all worth
while..It ran like a dream, and we had no problems, until just outside
of SLC Utah, when it started dying for no reason that I could find, and
then one of the plugs would be burnt, then after replacing it, it ran great,
until just before Winnemucca, when it gave it last gasp, or should I say
pound of oil pressure.
I
had to hitchhike into Winnemucca, rent a huge U-Haul truck and drive the
Bronco up into it..
With
a crowd around the truck watching me, I had to start this motor that now
clattered so loud that it was deafening, and jump it up into the truck
with four wheel drive and both lockers engaged, the tires down to
10 pounds, and I literally jump it into the back of the U-Haul..
It
took three tries, and when it went in, and I could shut it down, all of
the bystanders just shook their heads, not believing that I did it.
It was actually harder, than some of the hardest climbs I've ever done,
because the walls of the truck were about 3-4 inches, from my newly painted
sides, and the floor was slippery aluminum, and the front tires hit the
wheel wells, just as the rear wheels hit the rear bumper and back of the
bed, at the same time. Causing the Bronco to jump and slide around.
I finally had to leap it, just like Double Whammy.
I
knew that it could do it, but was worried about the paint, and of course
the engine too.
Running
a motor without oil is bad news, don't you agree ? GROAN..
Getting
it out pf the truck when we got home was no laughing matter either, the
wheel wheels were angled going in, providing a little help getting in,
but going out they were straight aluminum walls, and the back tires had
no traction as they were sliding around on the aluminum like I was on ice.
I had to jump it out backwards too. SIGH
My
kids were watching from outside, and said that the truck was bucking around,
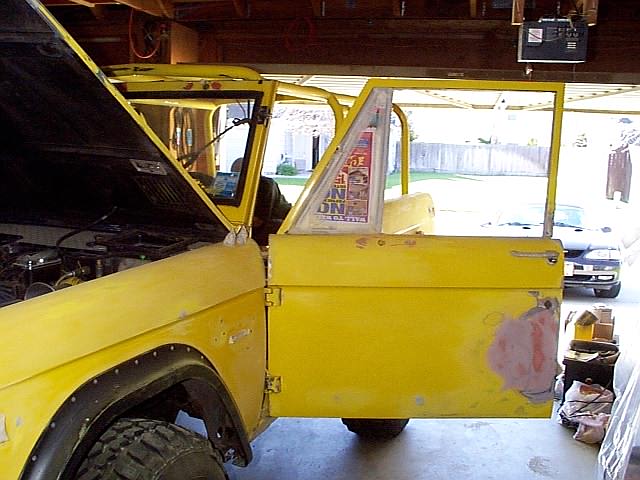
and jumping like crazy.It finally came out, and I pulled into the garage,so
that I could pull the motor.
While the motor was out I also replaced my slightly leaking power steering box, with a rebuilt one from Napa..Only $174.00 what a deal..No more mess..
Okay. Back to the nitty gritty stuff.
Air and fuel
are mixed thru a 700 cfm Holley Electronic Projection unit which also includes
a Holley Projection Upgraded high flow pump, which should meet this engines
fuel demands,
under high rpm sand runs.
The fuel and air mixture flows thru the Projection unit, into an
Edelbrock Performer 4- barrel intake manifold to split the mixture, then
down thru 1966 small chamber Mustang heads, housing Crane Roller Rockers
, & Crane Hi Po Valve Springs, which are controlled by a Competion
Cams "Extreme 4x4 Cam" 270 degree cam. This cam is one of the new cams
made specially for rigs like ours, which has the ramp on the cam lobes
ground steeper so that the valves close faster, providing more power, and
retaining good vaccum, while allowing more high rmp performance with no
loss of torque. The power range for this cam is 1500-6000 rpm..
Cruise range is 2600-3000 rpm,
which is perfect as my Bronco runs 2800 @ 65-70 mph..
It will have a slightly loping
idle which I will love, but the steep ramp angles of the cam reduce rough
idle, and low end torque loss. This cam also needs a 8:75:1 to 10:5:1
compression ratio to achieve its full potential, which is perfect for me
as I will be running 9:5:1 .
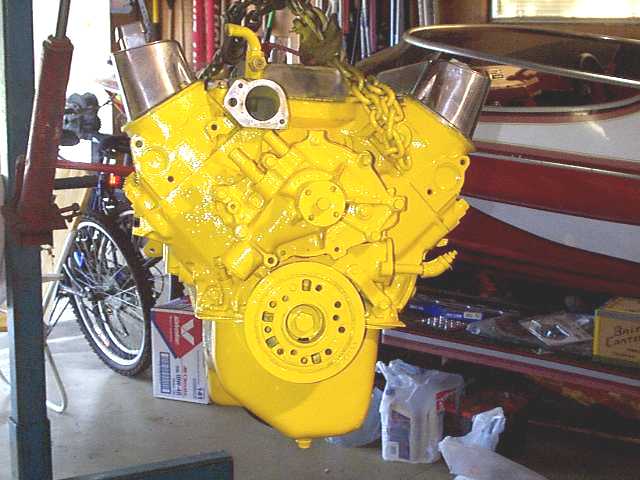
New 351 Windsor motor that was installed and then pulled again the
next day, because of a cracked block !
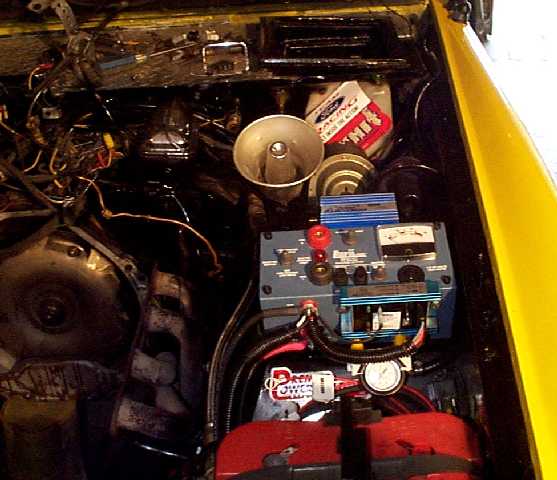
Pic on the right is of the new Premier Power Welder just before engine
install !
The fuel/air mix is then compressed to 9:5:1 by forged pistons cut down to achieve the 9:5:1 compression ratio, and includes chrome moly rings. This gives this engine a healthy 9.5:1 ratio, for great power, and reliability on 92 octane gas on long climbing trips, and regular 87 octane around town.
NOTE
I went from a 260 Crane cam (in
the first motor that I built myself), to a FS 268H-10 Comp Cam (in the
second motor that had a cracked block on start up. Built by a shop), to
a 270 "Extreme 4 x 4" Comp Cam (the third and final motor. The second
one built by the shop to replace the cracked block one),
Part # 35-243-4 running 1.6 roller
rockers, to move the torque curve up a bit. I had a hard time deciding
whether to go with a 268 or a 272. So now it looks like I ended up
in the middle. Hopefully with power and torque to spare at each end
: ) We will see how this one does. I would rather
have a little bit less than I had in mind, than too much over and have
detonation problems again.
Ironically the whole cam switch
thing happened (and this turned out to be a good thing) because the
old cam was a 260 degree cam, and the engine builder went with a 268 cam
to bump things up a notch (which I found out after it was in that it was
a street cam. What an idiot !). Then when the brand new engine
blew oil out the back of the block during inital start up, " which turned
out to be a cracked block, caused by the galley plugs being tightened too
tight". It had to be pulled apart again, and completely dismantled.
While waiting for a new block to arrive, I started doing some research,
because I was not completely sure that the 268 would do what I wanted it
to do. Because upon inspection of the new cam card, the engine power
and rpm limits were almost exactly the same as the 260 Crane cam, and showed
no noticable gain in top end at all and as I found out later was more of
a street gring than an RV grind.
Well I also found out after calling
Comp Cams tech line, that the cam that was initially installed in the new
motor was more of a street cam, and not a rv performance cam, which is
what I really needed.
The tech said that it probably
would have been okay, but I probably would have noticed some loss of torque
with the 268 cam. Well time will tell. I am glad that I found
out all of this stuff, and started looking into it, after pulling the motor
for the second time. Better to make something good happen out of
something bad, than to let it eat at you. I missed a bitchin Rubicon
trip with friends, on my birthday because of this engine being cracked,
and it really turned out to be a rather blah weekend, after planning to
be in the Rubicon during my birthday with good friends, and a campfire!
But life goes on.

Click here to go to the Competion
Cams Homepage.
NOTE:
The original
compression ratio of this motor for the last 10 years or so, was 10:5:1,
and although it was very powerful, it was a bit tempermental, in the fuel
quality department. So hence the above changes.
Spark is delivered
to this potent mixture via a remanufactured stock distributor, with the
advance curve reconfigured to take full advantage of the horsepower, and
torque curves of this motor.
The distributor
triggers a Jacobs Omni Magnum system that fires the sparks,
via Jacobs Energy Team wires, and
into Autolite Copper Core plugs..
NOTE:
The Jacobs System
requires copper core plugs to work with it's computer system..
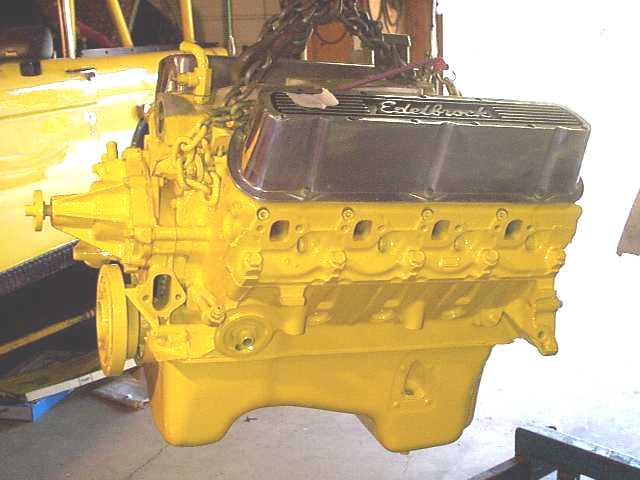
Edelbrock "Signature
Series" High Clearance Valve Covers, & Air Cleaner, with a K&N
High Flow air filter, top off this engine adding both beauty and functionality
to this motor..
Clearing the roller rockers and
high lift cam..
A TRW hi flow oil pump, with a James Duff 351 conversion deep sump oil pan, take care of the oiling dutys. Exhaust is handled by James Duff headers, and Flowmaster Mufflers, via a custom made "high clearance" exhaust system, that not only is tucked up above the frame rails in the middle, but is wound around the frame in the rear, to end up over the top right and left sides of the vehicle, with adjustable tips.
Cooling is handled with a
high flow water pump with a Super Cooler pop riveted to the vanes of the
pump, then into a custom made 5 core radiator. " Yes you read that
right, 3 thick and two thin cores to provide maximum cooling in a tight
area..It works very well..There is also a 1965 Ford 292 truck fan that
has a much higher pitch to the blades and provides maximum air flow, even
at idle.
Then added to that cooling combo
is an 18" Electric fan mounted in front of the radiator, between
the radiator and power steering, and transmission coolers..Just in case..
This Bronco doesn't get hot anymore!
A home made on
board air system using a Tecumseh/Ford air compressor
"$10.00 $20.00 at any junk yard",
feeds air into the entire rollcage, and provides air to power air tools,
and air up tires, as well as blow out the interior after a few long days
on dusty trails..
A K&N mini filter filters out
the impurities, giving me clean compressed air flow, at all four corners
of the vehicle, and under the engine compartment,
as well as the ARB Air Locker,
which resides in the front pumpkin..
Which will soon be two ARB air
lockers running in Dana 60's cut down to Bronco width, with reverse rotation
maximum clearance housings, running disc brakes all around.
Hopefully before next Easter Jeep
Safari !
It is the last and final upgrade
to the Bronco, except for some graphics on the paint..
Unless I decide to switch out the
transfer case to a twin stick lower geared unit..No rush on that !

Click Here
to go to the Premier Power Welder Home page!
A Premier Power Welder is also mounted under the hood, which not only provides welding voltage, and keeps the entire dual battery system charged, but also provides household ac 110 volt current for anything we like.. Margaritas anyone? After we are in camp of course !
BUMMER & MORE
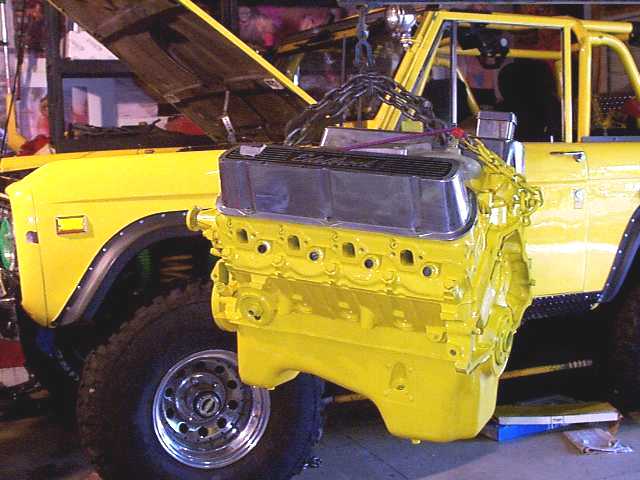
Well it is July 19th 2000, and yesterday I finally
had the new motor wedged back into the Bronco. While turning the motor
over to start it, my daughter pointed out that there was a rather sizeable
leak coming out from under my rig. Well it was a hell of a lot of
brand new engine oil. Not only that but the engine was backfiring
up through the injection like crazy, sending flames shooting up through
my injection, indicating the wrong firing order..Well I had just changed
the entire firing order to a 351 windsor firing order, as my old wires
were set to a 289-302 firing order. Well when I called the engine
builder, and told him about the oil. He said, " Oh by the way did
I tell you that I put a 289-302 cam in your motor?..I said no and that
might explain why there are flames shooting up through my injection system.
Man was I pissed. After putting the firing order back to the original
configuration, it fired on the first try! Go figure! It turned
out that the engine builder TRI-C Engines of Sacramento Ca, had overtightened
the galley plugs in the back of the block, causing the block to crack,
and causing a full force oil leak, that only allowed the engine to run
on inital start up for about 3 minutes before the pressure started to drop
rapidly. It was immediately shut down. Man was I pissed.
Did I already say that?? It won't be the last time : )
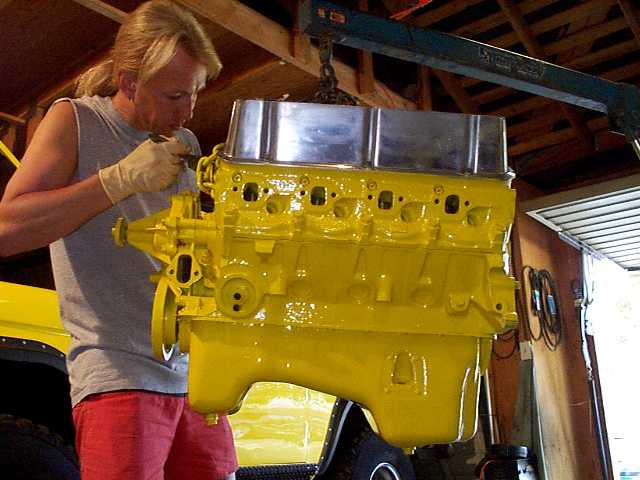
It takes two solid days to get this motor in, not to
mention the entire weekend painting,
and detailing every little piece by hand, as well
as the entire block, etc. A lot of detailing went into this motor,
and it all has to come back out and be trashed. They are looking
for a new block as we speak, and hopefully will have it finished by next
week..They are doing a good job of follow up, I had the rig towed
up to them, and they pulled the tranny and t-case, hoping that it was just
a galley plug that they missed, but found a split block instead.
So now they are pulling the motor themselves, and are hoping to have me
up and running by next week sometime. Which is none too soon, as
we are running the Duzy Ershim trail the first weekend of August..
NOTE
I went from a 260 Crane cam, to
a FS 268H-10 Comp Cam, to a 270 "Extreme 4 x 4" Comp Cam,
to move the torque curve up a bit.
See above article on the new motor. Two cams in one engine in less
than one week, I never would have imagined it. Go figure !
Because of this I missed out on a bitchin Rubicon trip
with my friend Michael, and his up and coming Bronco, hich is quite tough,
and well set up. He is a good friend, and we will be going on quite
a few trips together this year, if I can ever get my rig up and running
again. Talk about a fiasco. Mike stopped by ( on his way to
the Rubicon ), to see if I had my rig back yet, and was just as bummed
as I was that it wasn't there. It was hard to see him going without
me.
I had worked so hard, to get ready for this trip,
but there's only so much you can do. He gave me an A+ for effort,
saying that he was not sure that he could have done the same thing in my
shoes.
As I am writing this they are undoubtedly having coffee
or something better around a nice campfire talking about my misfortune.
Hi guys.. : ( Hopefully they toasted me with a good cup of coffee,
beer, wine, or magaritas.
Some birthday present. I am sitting home with
a $2500.00 engine that is cracked.
Oh yeah. Life is good..
Paint, Body & Interior
Ohh and New Tires..LOL
February/March/April/2000
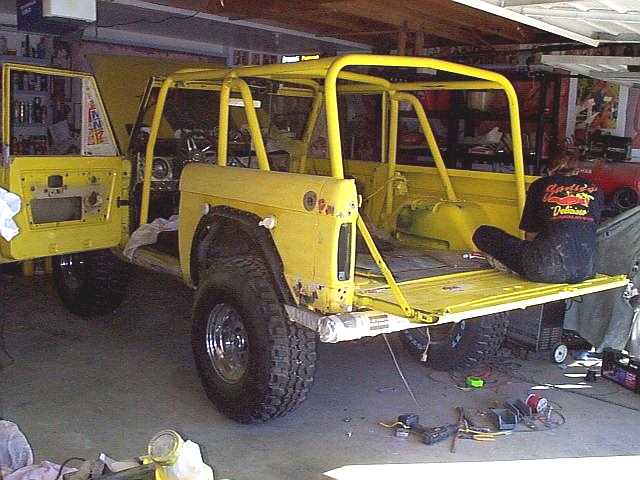
Okay the hard part was tearing what was a clean nicely running rig, into what seemed to me like a stripped down wreck.
Just before I started all of this
I had a new ![]() pull out CD/Reciever Stereo installed with a 600 watt Kohler Amp, giving
me 600 watts of clean pure power to push out of rear mounted 250 watt Pioneer
speakers, and front mounted Panasonic truck boxes, that are all weather
proof, then I also went out and installed new 35" BFG Mud Kings, and put
the old ones on my 63 Ford 4x4 truck..
pull out CD/Reciever Stereo installed with a 600 watt Kohler Amp, giving
me 600 watts of clean pure power to push out of rear mounted 250 watt Pioneer
speakers, and front mounted Panasonic truck boxes, that are all weather
proof, then I also went out and installed new 35" BFG Mud Kings, and put
the old ones on my 63 Ford 4x4 truck..
Well with that out of the way,
now was the time to get serious.
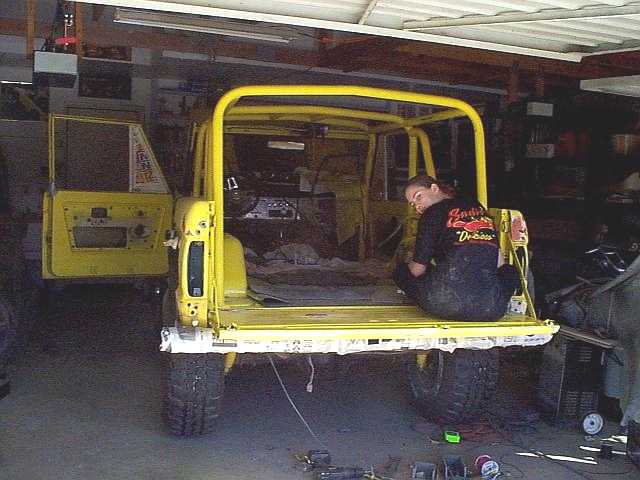
It all started with wanting a beautiful,
strong roll cage for the Bronco. I wanted it for three reasons.
I wanted to provide protection
for the kids in case of a roll over. I also wanted to extend the bikini
top to cover the kids as well, so that they wouldn't be so exposed to the
sun, on our long trips, and I wanted it to to look great as well.. The
third one is what got me into a huge project..
Here was the plan.
1st do minimal work to get the
cage in, leave seats in, pull carpet back,
and cover with wet blankets to
keep interior from being burned.
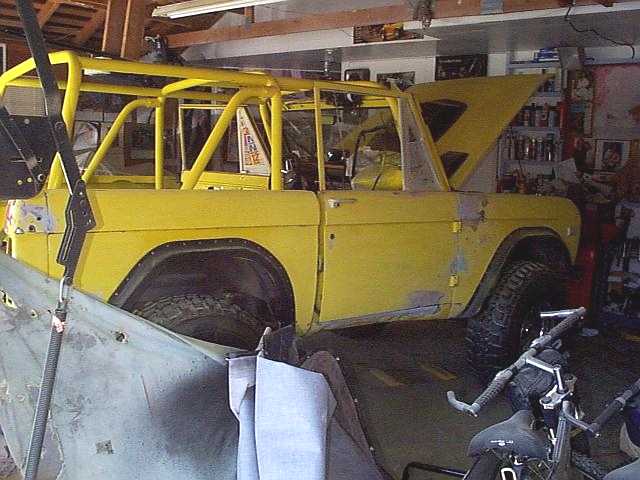
2nd Paint new roll cage, with interior
still in vehicle, and change entire interior color to match the exterior.
Which was Corvette yellow..
Only one of these things happened.
The cage did get done the way I
wanted it with the interior in, and undamaged.
However, painting it was another
matter, and the idea to match my original paint, instead of doing the cage
black, was the other thing that was ultimately going to kill me for the
next 2 months.
This project started in early February
and we had to leave for Moab on the 15th of April..
To make a long story short, the
cage was painted in Corvette yellow, that was computer matched, but when
the technician was done, I told him that it looked brighter than my original
paint did..
He assured me that it would dry
darker than it looked.
RIGHT !
Well I believed him, and fired
up my compressor, after prepping the entire roll cage, and spraying it
with a good coat of primer, and shot the cage..Well the damn cage ended
up looking so good that the Bronco looked like crap next to the brighter
prettier paint on the cage..
HMMMM... I feel a dilemma approaching..
Repaint the Bronco, or try to dull
down the roll cage to match the original paint..
???????????????????????????????????????????????????????????????????????????
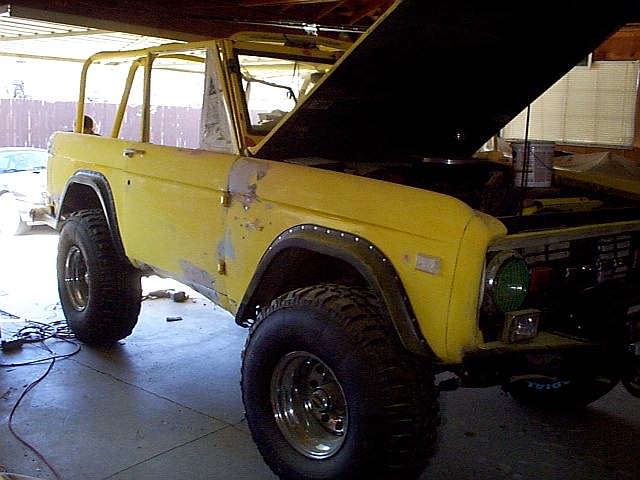
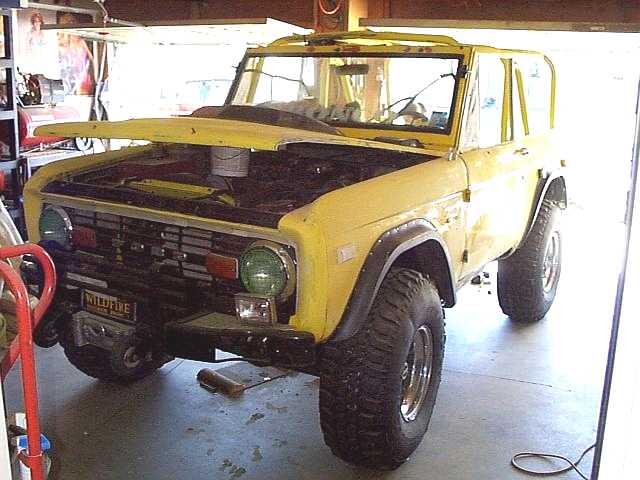
Well the next thing that I know,
I am stripping the entire Bronco down to nothing, and repairing every last
dent, ding, and problem that I have ever had, cracks in the hood, " reinforced
with large bolts welded into the weak parts of the hood, and then molded
in to the hood to form a stronger than stock beautiful hood.
Doors that were out of alignment,
and fenders that had been tweaked by rocks, in the Rubicon, as well as
rocker panels that had seen better days..Chipping paint all over the place,
and a big dent that had been of my right front fender since sometime in
the late 80's. I also fixed the spare tire swing away mount, that
from the factory had been quite short and caused the body to seperate at
the seam when the tire carrier was opened to provide access to the rear
of the Bronco. It was lengthened about 6 inches, with two lengths of steel,
layered over each other, and then welded to together and ground down to
look like on solid piece. Finally I can open my tire carrier again.. I
also cut new and shaped new holes for 3 new LED tail lights on each side,
2 reds for brake lights, and one orange for the turn signal..Yee Haw..
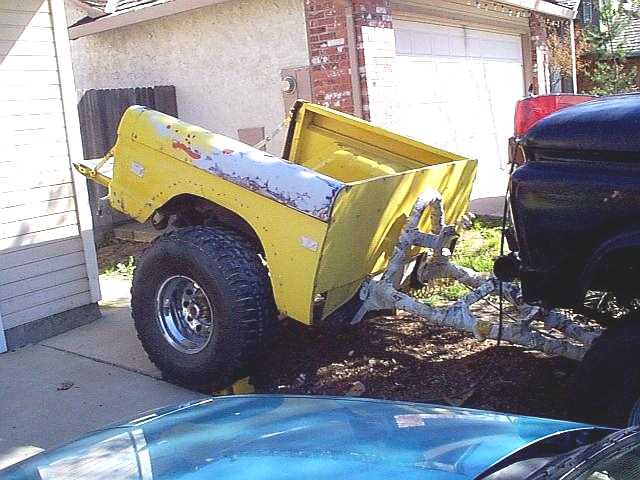
Trailer
Troubles:
About half way through this process,
my daughter says, " Mom what about the trailer ?.
Oh Crap. I had forgotten
all about my trailer, and had to start stripping it down as well, cutting
quarter panels off, in preperation for a custom bumper, that wil be alot
like the one on the back of the Bronco, only lighter, and made of square
tubing..It also had some dents, from Rubicon trips, and needed a new top
as well, as some other much needed adjustments..Also new Bushwacker
Flexy Flares were installed on the trailer to match the ones on the
Bronco, replacing the nasty cracked flares that were on there.
So two months, of working 12-15 hour days at work, then coming home and working on the Bronco until late at night, getting just a few hours of sleep per day, it finally went into the paint shop just 3 weeks before we were to leave for Moab.
Note to Kiera.
I couldn't have finished this project
without my daughters help. She sanded for hours, polished every bit of
chrome, and aluminum on the Bronco, as well as taped for hours before we
took it into the shop, only to have the lady tear most of it off, when
we got there. The look on my daughters face was priceless. GRIN
She was looking at me like MOM ! What the hell are they doing????
Thank you Kiera, for all of your
hard work and dedication.
I couldn't and wouldn't have finished
on time without you. You are one great kid. *S*
The paint shop had it for one week, and did a beautiful job. Painting the Bronco and Trailer inside and out, with a fresh coat of Electric Yellow, and a Clear Coat also.
Now comes the fun part. Trying to
completely rebuild a Bronco in only two weeks.
The entire wiring harness that
actually snaked all over the previous roll bar, had to be entirely rewired,
and reconfigured to blend with the new cage, as well as mounting the overhead
console between two specially welded bars to hold it in place. That was
a chore that took close to 3 days to do alone.
Then all brand new weather stripping
was purchased and installed from.
Gt
Restorations E-Mail
Click on the Business Card to see it full
size for phone and other info!
Click on the links below to go to the website,
or for direct email link !
Gt
Restorations E-Mail
It fit perfectly, and was almost
$60.00 cheaper than the Bronco shop that resides here in Sacramento.
They will ship anywhere, so give
them a try. It was worth the effort. No more rattles.
They were at the Good Guys Nationals
Auto Show 2000..But travel all over, as well as ship anywhere.
Click above to the only link that I could find on theses seats..
My seats were purchased from Tognotti's
Auto World here in Sacramento, and are a beautiful rich black velour!

TOGNOTTI'S AUTO WORLD
2509 Fulton Avenue
Sacramento, CA 98521
Ph: (916) 485-5072
E-mail
Then there were new ProScat Racing
seats, "which needed new brackets fabricated, "which took one day", and
a rear seat that has to be relocated forward to clear the new stereo speakers,
and system.
Then the seat had to be removed,
and the bikini top taken in to the upholstery shop, as well as the trailer,
for some serious reworking, including a new top for the trailer, and an
extended and custom designed bikini top for the Bronco, new carpet throughout,
and a rear seat recovered to match the front seats.
I also carpeted the inside rear
of the Bronco to match the trailer, as well..
Fire extingushers were mounted
inside under the side rails, to get them off of the roll bar where they
were before. The air hose mounts were also moved to the side rails,
and custom mounts fabricated and painted to match the interior, allowed
a clean and stylish installation. Everything was put together with
only Stainless Steel nuts and bolts, and hardware, where ever possible.
This caused many countless trips to the hardware store, to practically
buy them out of stainless steel stuff. A beautiful Dee Zee Gold Series
Clear Coated Diamond Plated Truck Box, was located just two days before
I left by S & H Four Wheel Drive after a week long and very intense
search. They worked their butts off to get me this box.
It barely fit, and required some
last minute fabrication to do so, but turned out great. I love it
!

My daughter Kiera and I were also
out rewiring the new LED tail lights just two days before we left.
They turned out great, and were
one of the most noticed things on my rig while at the Jeep Safari.

My Super Nova LED Taillights are oval,
but this round on is all that I could find that was lit up to show you
what they are like.
I used four reds, and two ambers,
to acheive the look that I wanted.
http://www.grote.com
Click here to go straight to the homepage
of Grote Lighting Products, for big rigs !
I wanted something that would really
stand out, and climb as good as it looked, and I feel that I have achieved
that goal. This rig is both highly functional and yet quite beautiful
to look at. We were planning on leaving at 2am the morning of the
15th, but were up installing the soft top which because of the roll cage,
had to be modified to come apart like a quick release system. So we left
at 8 am after falling into bed, at 3 am. The poor kids were falling
asleep standing up, while holding the bars for the soft top up in the air,
so as not to scratch the new paint. I have never done so much so
quickly and hope that I never do that again..
IT WAS A KILLER..
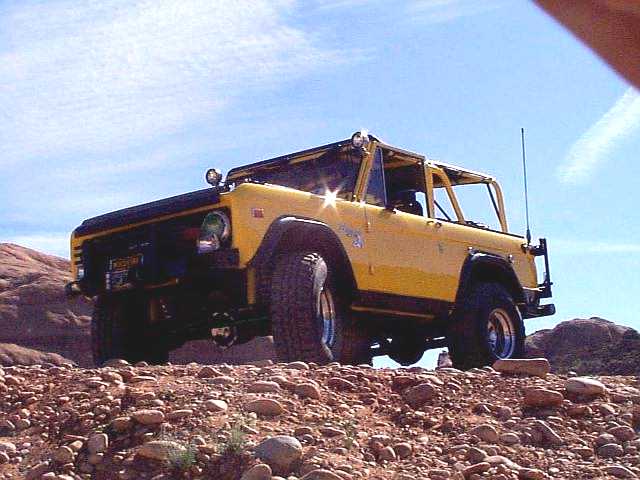
The finished product, over 1200 miles later in Moab Utah..
Just 3 days after completion, and a marathon drive to get here..
At the top of Potatoe Salad Hill..
![]()
![]()
![]()
Click to Return