The Kits:
Few kaiju has ever been as imaginative or as threatening as
Mechagodzilla, in both his incarnations. Although I prefer the original
Mecha, all razor-sharp plates and spikes, an obvious instrument of death -
his pumped-up modern incarnation also is an awesome display of "nonlife."
Metal takes on the shape of a kaiju, becoming a monster that is even colder
and more deathlike.
Mechagodzilla models are a blend made in model heaven: it's a
vehicle, it's a monster, it's the two most popular model subjects in one.
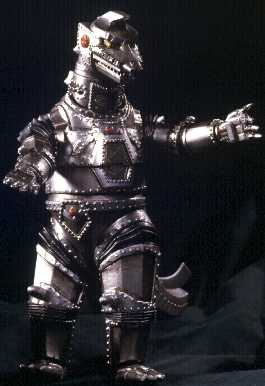
The original Mechagodzilla was one of the best releases in Bandai's
Tokusatsu series - kit number 5. The original illustration by Yuji-Kaida
was reproduced as a giant poster inside the box, and on the back of the
poster were eleven shots of the MG-1 and MG-2 from the original series.
These shots were a modellers dream, including front, back, and side shots
of both versions of the original robot, as well and underviews (between the
robot's legs looking up) and overviews (down from above the head) and a
flying view.
I can only guess that Mechagodzilla got this upscale treatment
because of his sublime combination of figure and vehicle elements.
As usual with the Tokusatsu kits there was a nifty little
instruction sheet combining colour pictures of the finished kit with
colour, and black and white, pictures from the films. These included
detail shots of equipment behind the plate on Mechagodzilla's chest, and
closeup of the details when Mechagodzilla's head is gone.
Sigh, the tokusatsu series . . . we can only hope that Bandai
decides to continue it some day.
 However, the good news was that series supported new releases
until 1994 and the kits are still available. The last kit to be produced
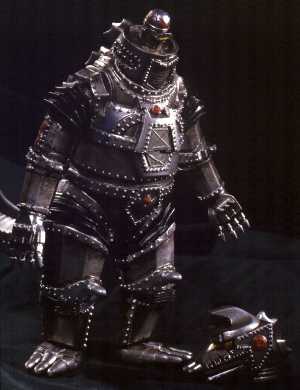
was kit number 16 - Super Mechagodzilla.
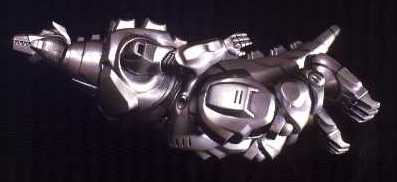
There's no poster with Super Mechagodzilla, but there are lots of
extras and some perks. First of all, while I love my Max Factory vinyl of
the new Mechagodzilla - building the "Garuda" ship in vinyl was a task made
in hell - with both the laser cannon requiring major work to keep them
straight. In the Bandai kit, with nice, sturdy styrene plastic, all the
complex curves and elaborate weaponry of the Garuda are reproduced in
fine, hard-edged detail.
However, the good news was that series supported new releases
until 1994 and the kits are still available. The last kit to be produced
was kit number 16 - Super Mechagodzilla.
There's no poster with Super Mechagodzilla, but there are lots of
extras and some perks. First of all, while I love my Max Factory vinyl of
the new Mechagodzilla - building the "Garuda" ship in vinyl was a task made
in hell - with both the laser cannon requiring major work to keep them
straight. In the Bandai kit, with nice, sturdy styrene plastic, all the
complex curves and elaborate weaponry of the Garuda are reproduced in
fine, hard-edged detail.
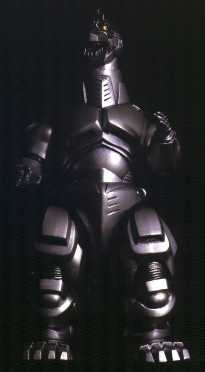
Mechagodzilla - like so many Bandai Gundam kits - is rendered fully
posable, with moving mouth, head, shoulders, elbows, hand, waist, hips,
knees, and feet. This is a lot of fun, but the joins at the hips - in
particular - have a pretty large gap that accommodates posability but will
probably bug a lot of modellers who want a "museum quality" replica.
Nevertheless, this Mechagodzilla features a lot of flexibility in pose -
and even comes with a "flying head." Just pop off the walking head, and
the rest of the model is posable enough that your Mechagodzilla can be
doing Mach 4 in a few instants, with the Garuda flying convincingly
alongside.
Or pop out a well-concealed plate section on his back and pop the
Garuda in place to form the ultimate nemesis for Godzilla.
All in all, these two kits are probably the very best in the Bandai
series, matching the medium to the subject to create some really accurate
figure kits. Somebody at Bandai must have loved Mechagodzilla.
Painting:
 The original Mechagodzilla is a fairly simple paint-job: basically
bright silver or aluminium. You can even hit these guys with a spray can
of Testor's chrome. I like the dark coloured compression plates at the
joints to look slightly metallic: a mix of black and gun-metal. Then clear
orange painted over the silver basecoat for the "eyes" and clear red over
silver for the "ears" and MG emblem on the arm. The metal plate on the
chest and the grate in the neck look good with a duller metallic for
contrast.
Then it simply becomes a question of how much weathering you want
to do.
The original Mechagodzilla is a fairly simple paint-job: basically
bright silver or aluminium. You can even hit these guys with a spray can
of Testor's chrome. I like the dark coloured compression plates at the
joints to look slightly metallic: a mix of black and gun-metal. Then clear
orange painted over the silver basecoat for the "eyes" and clear red over
silver for the "ears" and MG emblem on the arm. The metal plate on the
chest and the grate in the neck look good with a duller metallic for
contrast.
Then it simply becomes a question of how much weathering you want
to do.
Oil and stains from heat, battle, et cetera are best portrayed with
brown and chestnut ink. (My favourite company is CITADEL. They have an
extensive line of inks.) One of the nice things about brown and chestnut
inks is that they can be blended for a variety of tones. The brown looks
oily, and the chestnut when thinned is a very rusty shade. Occasionally
mix some black in to darken the stain and create a shadow effect at the
edge of metal plates and joints.
Paint the brown ink (or the brown/black mixture) along the
underside of raised edges and then draw some of it out . You don't want it
to look like dried fluid, so use a second brush to spread it out gently and
break up any flow lines. (I quite often paint with two brushes in my hand
at the same time, but you're going to have to practice your coordination
with this technique.)
You want to hit the joints with colour, random bolts (I love the
bolts on the old Mechagodzilla) with a mix of brown and chestnut, and also
pick a few random spots on metal plates that have been blasted by
Godzilla's radioactive breath.
As always with weathering, you want to have enough to suggest dirt
and battle damage, but not enough to look like Mechagodzilla's been in a
junkyard for ten years. (And if this kind of thing alludes you, don't
bother. Your Mechagodzilla may have come fresh from the shop!)
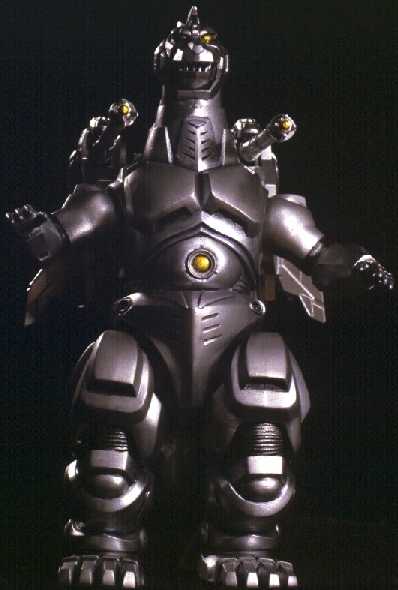 The new Mechagodzilla presents a number of challenges and my
solutions may not be yours so remember that modelling is about
experimentation. (A good excuse to buy more than one kit to play around
with.) While we still want to start off with a bright metallic base coat,
Mechagodzilla is coated with diamond finish unlike the original suit.
Also, if you look at pictures you'll notice that the suit often has a
"bluish" cast in shadowed areas. This is probably from studio lights, but
it is a very nifty effect and one you'll probably want to paint onto you
kit.
The new Mechagodzilla presents a number of challenges and my
solutions may not be yours so remember that modelling is about
experimentation. (A good excuse to buy more than one kit to play around
with.) While we still want to start off with a bright metallic base coat,
Mechagodzilla is coated with diamond finish unlike the original suit.
Also, if you look at pictures you'll notice that the suit often has a
"bluish" cast in shadowed areas. This is probably from studio lights, but
it is a very nifty effect and one you'll probably want to paint onto you
kit.
Shadows can be created inside vents and around the armour plates
with the same black/brown mixture used on the old Mechagodzilla. (Don't
use straight black as the shadow will be "too deep." Look around you,
most shadows are not black but lighter tones.)
The blue effect will occur out from heavily shadowed areas. (You
may actually want to pose your kit, put a light source on it - like a desk
lamp - and note where shadows fall.)
The best product for creating the blue "shimmer" is Liquitex
interference blue/opal blue. A quality of interference paints is that they
seem to disappear unless the viewer is looking directly at them, from the
sides they are transparent. This makes them a great SPECIAL EFFECT if you
don't get carried away with them.
Opening the bottle, you seem to be looking at a white paste, but
when spread on very thinly over black, metallic, or other colours - you
will produce a bright, almost metallic blue.
In this case, you want to go VERY LIGHTLY - to give the suggestion
of shadow and light. You don't want to own a blue Mechagodzilla.
Break the paint down with water and play with the viscosity on a
piece of painted scrap. You're trying to spread on colour so lightly that
a casual onlooker barely notices the effect. And again, you want to spread
out the paint with a second brush so that these blue areas blend until they
disappear, there should be no hard edges.
It's actually much easier than it sounds (once you get use to
working with interference paint).
Final step - seal the kit with a satin finish for that "diamond
coat" look.
KEEP ON MODELLING!
STan
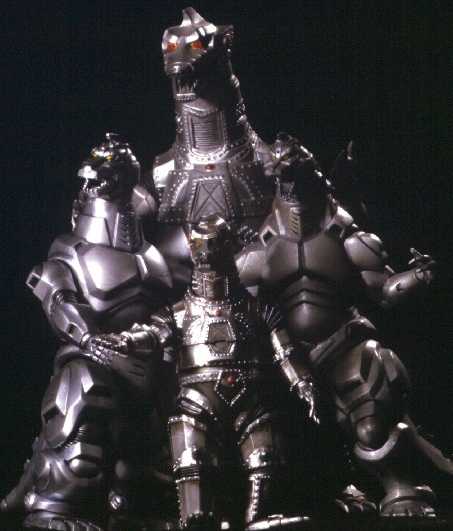
Here is a bonus picture of the Bandai Kits with the Volks and Kaiyodo kits.
 Back to the Stan's Kaiju Korner