
One of the best tips I can give you is that you need to have a good area to work in and have a nice, comfortable chair. Do not cheap out on the chair, you will be spending a fair amount of time in it and your lower back will thank you for it later! I personally use an office chair that has a decent lumbar support for my ruined lower back and is adjusted so that my legs are not in a bad position causing circulation problems.
You should have enough room to work and also have enough room to spread out your parts and supplies too. A place close by, but not on your immediate work bench, to let painted parts dry without being in your way or having the wet parts accidentally being knocked over is a good idea too.
A cutting mat is one of the tools that I never though much of until I had one. Now I won't work without it! Not only do they keep you from ruining your work surface when you cut a part, but they also help to keep your parts from slipping while you're working on them. You don't know how many times I saved myself from cutting my fingers by using the cutting mat to hold the parts steady instead of my hands!
Knives and brushes that feel good in your hands produce better results. The more comfortable you are working, the longer you can take to get everything just right and will not rush through things to get it done.
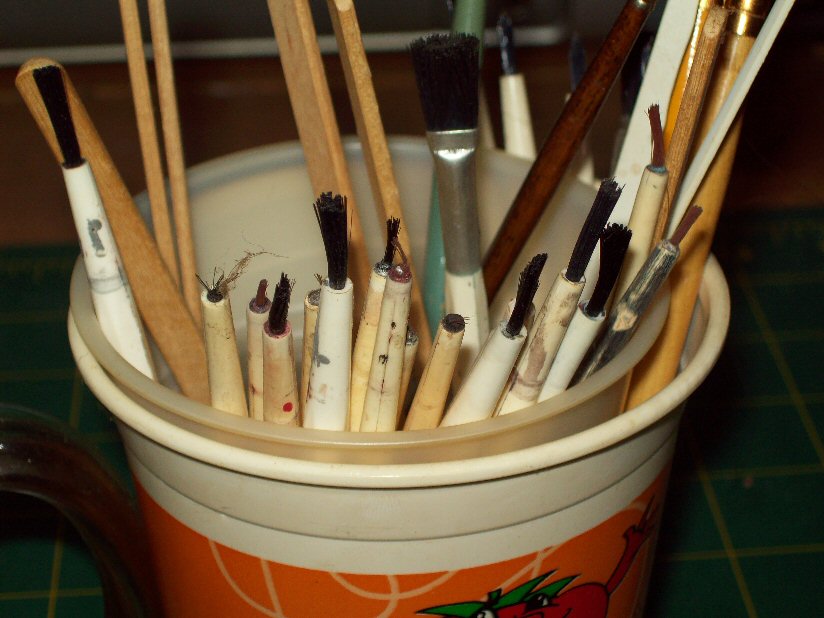
Buy extra brushes to cut down for detail work too. I have no problem buying the cheap testors brushes and cutting the bristles down to the size and thickness I need. I actually have a stash of new testors brushes sitting in a drawer just to cut down when I need to. Also store your brushes either completely flat or bristles up. This will keep the bristles from becoming deformed and unusable.
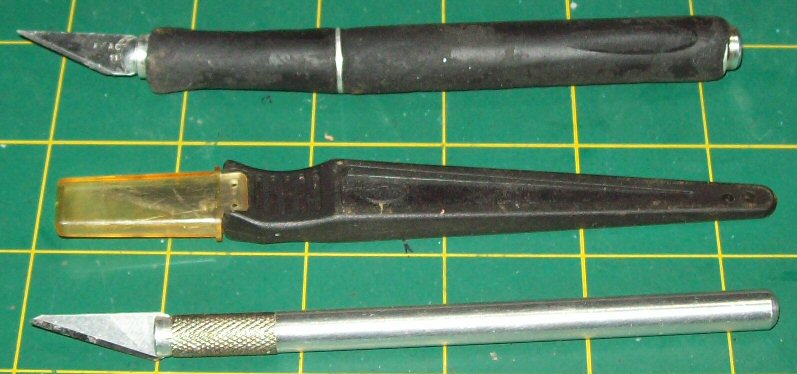
Don't think you have to stick to the model section for your tools either. My favorite Exacto knife came from the drafting section of Staples. It is thicker than the ones in the hobby section and also has a padded handle. Look around the other sections of the stores your already shopping in and you'll be surprised what you will come across.
Here are some scans of what a model work area was suggested to be like in an old 60's Model Car Science magazine I found. I figured I would share them here for your enjoyment. Just click on the image for a larger view. You will have to use your return or back button on your browser to return to this page. To save the pictures on your computer for later reading or to print them out, just right click on the image and choose Save As from the drop down menu.
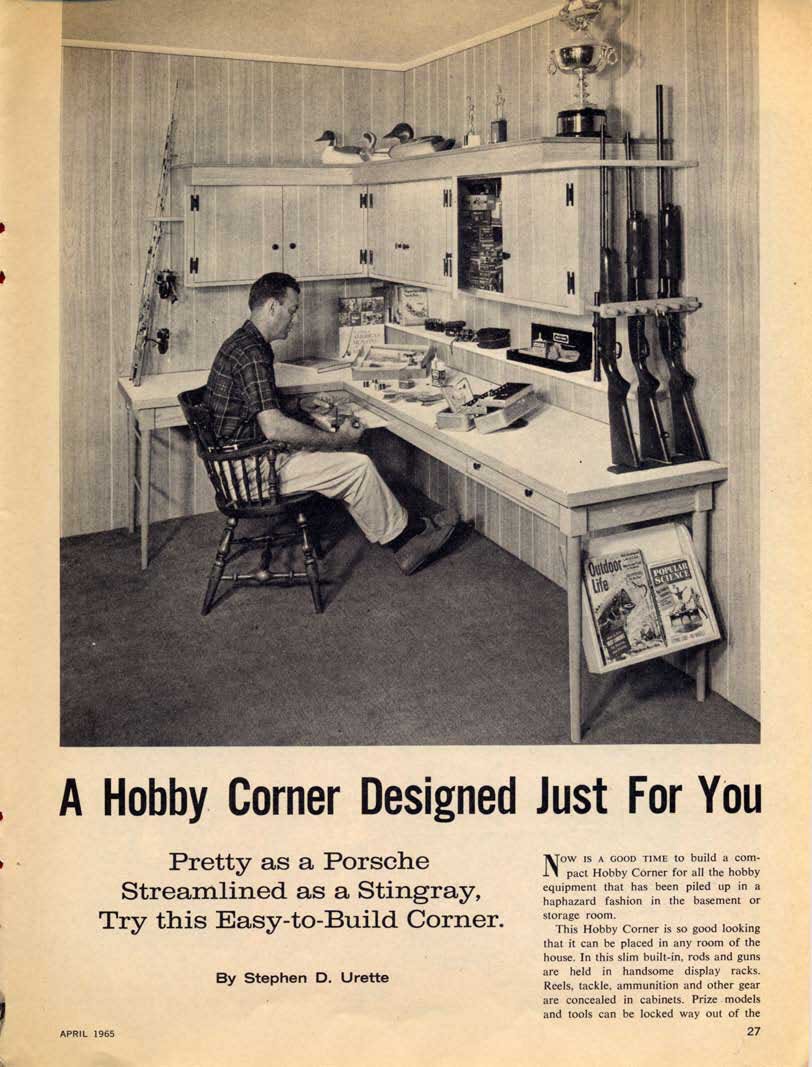
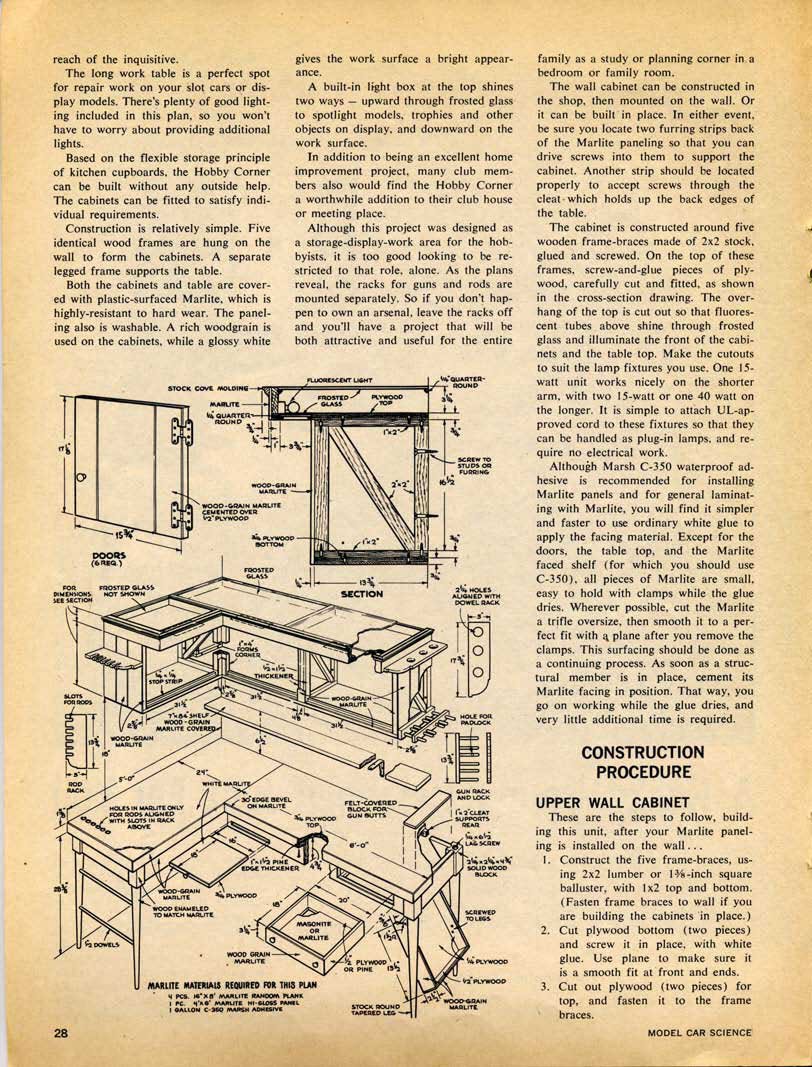
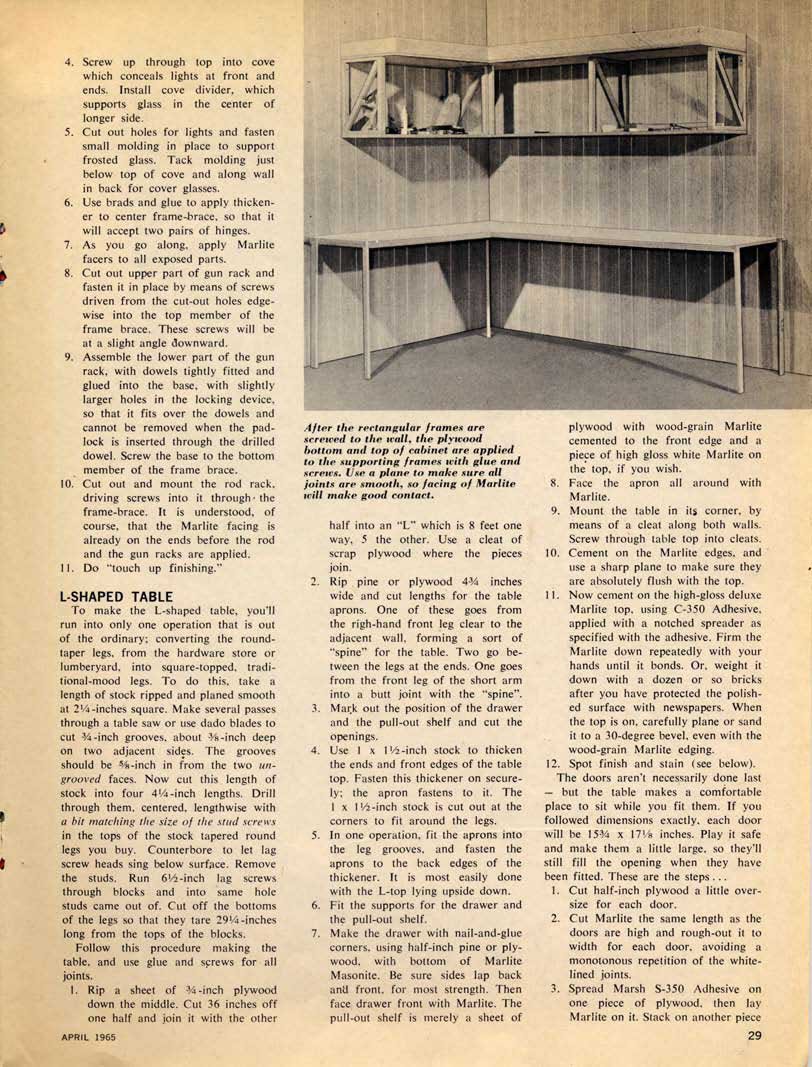
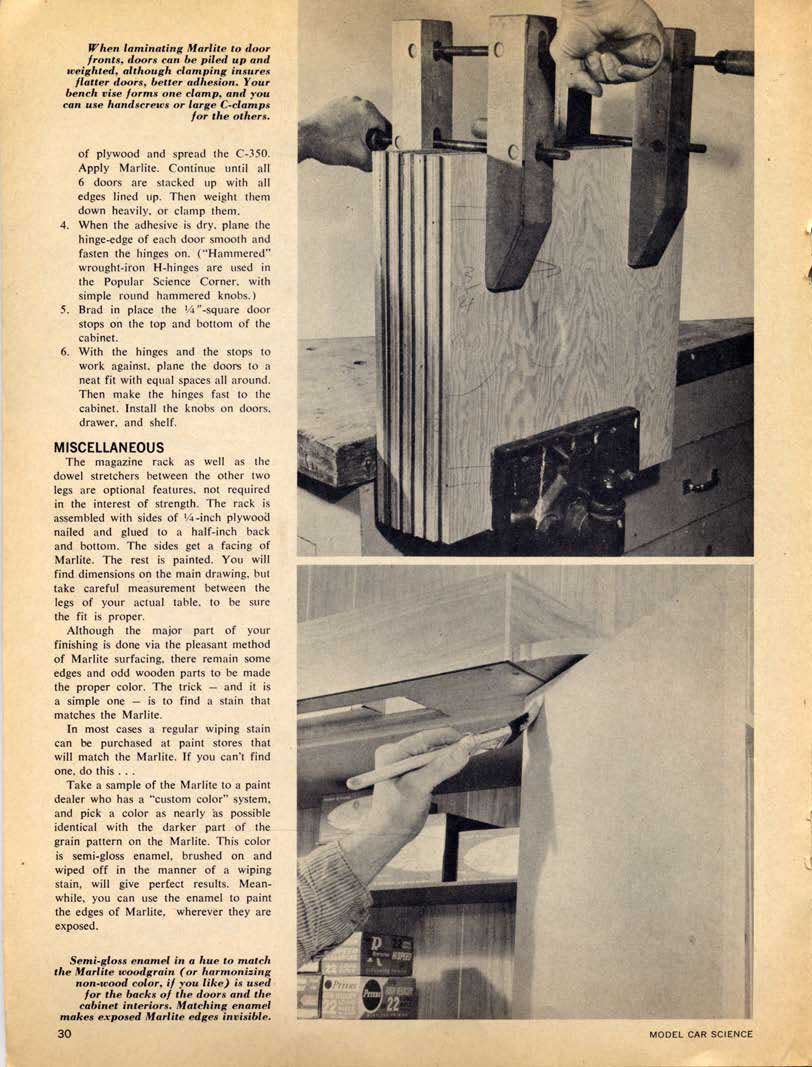
Please don't contact me asking what the glue or paneling they used in the project is, or where you can get it. I honestly have no idea either. I'm sure you can find suitable alternatives at your local home improvement store if you decide to try to build the work area for yourself.
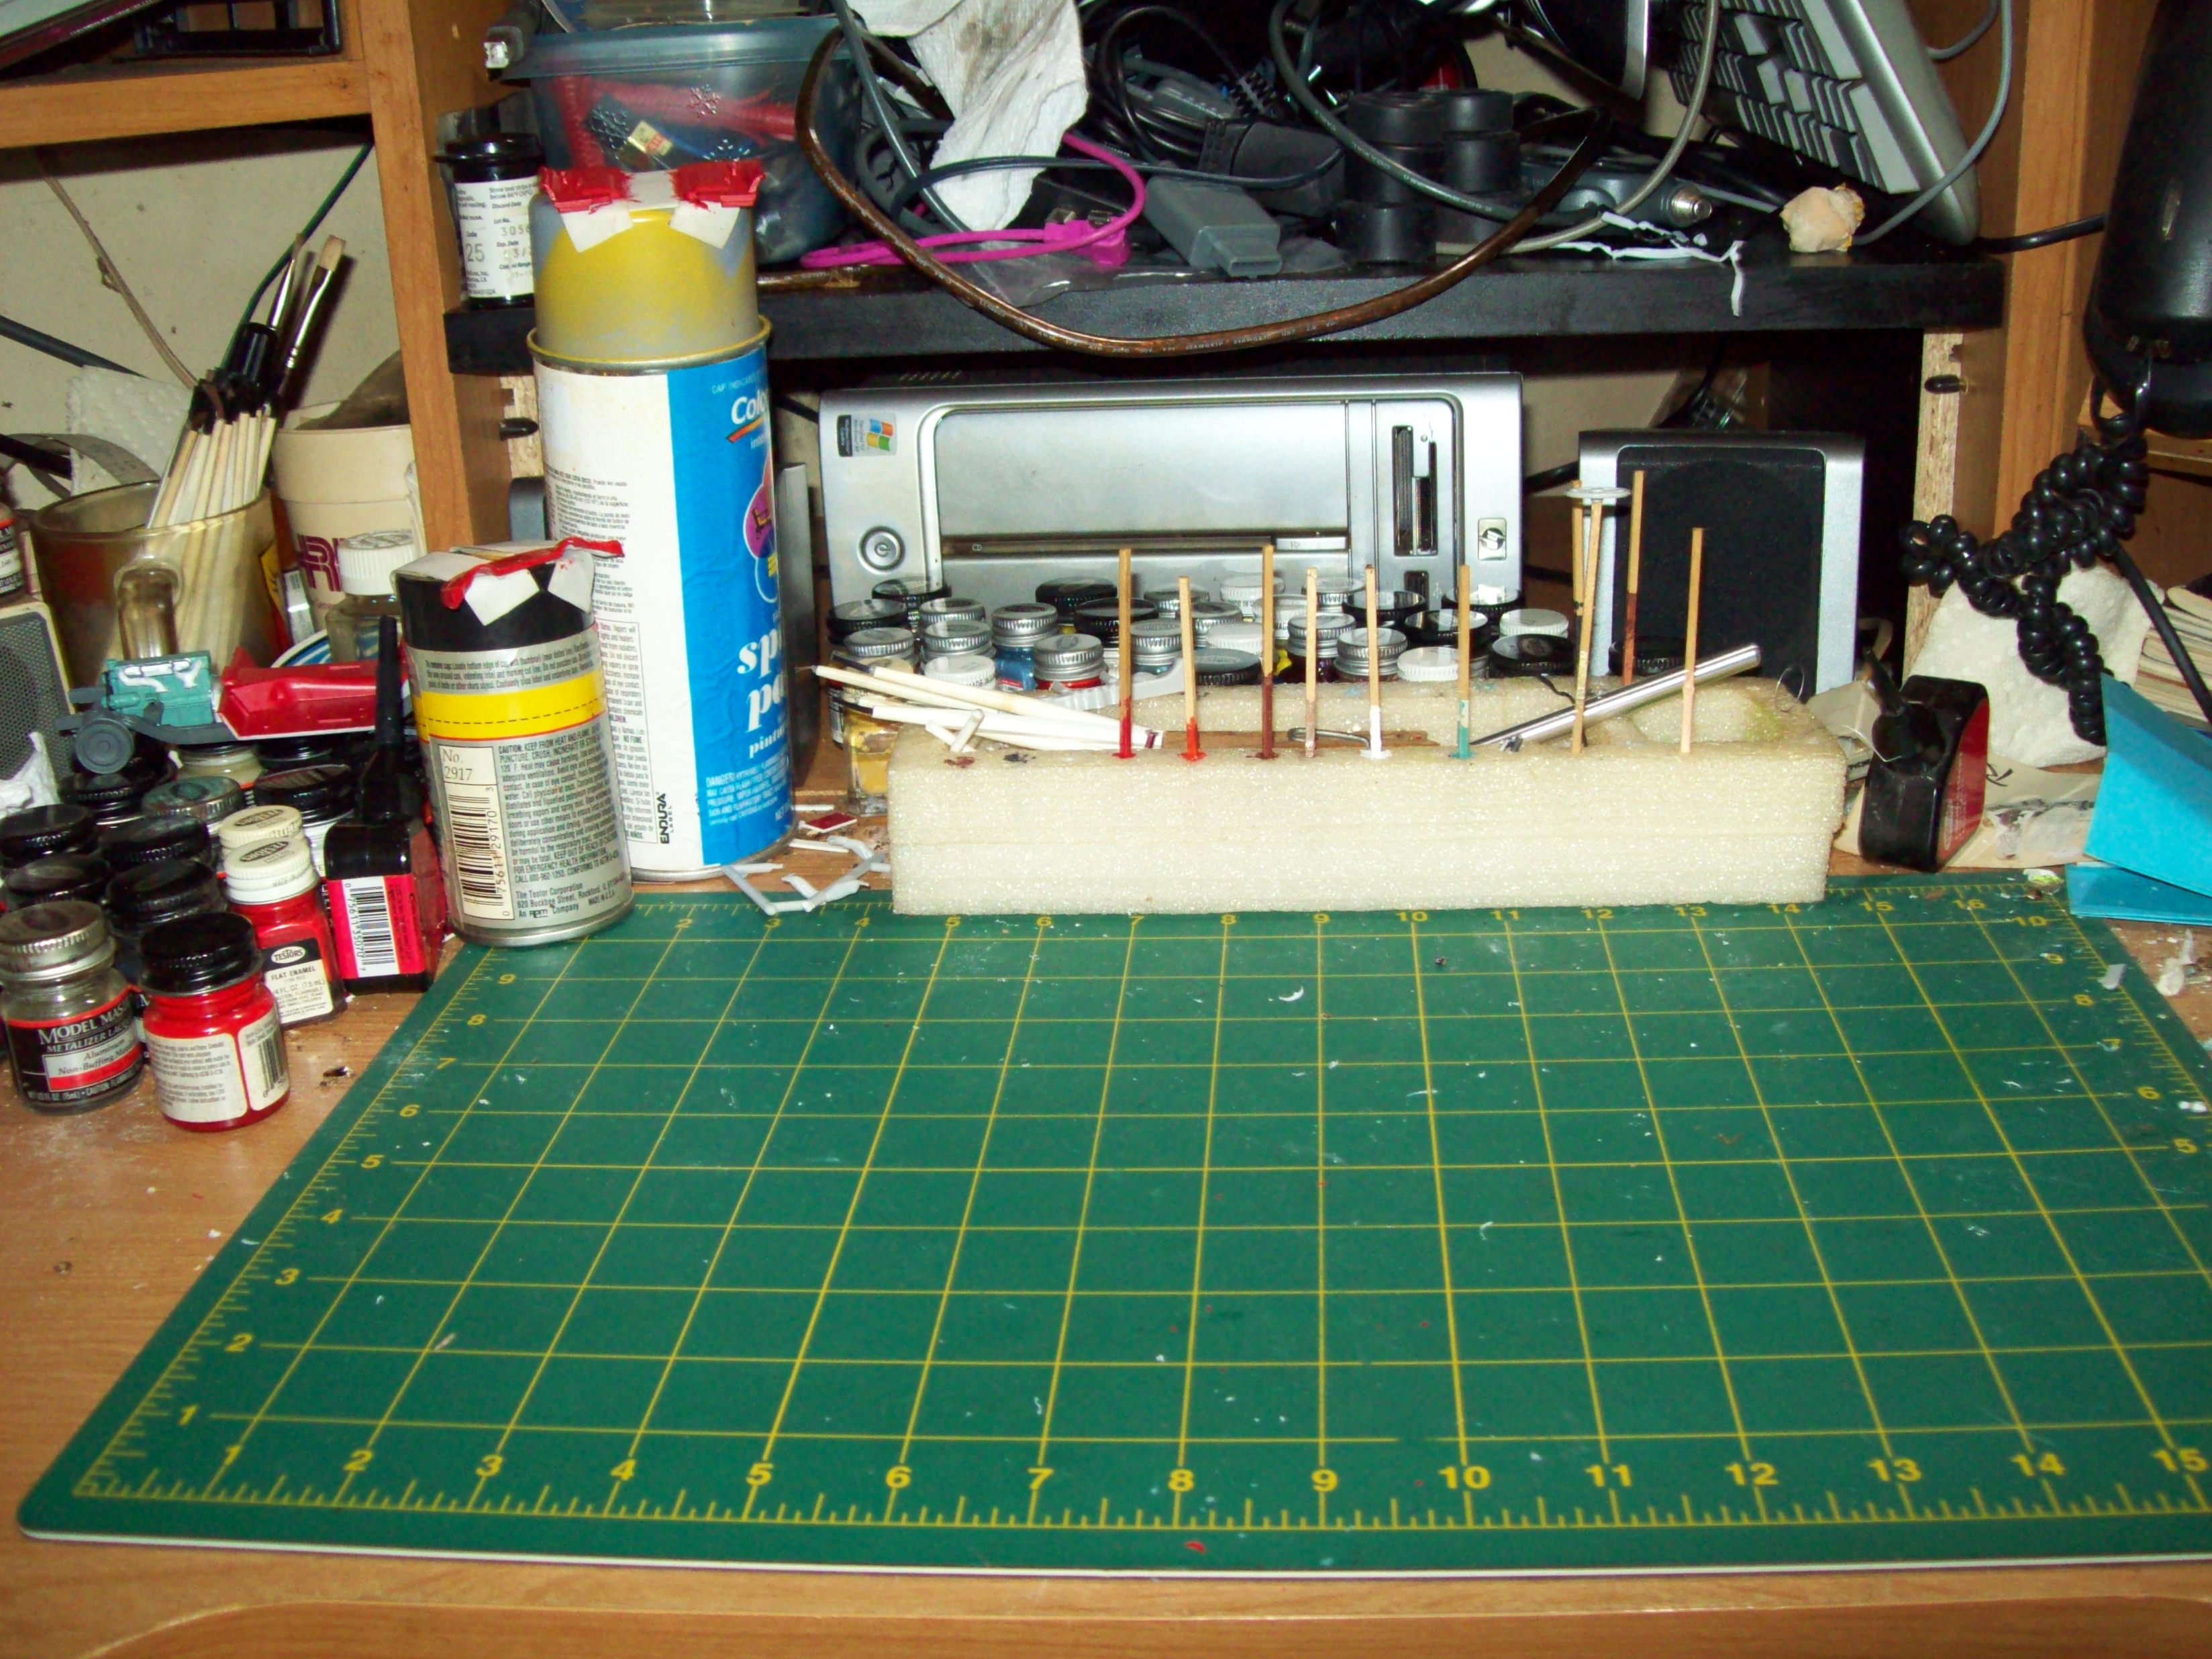
I feel that I have to say that the picture at the top of this page is my temporary work area. I will tell you quick, fast, and in a hurry that it is way to small and real inconvenient to work in. I honestly only put it on here to have a picture for the page.
Unfortunately it is also my computer desk so I have to move everything when I want to work on my models and have to put everything back to work on my computer. I also do not have room to work on more than one sub assembly at a time and have to store the rest of the parts in the box, only to have to dig through it to retrieve something I need. Trust me, this isn't going to last very long.
I will be building a dedicated work area once again so I don't have to do this any more! I'll update this page when I finally get fed up enough with my current working conditions to make it happen.