
I've
said many times on different forums that you can use plastic signs to
build things in scale instead of paying for the expensive Plastruct
sheets. It has usually resulted in someone trying to start an argument
over it and I even had one moron say that I didn't build what I said I
did and stole the pictures of something they bought at a store. I have
given up on trying to convince people that there is a more economical
way to build things and when someone starts to start something with me
I just let it go and don't try anymore. The way I see it is I gave them
the information and if they want to keep waisting their money its on
them.
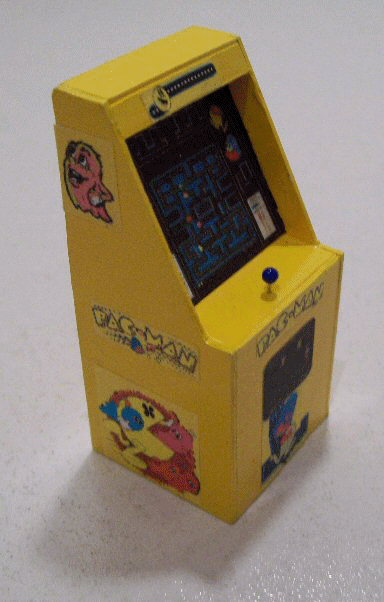
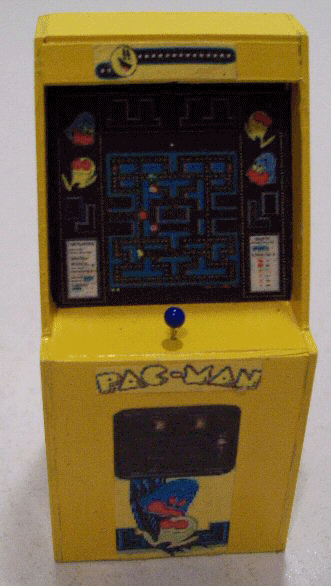
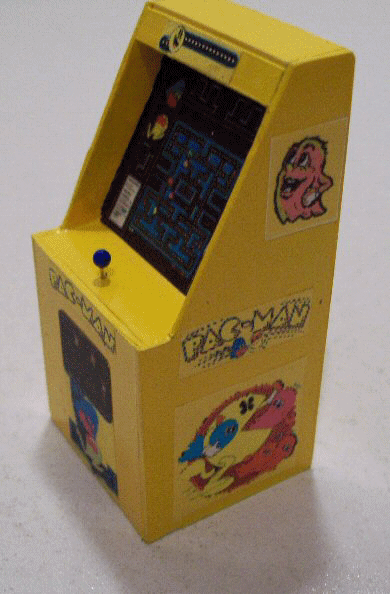
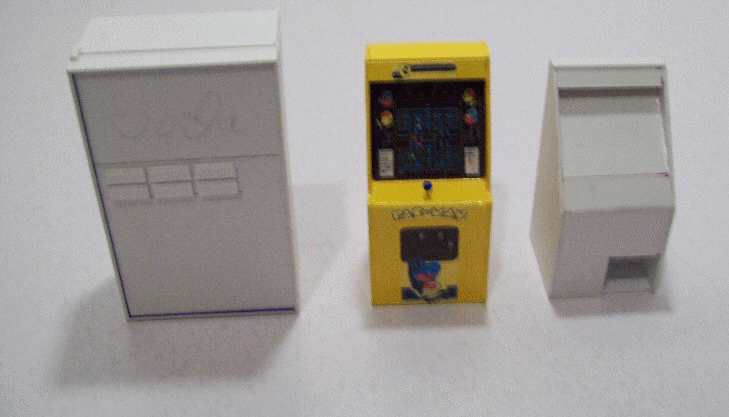
Yea, the person falsely accusing me went over real well with me and they were quickly proven wrong since I have all my assembly pictures showing how I built the Pac-Man Machine shown above that I was using as an example. I still need to finish the 1 & 2 player buttons and redo a couple of graphics on it, but it was a first try at using signs to build with and came out well in my opinion.
Now I'm not going to say that plastic signs will replace everything you would normally use Plastruct sheets for, because you can't. Plastruct has some detailed sheets that you just can't replicate using the signs.
What you can use the plastic signs for is to replace the flat, non detailed Plastruct sheets with a less expensive alternative. I don't know about you, but in this wonderful economy we're living in right now I can always use a more cost effective way of enjoying my hobby!
One word of caution though, use the thicker signs as they hold up better and are easier to work with. I also sand the writing and boarders off with fine sandpaper before I lay everything out and cut the parts out of the main sheet. This is so I don't have to sand the individual parts.
You'll see the paint was left on a few of the pieces in the below pictures. I did this for the tutorial only so that you could see that I really am using the plastic signs. I sanded the factory paint off of them before I painted the finished product.
Since I have posted how I built the Pac-Man machine before, I'll go through the basics of building another scale arcade machine to show how you how I use plastic For Sale signs to build items that either aren't available or I don't want to spend the money on purchasing.
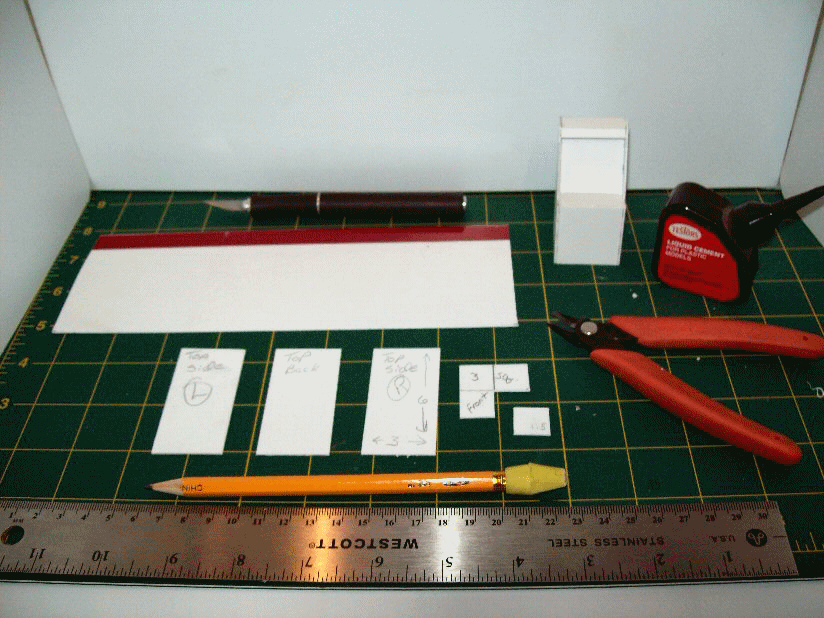
This is what I started with, and the tools I use when working with the signs. You can see the unfinished Pac-Man machine shown above in the upper right corner of the picture. I found the dimensions of the machines on a Coin Op and Vending Machine Sales & Service web site and roughly scaled them down to 1/25th scale. I then cut the pieces out of my sign after laying everything out and marking what it was for.
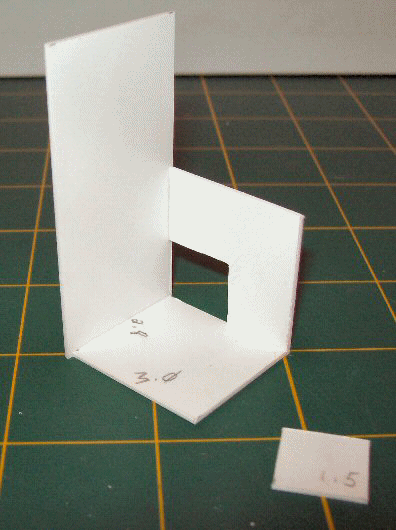
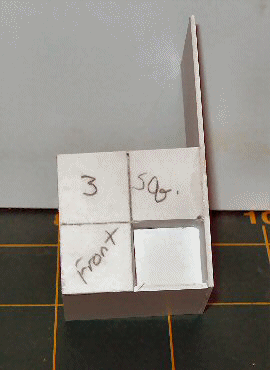
Once everything was test fit to make sure everything fit well, I started gluing everything together with ordinary Testors liquid glue. I didn't even have to tape the pieces together, I just held them for a few seconds and they were glued well enough that I could move on to the next section. I did build an inner box for inside the hole cut on the front to finish it off before the rest of the sides and the top was glued on.
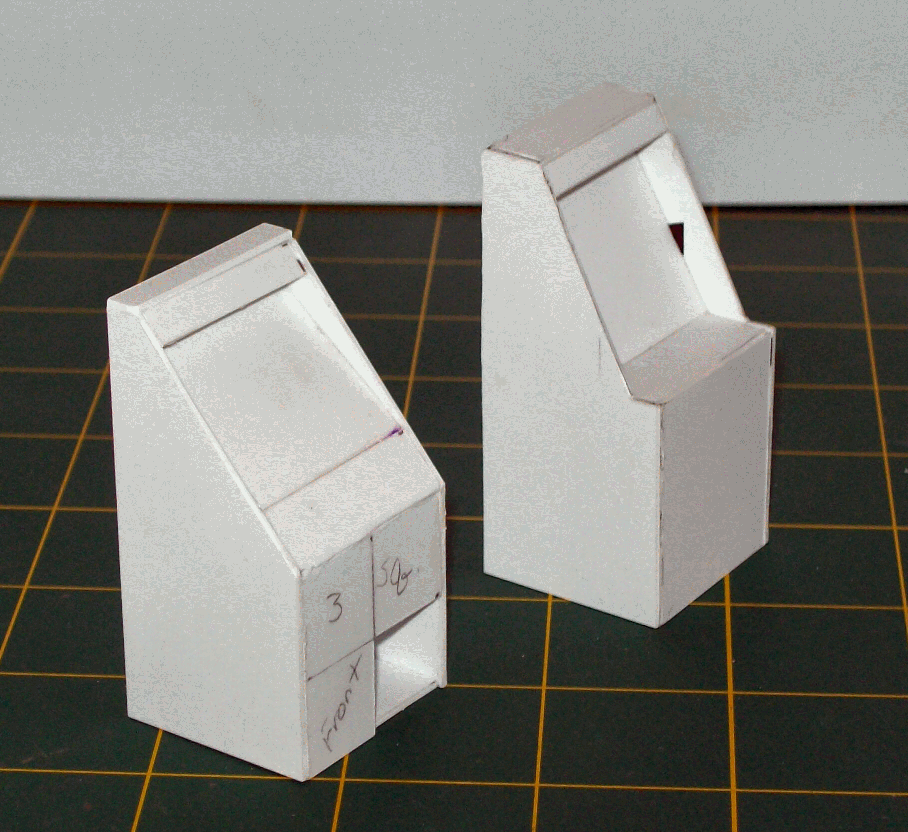
And here we are with both basic game consoles once everything set up over night.
Once you're finished, you'll have something that not everyone else will have after a few added details, some paint, and the graphics to show what the machine is supposed to be.
Below you'll find some other projects I have built for the Oasis Diorama.
A Soda Machine, the Pac-Man machine, and a yet to be determined racing game.
A photo machine like was just about everywhere in the 70's and 80's.

A dollar bill changer, a cabinet, and a Hot Dog cooker. I still need to build the Bun Steamer for this.
Last but not least, all the counters and shelves for the store.
I hope you have found something interesting and that I have inspired you into trying to build something with plastic signs.