 |
|
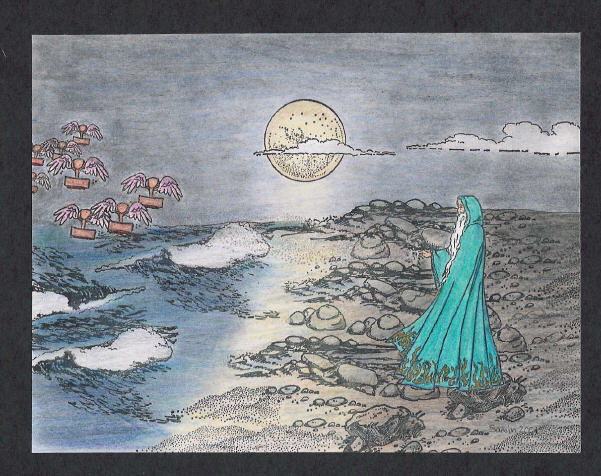
| The Wizard of Stampymede Summons his Minions |
| Stamps Used: moon, rocky beach: Third Coast clouds (partial image): Beeswax wizard, flying stamps, waves, large rock: Cherry Pie smaller rocks: Art Impressions sand: Darcie's Country Folk |
| How it was Done: I usually use Memories permanent dye ink because it gives a nice, strong black color that will not run if you color in your scene with watercolors or markers. 1. Stamp wizard and mask 2. Stamp beach, including rocks and sand 3. Stamp lower wave and upper right wave, then stamp upper left wave upside down (partial image) 4. Stamp flying stamps onto separate piece of cardstock four times, masking as necessary - it is a good idea to mask and stamp at least once, to have one stamp appear to be behind the others - this adds depth to your scene); make one copy of those images at 50% (reduced) 5. Carefully trim and adhere flying stamps to scene, with smaller stamps behind and slightly above the larger ones 6. Stamp cloud (partial image), then mask 7. Stamp moon 8. Color scene first using regular colored pencils. Be sure to keep the area in the center lighter in color than the sides, so that it will look like the moon is lighting a path down the center of your scene. I then went over my scene using chalks in the larger areas (sand, sea and sky) to smooth out the color a bit. Note that I used many different colors in some areas; for example, the sea is colored with gray, blue, green and purple 9. Add dots in gold and metallic pink using gel pens (it is hard to see them, but the dots go from the wizard's outstretched hand to the flying stamps); color decorations on wizard's robe using gold gel pen. The key to coloring this scene was to use a very light touch throughout, gradually adding layers of color so that the moonlight would really seem to glow in comparison to the darker areas of the scene. |