| Lesson Three Reverse Masking |
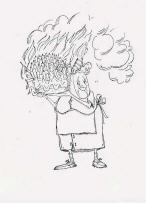 |
| I'd like you to meet Burnadette, another of my friends from Art Impressions. She's going to help me demonstrate reverse masking. Her generously proportioned figure makes this alot of fun! First, I stamped Burnadette in black ink. |
| For reasons I do not yet understand, reverse masking (that is, masking the background and stamping inside an opening in that background mask) is often called "mortise" masking in the stamping community. According to my dictionary, a mortise is "a notch, hole, or space" cut into something (usually a piece of wood) to "receive a projecting part." I prefer the term reverse mask, because all this kind of mask does is protect the area around where you want to stamp, instead of covering a specific image in order to stamp something around or behind it. |
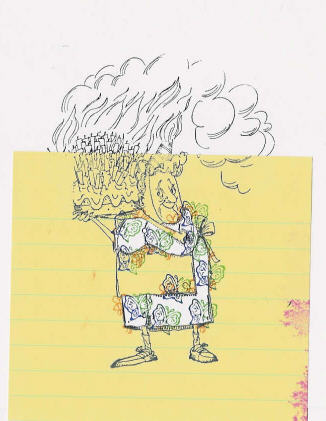 |
| Then, I stamped her again onto a large Post-It note. Instead of cutting around the whole figure of Burnadette, as I would for a regular mask, I used a craft knife to carefully trim away her dress. Notice I left the apron part of the Post-It mask alone. I will make a separate mask later, isolating the apron - you'll see that in the next step. I didn't bother to make the mask big enough to cover her head, since I wanted to focus only on her dress here. This is a reverse mask of Burnadette's dress. |
| I placed my mask over the stamped image of Burnadette, and inked a tiny butterfly stamp (Close to My Heart) with two colors from a Kaleidacolor ink pad. I randomly stamped the butterfly all over her dress, making sure that most of the image was visible in a couple of places, so you could tell what it is supposed to be. |
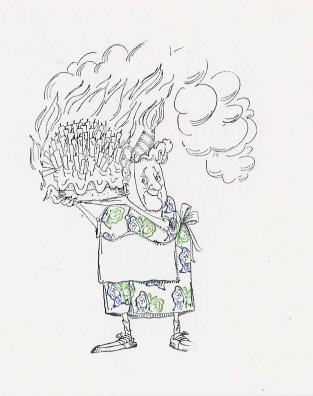 |
| Here's how she looks with the first reverse mask removed. You can see how just her dress got stamped with the butterflies. Now, let's decorate her apron... |
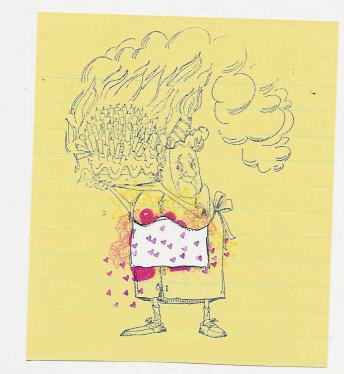 |
| Here she is with the second reverse mask on. In this case, I stamped the image onto another Post-It note, and trimmed away just the apron portion. It was trickier to find a stamp with a tiny enough image to repeat on the apron. I could have used a "background" or "texture" stamp, but in the end I just inked one very small part of a large stamp by Darcie's Country Folk. The results weren't all that great. Next time, I'll probably use one of those "texture" stamps, to get a more even coverage. |
 |
| For a look at another scene that uses a reverse mask, check out my scene, Hedwig Brings a Howler in the Gallery. |
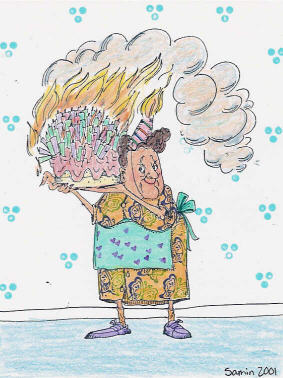
| Here she is in all her glory. Doesn't she look positively glowing? The tri-dot stamp used for the wallpaper is actually part of a Hebrew alef bet (alphabet) set I got from Rubber Stampede. Colored with regular colored pencils. |
| "Well, I wouldn't say you're old, dearie... But I had to cash in my Social Security check to pay for the candles!" |