| Lesson Ten Coloring Techniques |
 |
 |
 |
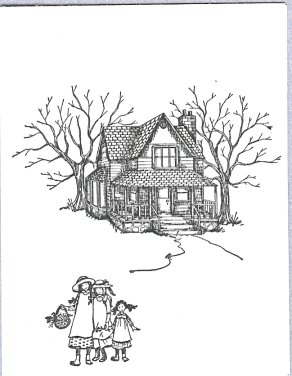
| There are many different ways to color in a scene. The look of one basic scene can be changed dramatically not only by the colors you choose, but by the technique you use for coloring in the scene. For example, by coloring this simple scene for spring, summer, or fall you can achieve three completely different looks (I wouldn't make this a snowy scene because of the way the girls are dressed). |
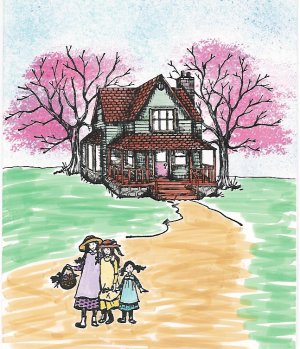
| I chose to color this as a spring scene, since it is May 2003 as I write this. |
| In this version, I used Marvy Le Plume II markers on glossy cardstock. This is perhaps my least favorite technique; I feel completely inept when it comes to coloring with markers. The girls came out okay, because they are small. The sky isn't bad, because I sponged the marker color on. But there must be a better way to color the ground! By the way, the blossoms were made using a leaf stamp. All images by Art Impressions. |
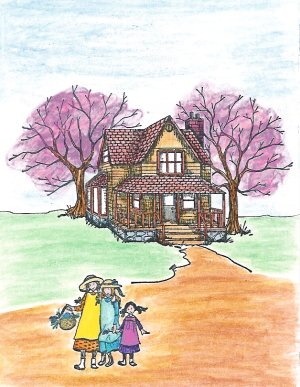
| In this version, I colored the entire scene using Derwent watercolor pencils on regular cardstock. Even though the colors I used are very similar to the first version, note the different effect caused by the medium used. |
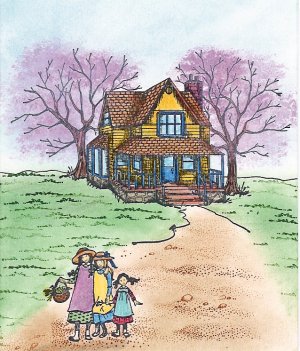 |
| In the final version, I used my favorite coloring techniques. The sky, grass and dirt were colored mostly with chalk. I also filled in the grass area and dirt with small texture stamps (grass and dirt by Darcie's, rocks by Art Impressions) that can add so much to your scenes (more about that in another lesson!). The house, tree trunks and girls were colored with regular colored pencils. I also used pencils to color in the ground around the girls. Whenever I use colored pencils, I always use more than one color for every part of the image. I start with a light color and gradually add darker tones, sometimes even adding a different color (such as lilac, then light blue). |
| The blossoms on the trees were stamped with the leaf stamp used in version 1. I inked the stamp first with a pale pink pigment ink (using a Dauber Duo). I went over the same places more than once. I then repeated the process using a darker pink, leaving paler areas showing through. |
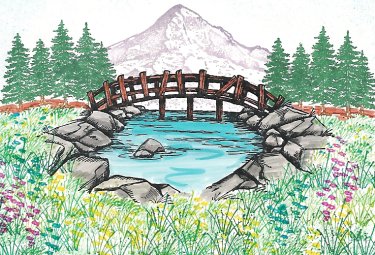
| There are, of course, many other ways to color your scenes. You could even experiment, as I have recently, with stamping scenes on photographs of the sky, or the sea (actually, I use photocopies of the photos, and they look pretty darn good to me!). The best technique to use is the one you like the most; the one you feel you do the best. But don't be afraid to try new methods of coloring in your scenes. Sometimes a particular scene will "tell" you to use a particular technique. In other cases, the stamps themselves will guide you. To the right is a scene I "colored" mostly by using colored inks on the stamps. Only the bridge, rocks and water were colored in, using Marvy Le Plume II markers (since this is glossy cardstock). |
| All versions were stamped using black Memories ink. |
| Version #1 |
| Version #2 |
| Version #3 |
 |
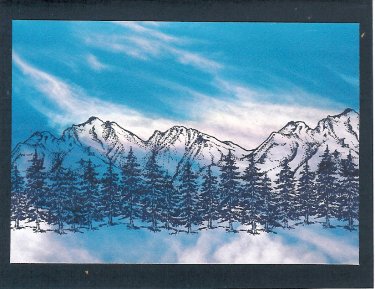 |
| Mountains by PSX, trees by Art Impressions. |
| All stamps by Art Impressions. |
| However you decide to color your scenes, have fun! |