Contents
Introduction
Camera Basics
Choosing a Camera
Taking Good PicturesDigital Photography Advice
Internet Publishing
Links
Photo Gallery
HDR Part 2
Bay Area Back Pages
Bay Area Biking
SF Bay Area Rec. & Travel Home
Bay Area Parks
Contact Me

High Dynamic Range Experiments
Some
of the best outdoor photography opportunities can often result in
disappointing
results. The pictures never seem to look the same as in real life. This
is especially problematic in shooting sunsets, backlit shots, and
dramatic cloud pictures. The
problem is primarily due to dynamic range limitations of photography.
Dynamic range is the ratio between the brightest and darkest areas of a
scene. Film and digital sensors just cannot capture the full range of
light seen in nature. The worst cases are shooting towards the sun at
or near sunset, where the sky is very bright, but the land is dark and
shaded. Usually, shooting sunsets results in silhouettes, where the sky
is properly exposed, but the foreground is black and featureless.
Another situation,
with somewhat less dynamic range, is shooting scenery with a bright sky
and clouds. Exposing properly for the sky and clouds often results in
the land being too dark. One way around this is with a graduated
neutral density (GND) filter, where half of the filter is dark, and the
other half is
light or clear. This works well when the horizon is flat. If the
horizon has hills and mountains, however, this can result in those
mountains being either under or over-exposed. Since the dynamic range
can vary greatly from scene-to-scene, you need to carry a set of GND
filters with different densities.
There are tricks that can be performed in processing the pictures that can deal with with ranges of brightnesses, but they require skill and are time-consuming and tedious. In more recent years, easy-to-use software solutions have appeared for HDR (for High Dynamic Range) image processing. They use computer software to digitally combine multiple pictures of the same scene taken at different exposure settings to compress the range of light and dark so that it is compatible with monitors and prints. The most common programs for doing this are Adobe Photoshop CS2 (and above) and HDRsoft Photomatix. Photoshop is a professional program and is very expensive. Photomatix is just for doing HDR processing and is much cheaper. You can get a free download of Photomatix. The free version is fully-functional, but it leaves a watermark on the pictures. For $99, you can upgrade it to the registered version that does not leave a watermark.
To take the test pictures below, I used my Olympus E-510 SLR and took multiple pictures at different locations. In most cases, I used a tripod, which gives the best results, but is not absolutely necessary. I used automatic exposure bracketing, varying the exposure by +/-0.7 to +/-1 EV. I used burst shutter mode, which shoots 3 pictures in 1 second at each exposure setting. In many cases, I manually shifted the exposure up and down by up to 3 EV's to make sure I got the full range of brightnesses. I used aperture priority mode most of the time, setting the aperture manually to maintain a constant depth of focus. The camera automatically chose the shutter speed and ISO value. The camera has sensor-shift image stabilization, so I was able to handhold some of the shots, even at a slow shutter speed. I deliberately chose scenes that have a wide dynamic range and are usually difficult to shoot normally, particularly clouds, sunsets, and backlit shots. Since HDR does not do well with moving objects, I tried to avoid scenes with birds, people, and moving vehicles in them. For fast-moving clouds, I had to shoot fast.
I downloaded the trial version of Photomatix. I looked among the multiple pictures of a scene for ones at the extreme high and low end and at least one in the middle. I loaded these into Photomatix. I let it automatically align the pictures to compensate for small camera shifts between each shot, which is essential for the handheld shots. I also let it compensate for background motion, such as water rippling. It then creates a single HDR photograph. An HDR photograph has a dynamic range that is so wide that it is impossible to reproduce it on a monitor. It uses a technique called tone mapping, which compresses the range so that it can be viewed on a monitor. The program has adjustments for brightness, contrast, color, and saturation. See the links below for more information. I tweaked the settings to get the best results. I saved the files as TIF files, which are huge. Each file took almost 30 MB. I loaded the pictures into Photoshop, manually tweaked them for the best appearance, reduced them in size to about 800X600, and saved them as JPEGs. The results are shown below:
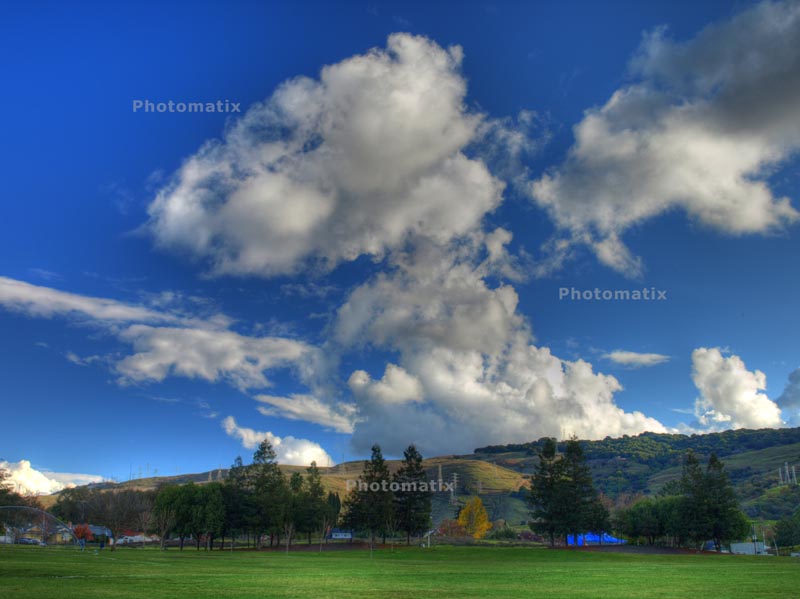
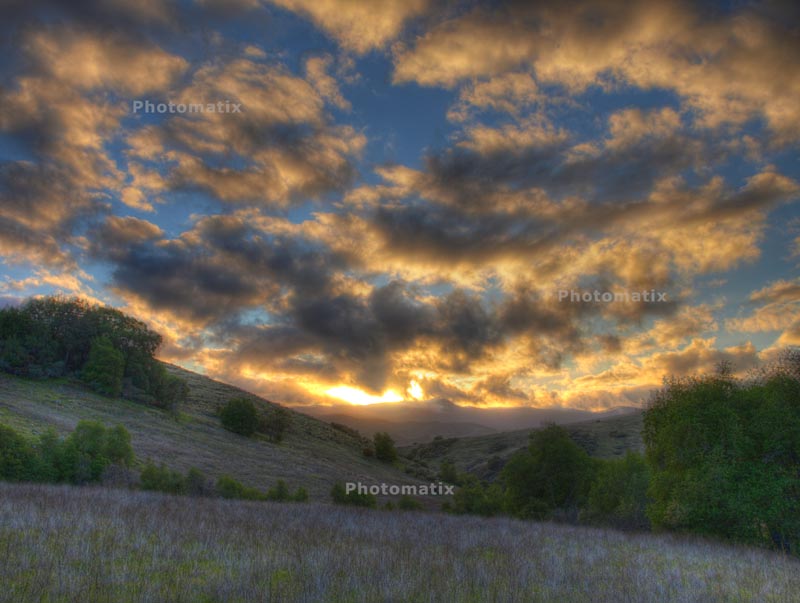
La Colina Park
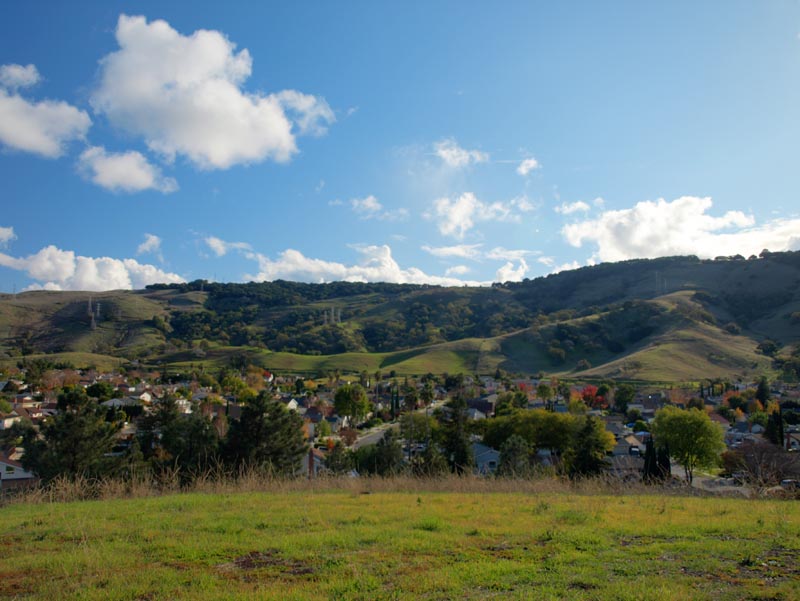
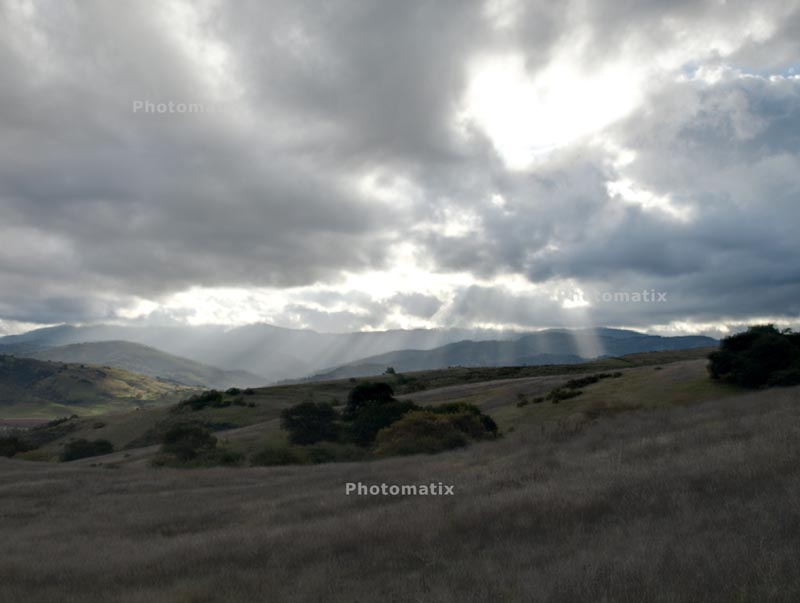
The
sky and clouds are very bright. The low angle of the sun creates deep
shadows on the hills. With the sky exposed properly, the shadowed areas
would normally be black and foreground would be dark. HDR processing
keeps the sky properly exposed, while bringing out the details in the
shaded areas.
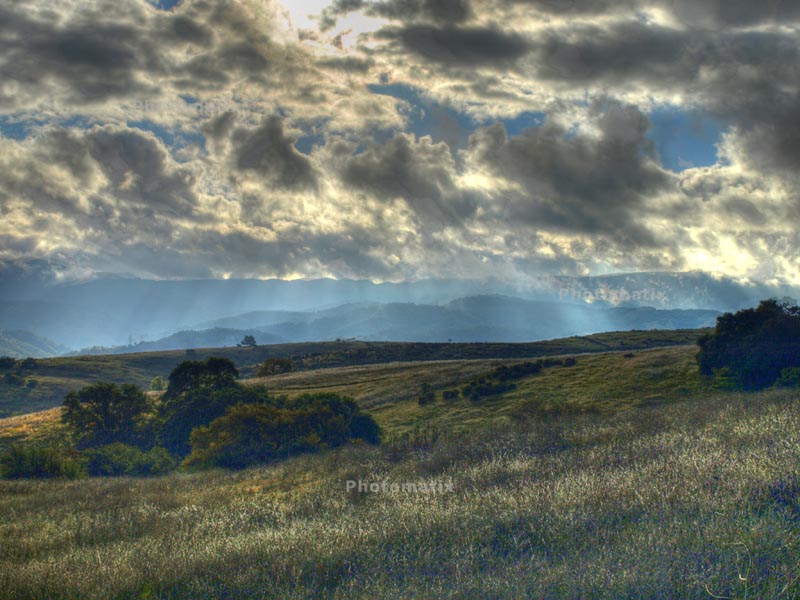
The sun is just to the left of the frame, brightly side-lighting the clouds. Most of the mid-ground is in shade. The foreground is brightly sunlit. HDR processing equalizes all of these.
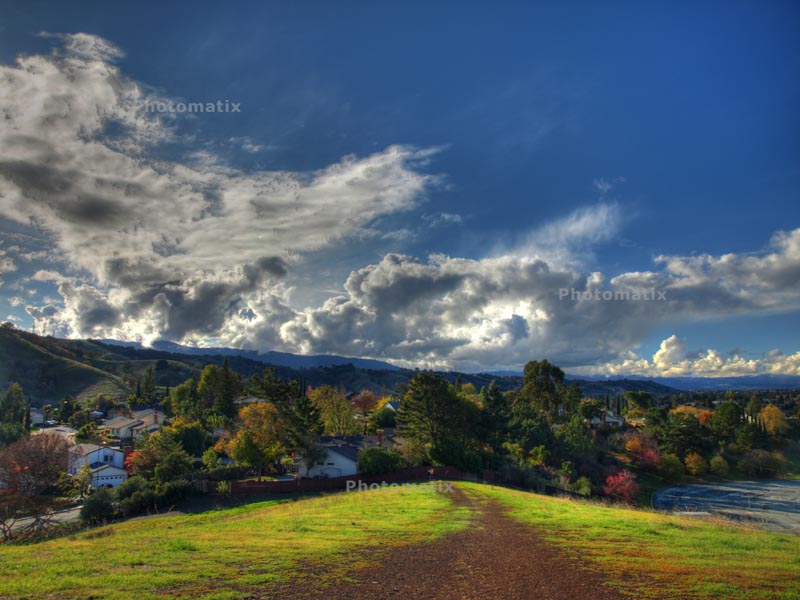
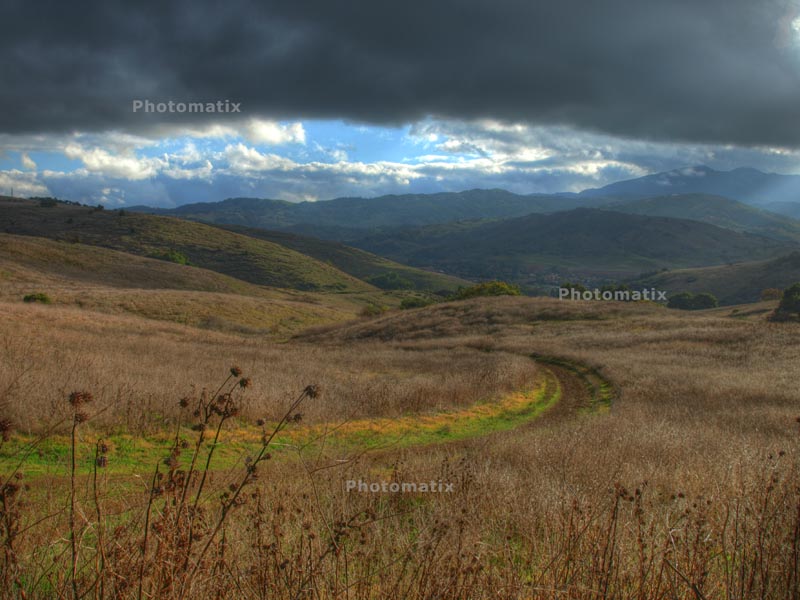
The sun is behind the clouds, highlighting parts of the clouds, but leaving the foreground in shadow. HDR processing keeps the foreground from getting too dark.
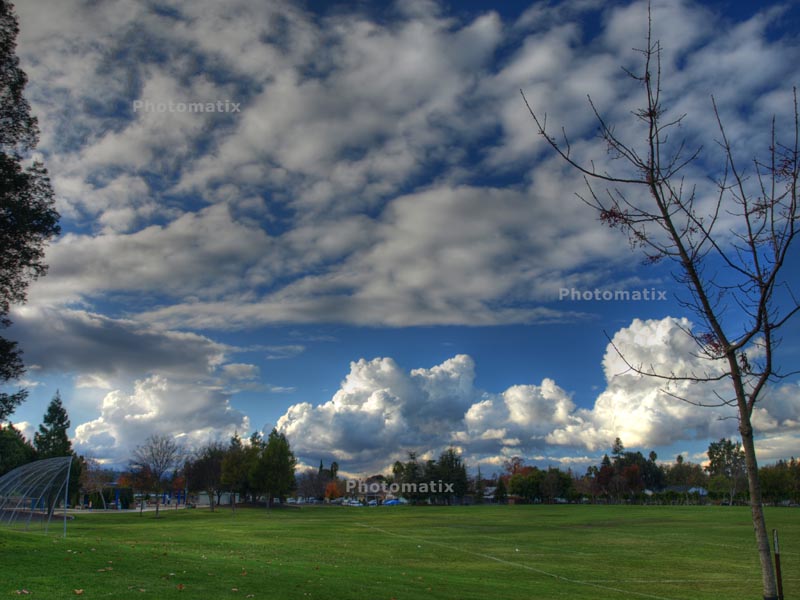
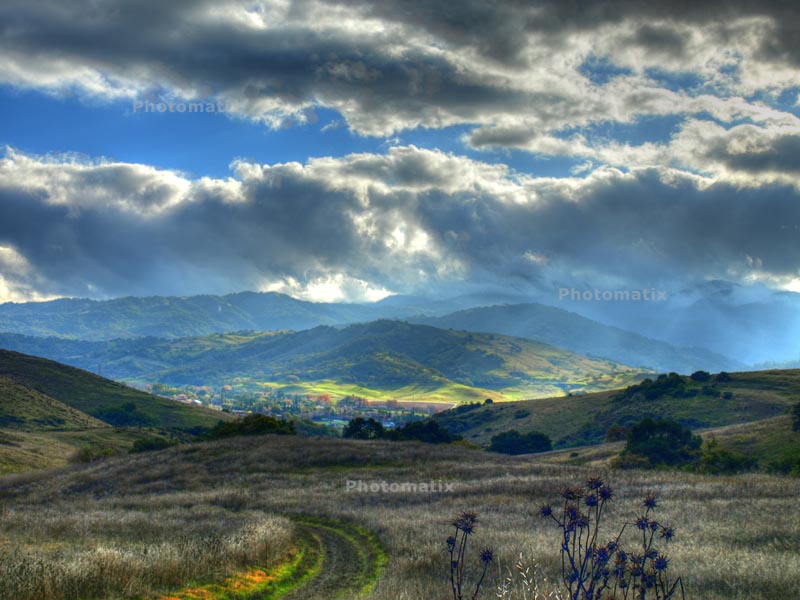
This is shooting directly towards the sun, which is behind the clouds. In a normal photograph, if the clouds and sky were properly exposed, the foreground and hills would be nearly black.
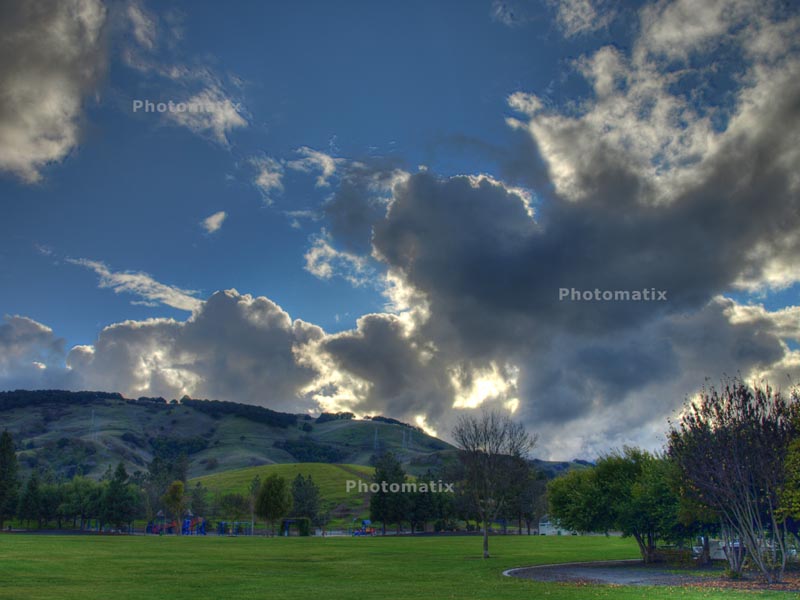
This is another mix of bright clouds, partially sunlit mid-ground, and the foreground in shadow.
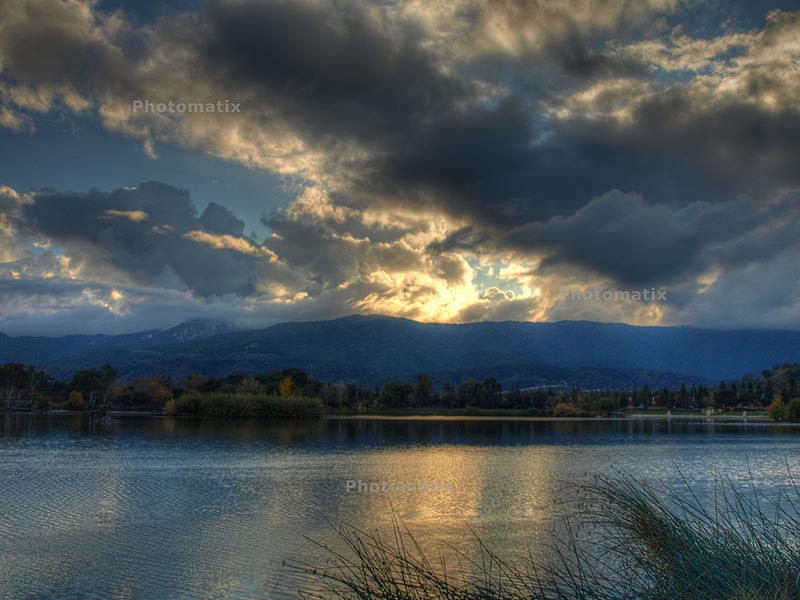
Lake Almaden
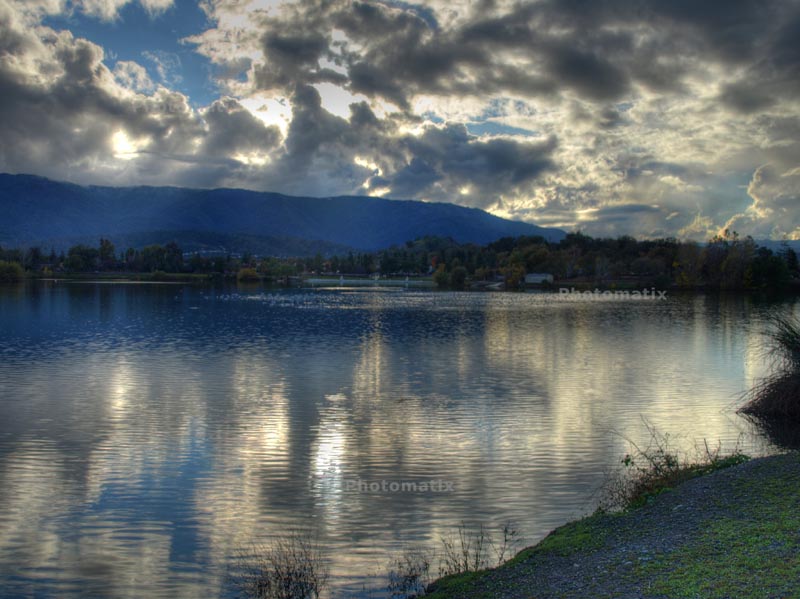
Looking across Lake Almaden at the sun backlighting the clouds. The mountains and foreground are in deep shadow. HDR processing allows details to be seen in those shadowed areas.
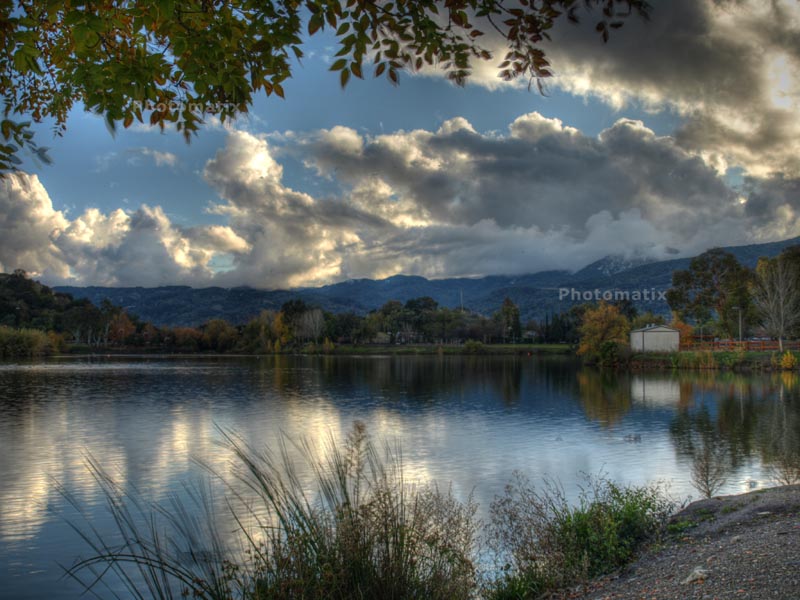
Some motion artifacts, called "ghosting" can be seen in the leaves on the tree. This is because the leaves moved slightly between successive shots.
Looking along Coleman Road, there are cars and people moving and would normally cause ghosting, but they are removed by Photomatix.
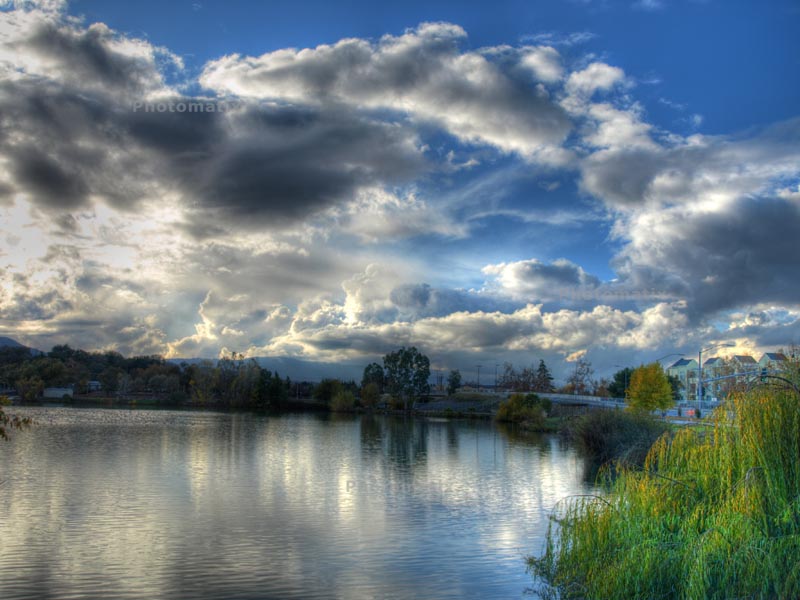
The setting sun shines through a hole in the clouds and reflects off the water. Everything else is in deep shade. HDR maintains detail everywhere.
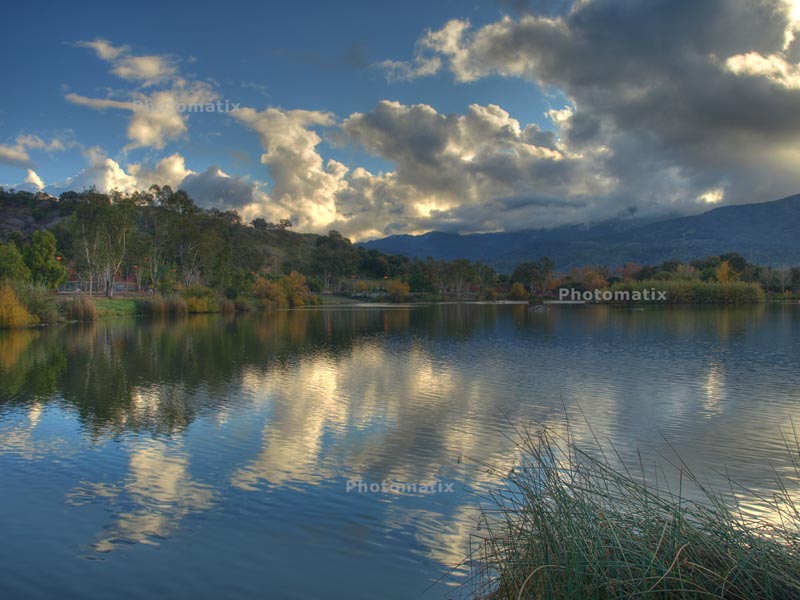
Only parts of the clouds are sunlit. Everything else is in shadow. The mountains on the right are in deep shade.
Almaden Quicksilver County Park
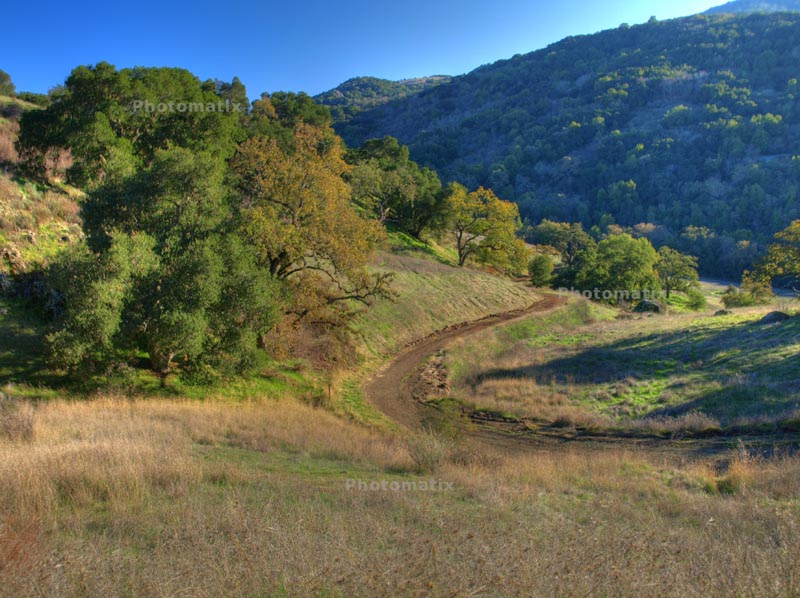
The Guadalupe Trail (handheld). Normally the hill on the right, which is in shadow, would be very dark. HDR brings out the shadow details.
Mt.
Hamilton and the Almaden
County Club from the Mine Hill Trail south of the Guadalupe Trail
junction (handheld). The mountain ranges in the background are sunlit,
while the foreground is in shadow. Normally, if the background
mountains were properly exposed, the foreground would be nearly black.
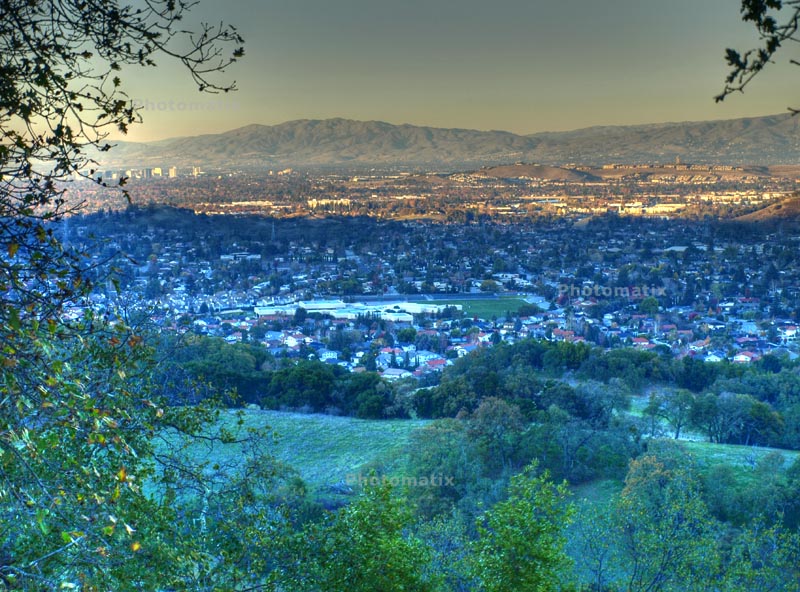
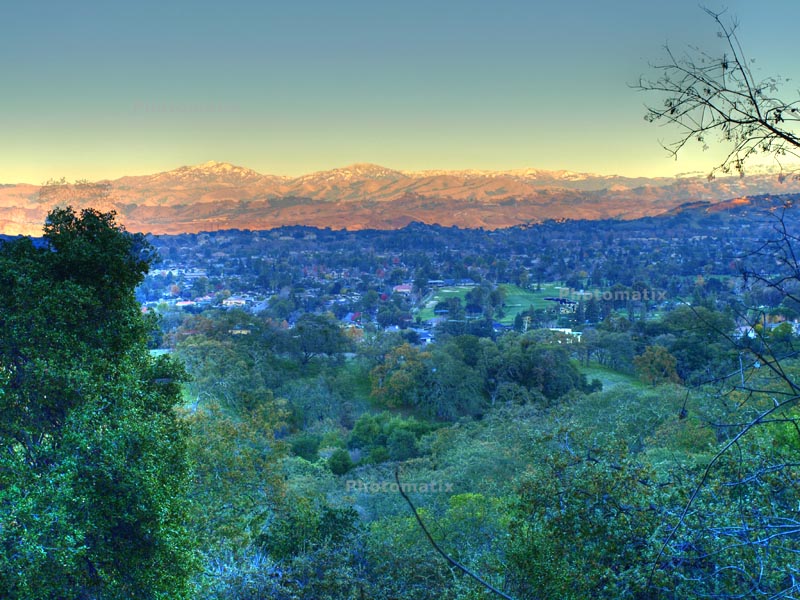
View
of downtown San Jose,
Communications Hill, Castillero School from the Mine Hill Trail. The
foreground looks bluer than the background because it is lit by the
blue sky. The picture color balance is set for normal sunlight, so the
background looks normal.
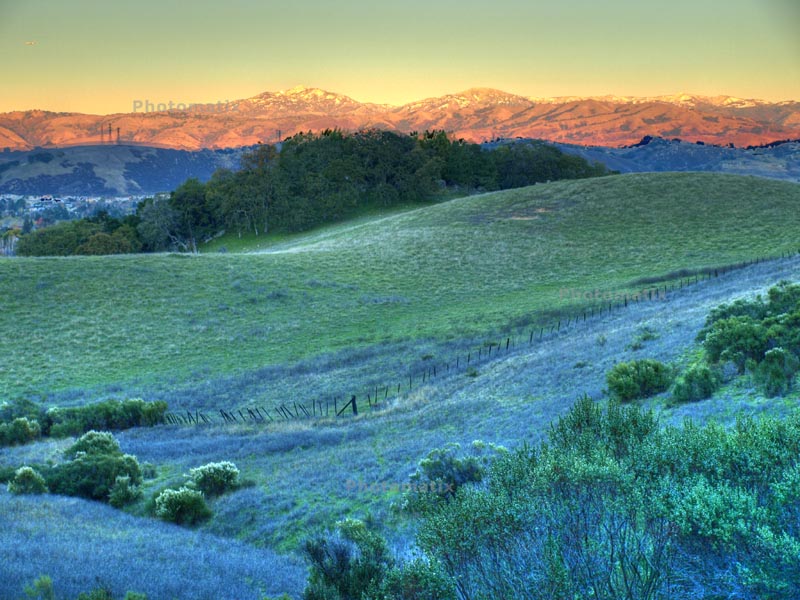
Mt.
Hamilton from the Mine Hill
Trail south of the Senador Mine Trail junction (handheld). This is at
sunset, so the mountains are bathed in reddish light, while the
foreground is lit by bluish skylight.
Martial Cottle Ranch
The
Martial Cottle Ranch is a state and county park that is undergoing
planning for development. It is not yet opened to the public, but it is
adjacent to urban neighborhoods. These pictures were taken by shooting
over the fence in the Vistapark neighborhood.
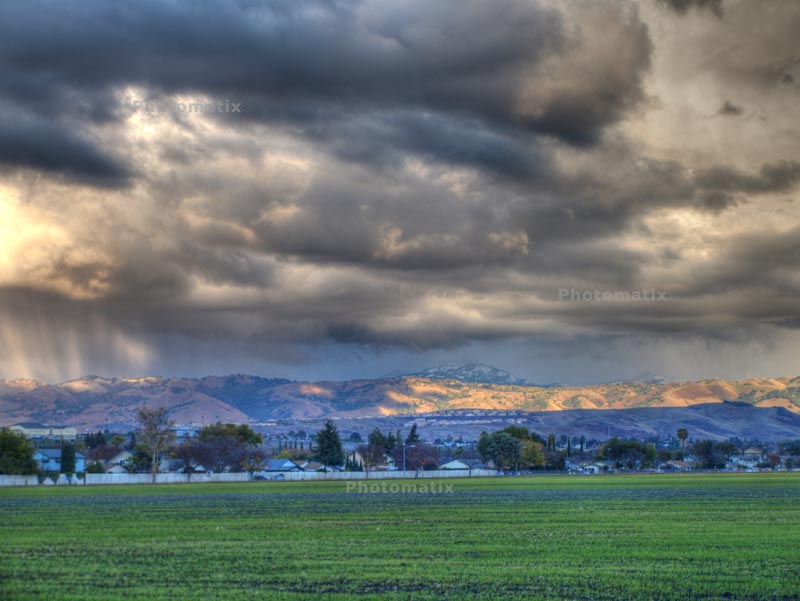
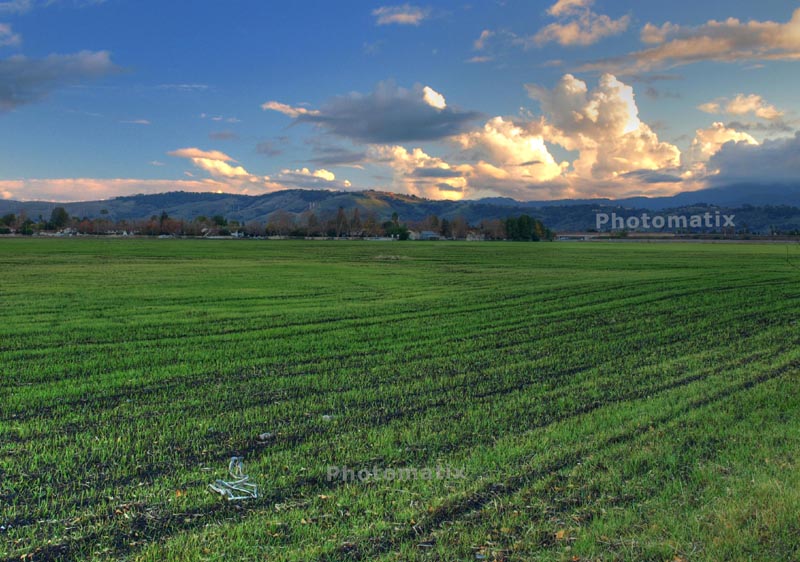
Sunlight from the setting sun highlights parts of the hills and some of the clouds, while the fields in the foreground are in the shade.
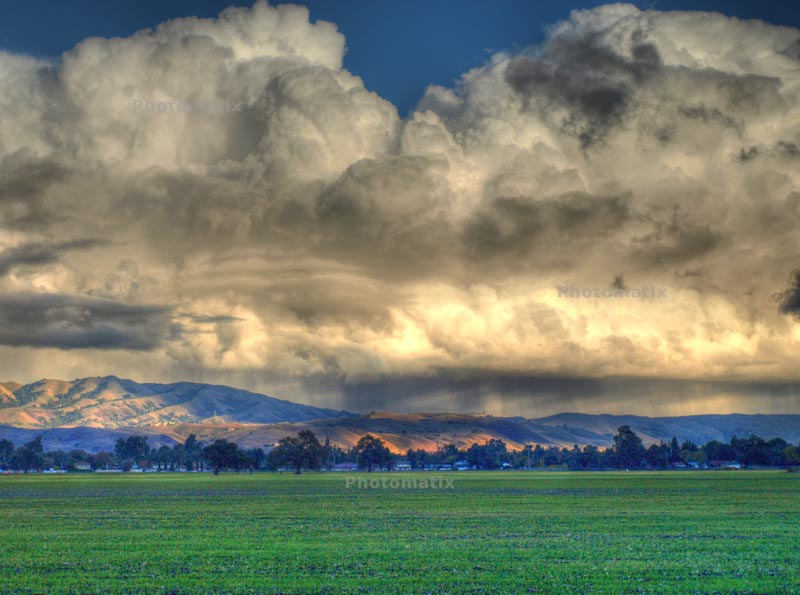
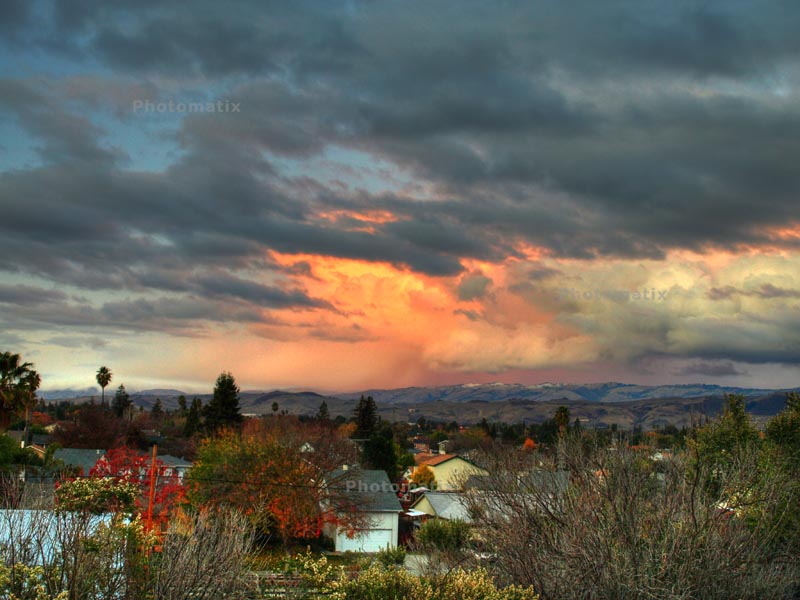
The clouds and hills are brightly lit by the setting sun, while the foreground is in deep shadow.
The clouds are brightly side-lit by the setting sun, while most of the hills and the foreground are in deep shade.
Santa Teresa County Park
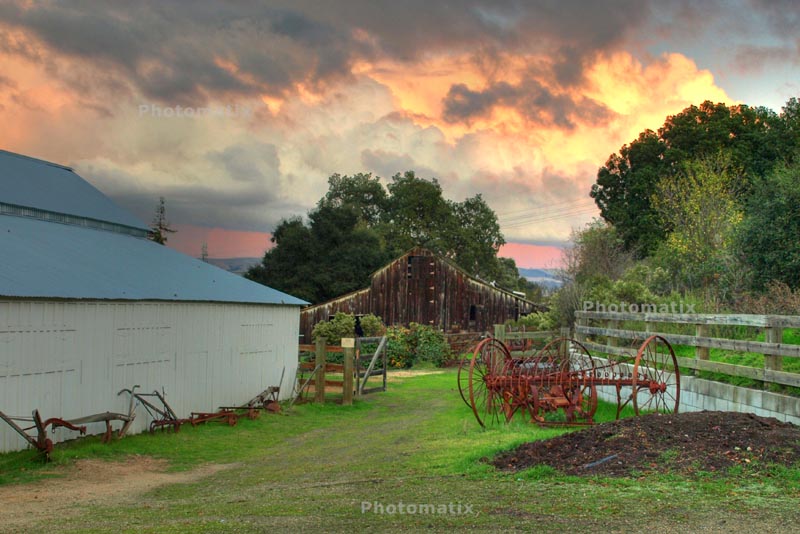
The barns at the Bernal-Gulnac-Joice Ranch. This is just after sunset. The sky is still bright, but the foreground is dark. HDR processing equalizes them.
View of Manila Drive from the Joice Trail at sunset.
View of the Almaden Valley from the Bernal Road parking lot. This picture, like almost all the others, was created using a technique called tone mapping.
This is the same picture, but using a method called exposure blending. It averages the exposures, which can result in a less dramatic, but more traditional-looking results.
View of the Stile Ranch Trail

View of the Mine Trail, with sunlight hitting the hills in the middle distance.
Another view of the Mine Trail, with more sun on the trail.
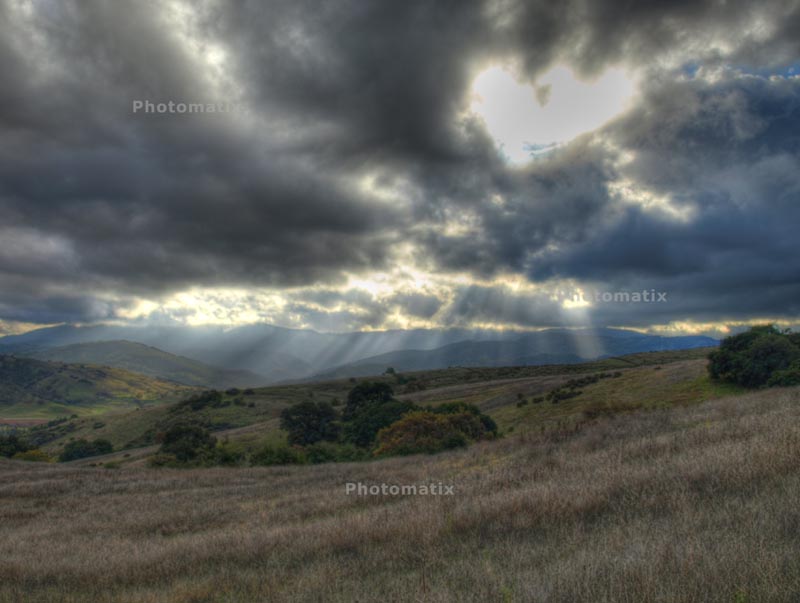
Another view of the Mine Trail, with rays of sunlight illuminating areas in the foreground and background.
Sunset from the lower Rocky Ridge Trail, looking directly into the sunset.
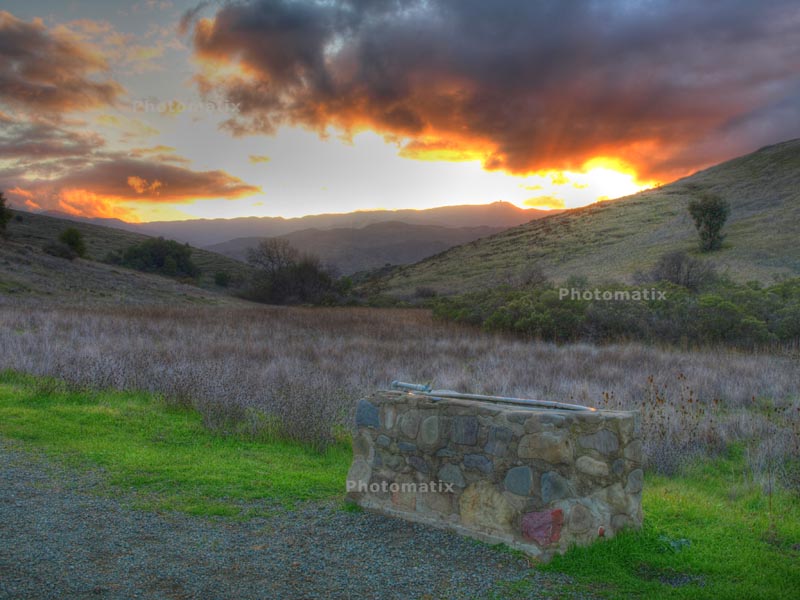
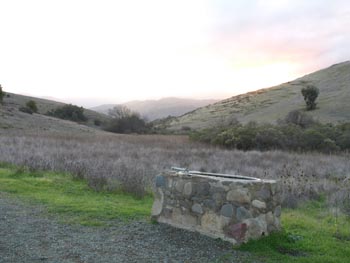
The horse trough at the Pueblo Area near the Mine Trail trailhead, looking right towards the setting sun.
These are the 4 pictures that made up the above picture:
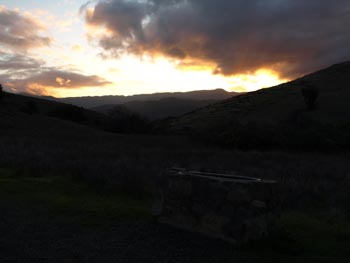 |
 |
| F
7.1, 1/60 sec, ISO 100, EV -1 |
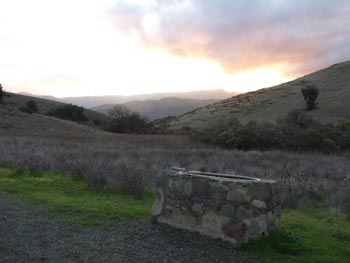
F
7.1, 1/50 sec, ISO 200, EV 0 |
 |
 |
| F
7.1, 1/40 sec, ISO 400, EV +1.3 |
F 7.1, 1/20 sec, ISO 400, EV +2.3 |
Note
that the first picture is the proper exposure for the clouds, while the
last picture is the best exposure for the foreground. These exposures
have a 3.3 EV total range. The second picture is what the camera would
normally shoot if set to auto-exposure. Note that the sky in that
picture is a just little too bright, but the foreground is much too
dark.
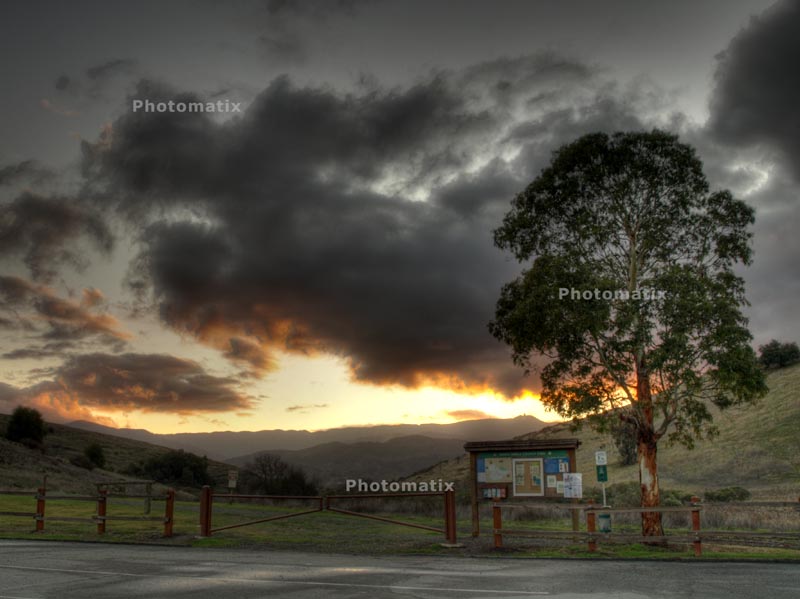
The
mapboard at the Mine Trail
trailhead, with the setting sun behind the clouds in the background.
Like the previous picture, this has a huge dynamic range, but details
can be seen in all areas due to HDR processing.
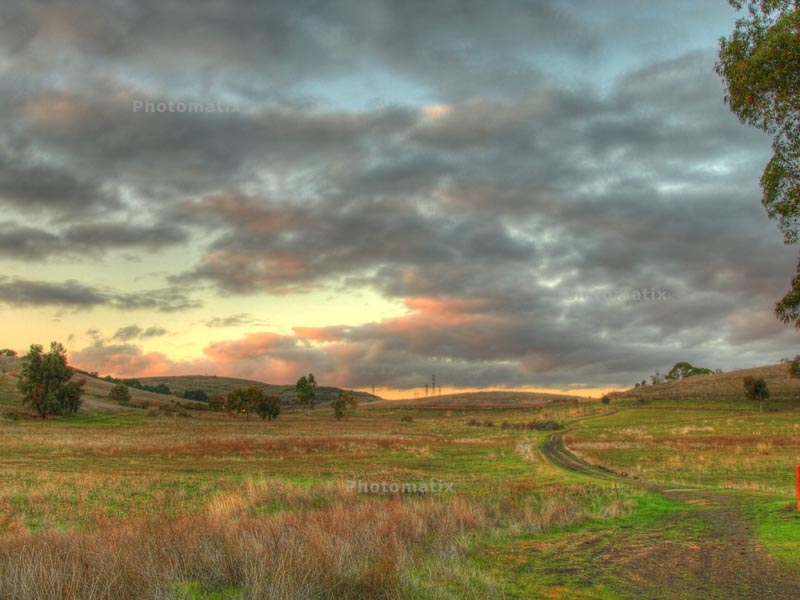
The field in the Pueblo Area at sunset. The setting sun highlights the clouds, but the fields are in shade. HDR processing brightens up the shaded areas.
For more pictures, see part 2.
Links
- About HDR, tips, &
techniques
- Wikipedia: High Dynamic Range Imaging
- Wikipedia:
Tone mapping
- HDR
Imaging Tips: Digital Camera Reviews & Photography Tips
- The Future of Digital Imaging - High Dynamic Range Photography (HDR)
- wikiHow: How to Take High Dynamic Range Photographs
- The PopSci How 2.0 Blog - High-Dynamic-Range Photography: A Guide
- HDR Photography explained, definition and realization
- HDR101.com Photomatix
Tutorial and HDR Photography
- Paint.NET: HDR image blending (tone mapping)
- Vanilla Days: HDR Tutorial: How to create 'High Dynamic Range' images using Photomatix
- Backing Winds: How to Create Professional HDR Images (using Photoshop CS2)
- High Dynamic Range (HDR) Photography in Photoshop CS2
- NatureScapes.Net - The High Dynamic Range (HDR) Landscape Photography Tutorial
- HDR How To: Dynamic Photo HDR - PopPhoto August 2007
- How
to Create HDR Photos - HDR/Photomatix tutorial
- HDR Software
- HDRsoft Photomatix
- Dynamic Photo HDR
- Qtpfsgui: free, open-source HDR imaging application
- Idruna Photogenics HDR
- Reviews of free HDR software
- Picturenaut
- Full Dynamic Range Tools (basic version is free)
- Imaging
Luminary Essential HDR (community version
is free, but has 1 MP size limit)
- HDR Images
Pictures by Ronald Horii. Page created 12/21/08