Simmerpot
Tutorial
page
3
Click on the Body layer...Add
a new layer. Name it Cutout.
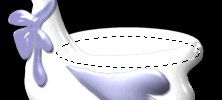
Click on Selection
Tool....Ellipse...Feather 0...Antialias Checked.
Make an ellipse like
this.....

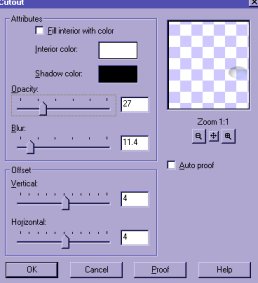
Now go to Image/Effects/Cutout apply these settings.
Turn off all layers
except Body and Cutout....Merge Visable, leaving the
cheek slected.
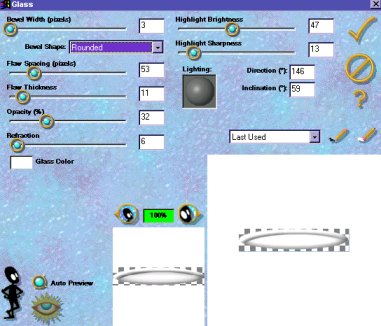
Go to eye candy / Glass and apply the same settings
as before. Rename
this layer Body.
You can click on the
mover tool to reposition the eye if it needs it. When you are
happy.. turn off all
layers except the eye and body...Merge visable...rename this
layer...Body.
Now Add a new layer..Name
it Bow...Go to Selections/Load from Disk and open
your gbow.sel.
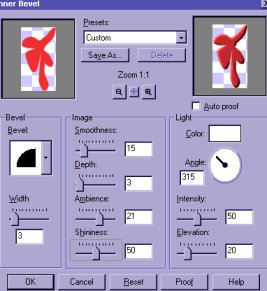
Flood fill with the color of your choice...Go to Image/Effects/
Bevel....
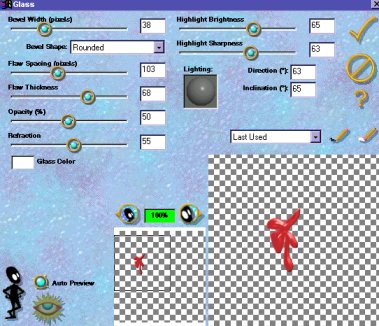
Now apply Eye Candy/ Glass
Use your Mover Tool to position your Bow.
Now Add another layer
and Name it Wing. Go to Selections/Load from Disk
and find your gheart.sel.
Flood fill with the
same color you used on your bow. Add an inner bevel.
Add a drop shadow
using the same settings as on the beak.
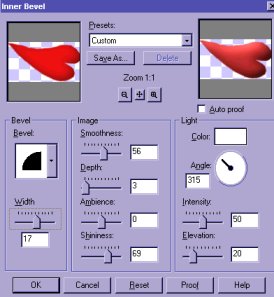
Now add Eye Candy / Glass.
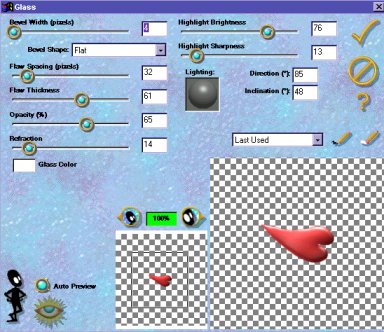
Now add a drop shadow..same as above.
Now we are going to
make the back part of the bowl.
Click on the
Preset shapes.. White foreground/ Ellipse /
Filled/ Antialias
checked / Create as Vector Checked.
Draw an Ellipse .....
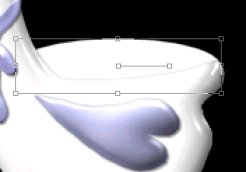
Holding down the shift/and
or/Control key use your curser to line up
the tail section and
a slight curve near the neck. When you are satisfied
with the alignment
convert this layer to a raster.
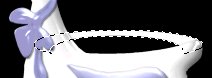
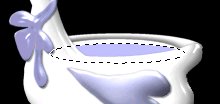
Click on the Selection
Tool... Ellipse..feather 0... anialias checked.
Make another ellipse
here..still working on the rim layer.
Now go to Edit...Cut...Paste
as a new layer. Name this layer Back
Deselect...
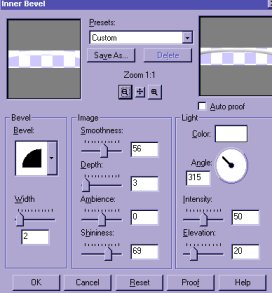
Click on the rim layer
and select.
Go to Image/Effects/Inner Bevel
Now click on the Back
layer... you may have to reposition it with the mover tool.
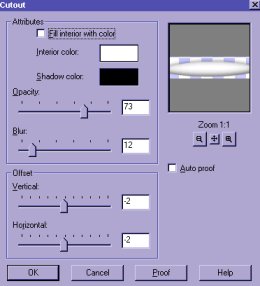
With the Back Selected...Go
to Image/Effects/Cutout
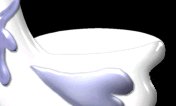
Turn off all layers
except the rim and back...Merge Visable.
Select the Rim and
apply Eye Candy / Glass.
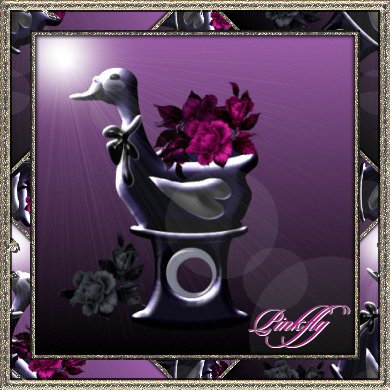
Deselect. Now
if you want to add something inside your bowl...add another layer
and add your water
or flowers. Here's how I added water.
I added a new layer
and clicked on the Selection tool/Ellipse and then flood
filled with the blue.
But you could add flowers or anything else you want.
Don't forget to add
drop shadows. If you want to add a candle and flame
add a layer under
the body layer, but on top of the gray layer.
Just play around and have some fun with it.
Now it is ready to
save as a tube....delete the black layer and merge visable.
I saved a copy in
psp format with all the layers preserved so I could change the
colors. I also
animated the simmerpot. You need your layers for adding the candle,
flame...and steam.
Hope you had fun with
this one. If you have nay questions, feel free to
email me.

Copyrighted 2001
Pinkfly's Creations
All Rights Reserved