Easel
Part
2
Click on the Preset
Shapes Tool and Select Rectanlge this time, with
same settings as before.
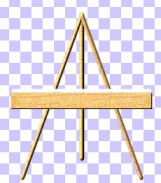
Make a wide rectangle across the front of the legs.
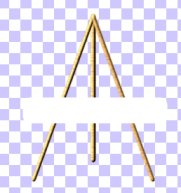
Click on the Selection
tools and draw a rectangle around the image and
click on the image
to select it.
Use the same Blade
Pro Preset/wood texture as with the legs and apply to the
selection.
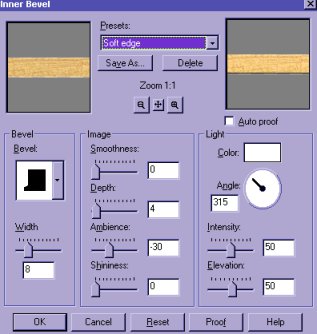
Then Go to Image.... Effects....Inner Bevel and use these settings.
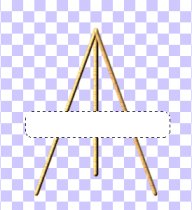
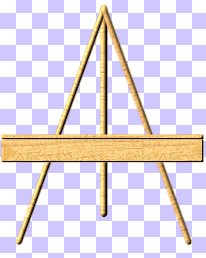
Add a new layer.
Click on the Preset Shapes Tool/ Rectangle again. Make
a rectanlge the same
width but more narrow than the first one you just made.
If you need to,use
the mover tool to adjust the placement of it.
Select the rectangle
and apply the same wood/Blade Pro Preset.....and inner bevel
as above.
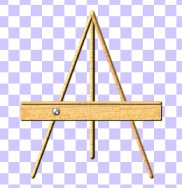
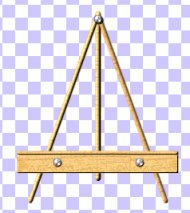
Now for the Bolts
to hold our Easel together. Add a new layer. Click on
Preset Shapes and
select Circle. Draw a small circle on the face of the
board above one of
the legs. Select the circle and add the Blade Pro
Preset... Leading.
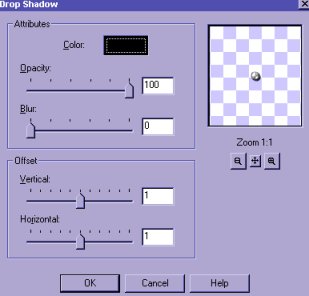
Then Add a drop shadow with these settings.
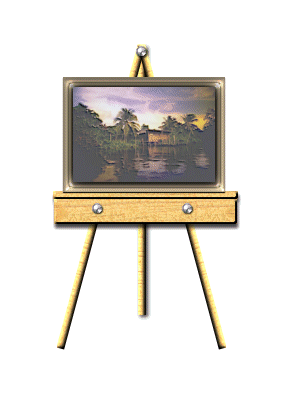
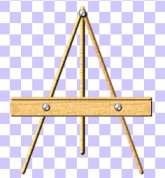
Your Easel should
now look like this.
Select the bolt....
COPY.......PASTE AS A NEW LAYER. Position the
bolt over the other
leg. PASTE AS A NEW LAYER....again. Postition this
bolt at the top where
the three legs are attached to each other.
If you want a table
easel... just lower the face of the easel.

Don't forget to reposition
the bolts if you slide the face down.
You can now go to layers....MERGER
VISIBLE. Save as a tube if you like.
Add a framed or unframed
picture to your easel. You can even add a
chain for decoration.
You can experiment with the length and width of the
legs to get the look
that you want.
Hope that you enjoyed this tutorial. If you need help you can email me at:
Copyrighted 2001
Pinkfly's Creations
All Rights Reserved