 Home |
 Media |
 Files |
 NES |
 Game Boy |
 SNES |
 VCS |
 DooM |
 Links |
 About |
 Master System |
 Game Gear |
 Genesis |
 5200 |
 Recipes |
 Neo Geo |
 3DO |
 TG16 |
 7800 |
||
 Saturn |
 PSX |
 NES Home |
 ROM Hacks |
 Accessories |
 NES Tech |
|
The Nintendo Entertainment System (NES) was released in the United States on October 18th, 1985, and now,
about ten years later, it's built up an amazing library of great games. So much for that "video game crash"
the media was barking about! I still like my Atari systems and my Master System, but the NES is something
special. Here are some useful tips and guides for improving and maintaining your NES and its accessories. |
|
|
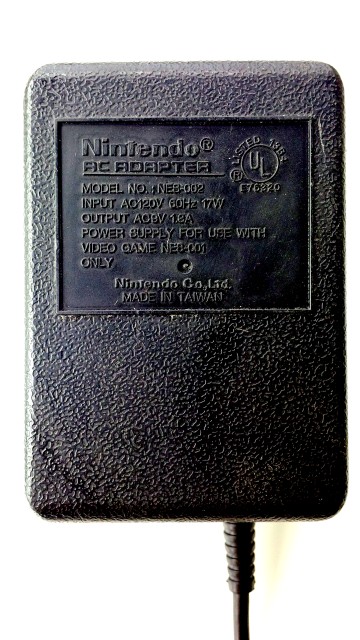
NOW YOU'RE PLAYING WITH POWER The NES uses a 9V AC stepdown adapter, rather than the traditional AC to DC adapter that most electronics such as cordless phone bases, answering machines, and of course, video game consoles use. This means that you should never try to use the Nintendo power brick with anything other than an NES. Doing so will seriously result in permanent damage to your electronics, or even a fire. Now, you might think that Nintendo would do this to charge you top dollar for replacements, but worry not. You can safely use any other 120V AC to 9V DC power transformer with your Nintendo, even the Sega MK-1602 adapter for the Sega Genesis. The reason why this is so, is because inside the NES is a bridge rectifier. In simple terms, it's what turns the AC voltage from the Nintendo power brick into the DC voltage used by the system. It works by re-directing the alternating voltage through circuitry that turns it into uni-directional DC voltage. Feeding it with DC voltage just takes some of the load off of that rectifier circuit, and doesn't cause any harm at all. |
|
STOP THE RESETTING Sometimes if your game doesn't start properly, your screen will start flashing, while the power light on the NES flashes. You might even catch snippets of the title screen or the publisher's logo and copyright information. This happens when the security chip in the NES can't communicate with its companion chip in the game cartridge. Often, you can simply clean your game, or the NES, or both, and continue on your merry way, but sometimes it just won't stop, even though the game seems to work fine between the resets. In this situation, there is a solution. Tools needed: Phillips head screwdriver Pair of side-cutters. Step 1: Remove the 6 main screws that attach the top and bottom of the NES. Step 2: Remove the 7 screws that hold down the steel RF shield. Step 3: Remove the 6 screws that hold down the cartridge loading mechanism. Step 4: Remove the 2 screws holding the main board and the power/AV block to the shell. Step 5: Carefully disconnect the wire harness plugs from the mainboard (the lower RF shield is sharp) Step 6: Remove the mainboard and turn it over, then remove the RF shield. Step 7: Orient the board so that the dot on the 16-pin chip marked 3193A is to the lower left of the surface. Step 8: Clip the 4th leg from the left, facing you. You may have to bend a capacitor or two out of the way. Now re-assemble the NES. It should no longer flash if it fails to communicate with the security chip in a game. |
|
|
Home |
Media |
Files |
NES |
Game Boy |
SNES |
VCS |
|
DooM |
Links |
About |
Master System |
Game Gear |
Genesis |
5200 |
|
Recipes |
Neo Geo |
3DO |
TG16 |
7800 |
||
|
Saturn |
PSX |