
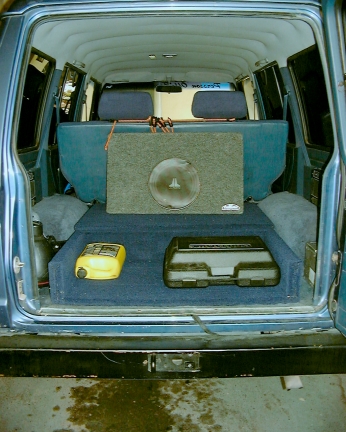
The back of my Monty started looking like a pig pen... 2 tool bags a couple of tool boxes, etc.
I saw an article in Off Road.com recently where a Jeep owner made a storage box for the back of his rig. The design was so simple, functional, and nice looking that I decided to make a box for my Monty.
The measurements were 40" long by 39" wide. Being that big, I decided to make a a two compartment unit so the cover wouldn't be too cumbersome.
Installation
Fit n Finish
Overall
Materials
- 4'x8' piece of 7/16" thick plywood for the floor and cover.
- 2"x6"x16' for the walls
- Enough Carpet to cover the box.
- Carpet Glue
Tools Needed
- Circular Saw
- 8x1.5" Sheet Metal Screws
- 8x2.5" Sheet Metal Screws ((6 pieces)
- Staple Gun
- Carpet Glue (2 Quarts)
- Carpet Glue Applicator (1/8"x1/8" square beads - cheap plastic ones)
- Utility Knife with several new (Sharp) blades
- Screw Driver (electric drill)
- Electric Drill w/ 1/8" drill bits (to predrill holes for Sheet Metal Screws)
- Square & 36" Straight Edge (for marking where to drill holes & cut the carpet)
- Stud Finder
Measuring and Cutting
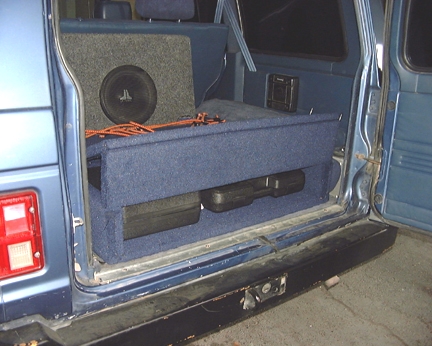
I first cut the 7/16" thick plywood into the top bottom pieces. I then cut the 2x6's into pieces for the back, side, & middle walls of the box..
I then attached the sides, back, and middle walls to the floor temporarily. Once attached I could figure out where I needed to cut the top piece to give me the two doors. This part can be a little tricky since you need to factor in where the hinges go. If you do it wrong, you won't be able to open the doors.
The carpet glue is very sticky, and once it gets on fabric, it's very difficult to get off. It's much easier to remove it from your skin, but regardless of that, I recommend wearing rubber or latex gloves to keep your hands clean. Latex (like surgical gloves) is better, since you can easily throw away gloves as they get too dirty to work with and put on a new set.
I then dissassembled everything and set up to put the carpet on the pieces. The carpet is really easy to set up as long as you have a sharp knife, staple gun handy and glue.
For the large pieces, you'll want to spread the glue down. The plastic applicator I purchased came with 4 sides, each having a different application depth.
I spread glue on one side of the floor first. Once done, I waited a couple of minutes to allow the glue to set a little. I wasn't told to do so, but I figured, it would make it less likely that the carpet would float around before it fully dried.
Once I had an even coat, I laid the wood down on the back side of a section of carpeting. I made sure I put it in a corner, so I could carpet both sides more easily.
After waiting about 10 mintues for the glue to set further, I began applying a coat of glue to the exposed side of the floor. Once that was done, I again waited a few minutes and then took the carpet and folded it over the exposed and glued section of the floor.
I made sure it was a snug fit. I let this dry for a while before going in and making the final cuts. I put the seam on the side I decided would be the inside of the cabinet. I only allowed a 1" overlap so I could hide it under the side wall pieces since they were 2" wide.
Once I finished carpeting the floor, i layed it aside and began carpeting the different outside wall pieces. I didn't put glue on these pieces. Instead, I just stapled the pieces in place.
Note:
Make sure when y ou're doing this that the carpet is VERY snug. If not, the carpet will have a lot of extra slack which ends up looking cheesy.
Once I got the two sides done, I screwed them in place using the 1.5" sheet rock screws.
I then double checked the width of my back piece, being careful the realize the carpeting adds to the overall dimentions.
I then proceeded to carpet the back piece again making sure I put the seam on the bottom of the back wall to make it invisible once assembled.
Once I got that in place, I screwwed the back wall to the base from the bottom using 1.5" sheet metal screws, and through the side pieces using 2.5" sheet metal screws.
Note:
Pre-drilling the holes for the sheet metal screws make this go so much quicker. It's best to use two drills if you have them, or a drill and a power screw driver.
Once the sides and back were in place, i repeated the step with the middle "separator" piece, again paying close attention on the revised dimentions and making sure the seam was hidden under that piece.
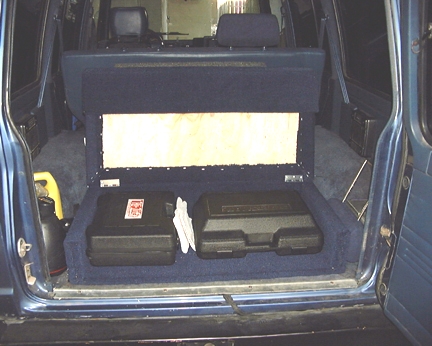
MAKING THE COVERS
Once the sides and floor were done, I was able to take measurements to know where to cut the one big piece I had thus far for the top cover. Additionally, instead of closing off the front, I made a 3rd cover piece that was hinged to move out of the way when not needed.
Instead of carpeting the covers completely, I decided that leaving the inside of the covers uncarpeted would work just as well. Plus I was running out of carpeting and didn't want to make a 2nd trip to the hardware store. (Upon reflection, the end reuslt worked out just fine.)
I decided not to glue the carpets to the covers, but I did take special precaution to ensure the carpet was very snug.
Once in place, I stapled the carpet ends.
I found that by making the dimentions tight, I don't need a clasp to lock the doors shut. The snugness keeps them in place while off roading.