SCOUT TROOPER/SNOWTROOPER/Fett pouches
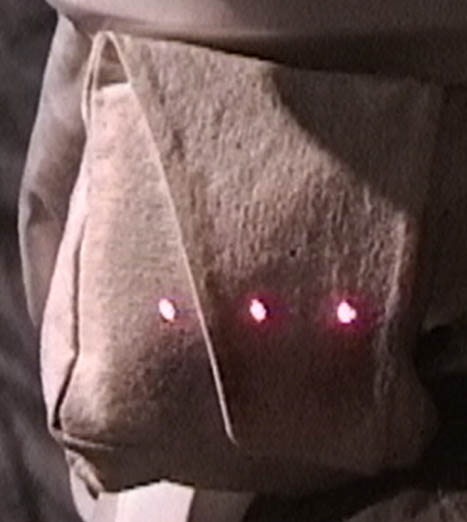
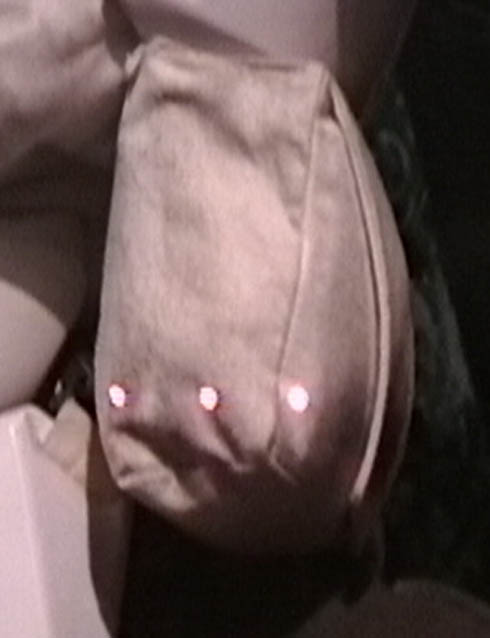
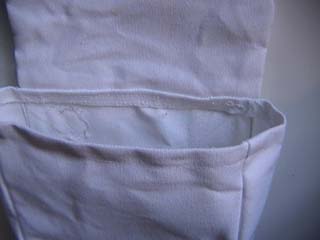
MOM shots of biker pouch, full scale image at 72DPI..
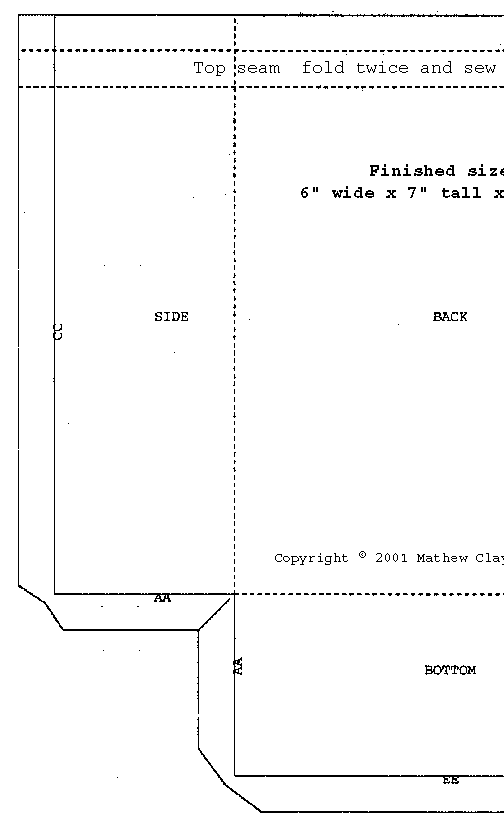
From these I estamate the pockets to be 6" wide, 7" tall and
2.5" deep.
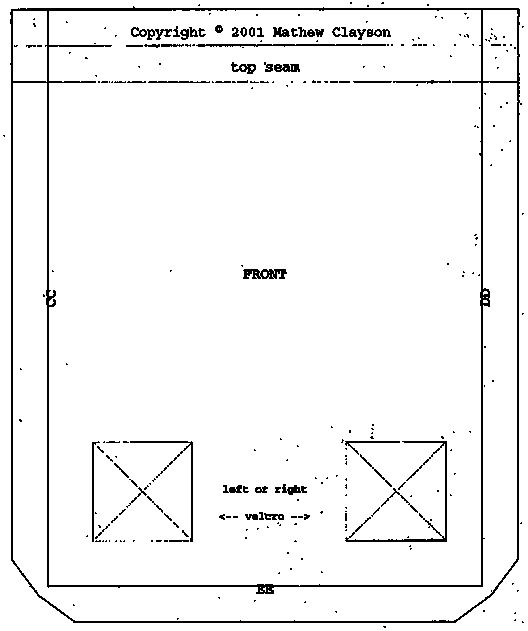
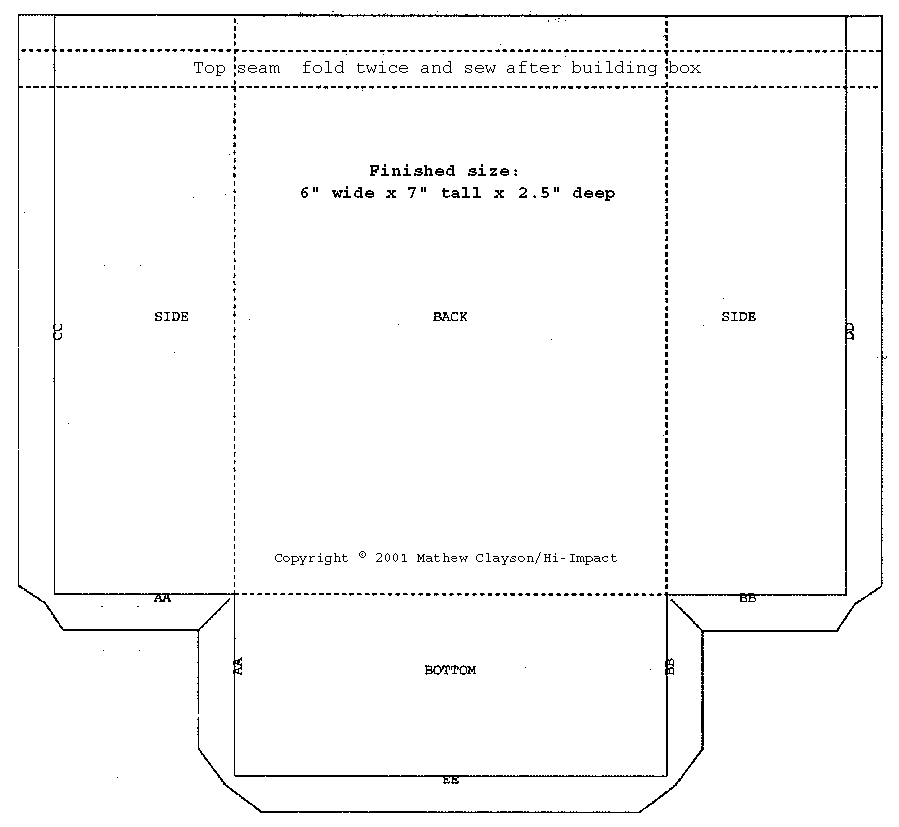
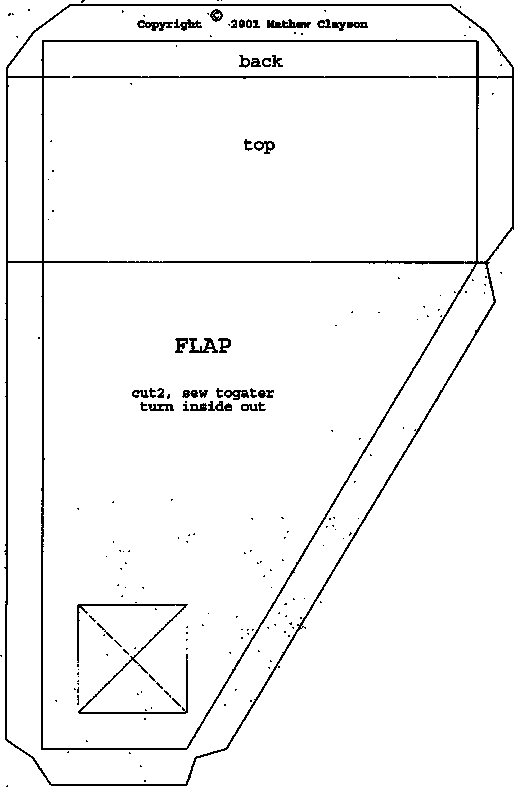
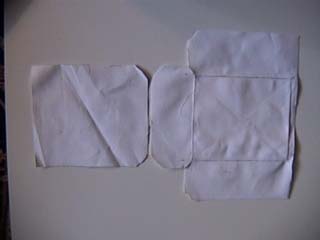
Pouch patterns, 1:1 scale at 72DPI.
The "front" and "back" are correct Bikerscouts and as far as I can tell
for Snowtroopers as well, but may be swapped for Fett and Dengar.
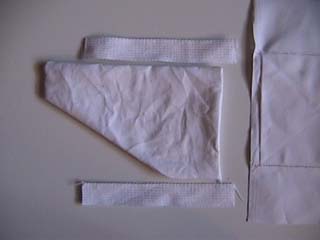
|
<- overlap and tape togather ->
|
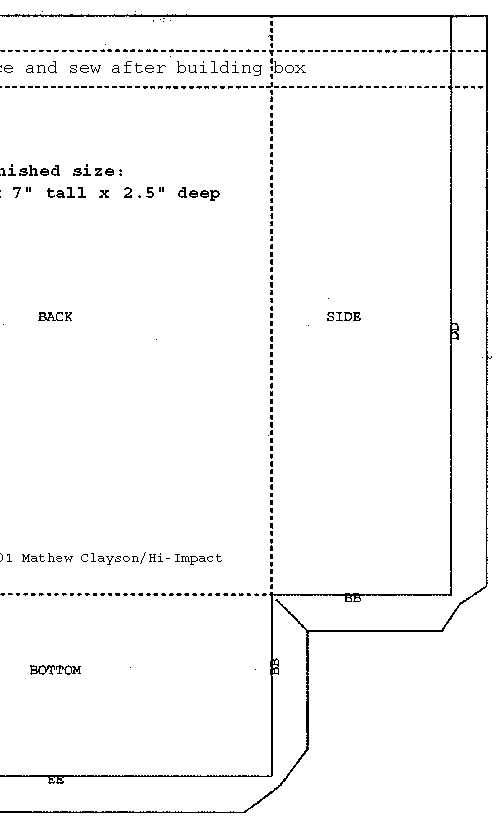 |
These are a split versions of the back panel.
Using these to replace the image above, you can print all of the patterns
ao a leagal size peice of paper.
Instructions
While at the Smithsonian MOM exhibit I took lots of pictures. I also
ran a
video tape of the whole thing, with a laser caliper attached to the
camera. Using the pics of the biker scout and dimensions saved on the
video tape, I came up with the patterns included. I've labeled two
of the patterns front and back, this is correct for the Snowtrooper,
but infact they should beswapped for the Bikerscout. And have to be
swapped for the Fett leg pockets, using only the"back" and the flap.
If you are swapping front to back, make sure you move the velcro as
well.
Feel free to download thise image, and print them out at 72dpi.
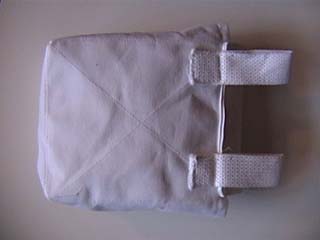
The pouch for the snowtrooper has two loops of 1-1/8" webbing attached
for hanging from the belt. Thus the whole pouch, other then the straps,
hangs just below the belt. I used 8" of 1-1/8" webbing for mine.
On
the scout the pouch is attached to the belly wrap, but only at
the top
edge of the pouch.
First off, cut your fabric, if you can find a heavy white canvas, cut
one of each pattern. And an extra of the flap for each pouch. If
your material is thin, cut two of each pattern, and double up the
"front" and "back".
Make the body. Sew on the Velcro loop material to the "front", your
second pouch should have the velcro on the opposite location. Attach
straps if applicable. With pieces inside out, sew "front" to "back"
along seam EE. Next sew seams AA and BB. Then CC and DD. If you
have a surger that's great, otherwise use zig-zag on all edges. Turn
top
edge down twice and sew. Turn inside right.
Make the flap. Plan ahead, as you need to assemble your second pouch
mirror image of the first. Overlap the 2 pieces of fabric, and sew
along the 1/2" seam, except at top of pattern. Turn inside right, and
tuck in the top edges, and top stich shut along the edge. Sew on the
velcro hook material.
Sew flap to body. It also looks the flap may be top stiched to the
top of the sides part of the way to help keep it's shape.
Copyright 2001, 2002 Mathew Clayson

Page and parts images created by Mathew Clayson
[email protected]