
 OPTIMIZING JPEG'S
OPTIMIZING JPEG'S
Welcome to part two of the optimization tutorial series. In this part we will cover how to optimize a JPEG graphic. For the purposes of this tutorial we will be working with ImageReady. Before we jump into this tutorial, lets discuss what a JPEG is exactly. First, a little bit of useless information you will never need, JPEG owes its name to the Joint Picture Experts Group, a gathering of ISO members. This group developed a file format known as lossy. A lossy image format will discard pixels from the original image based upon the level of quality used when saving. The JPEG format is able to reduce an image’s file size by approximating the transitions between pixels that surround the discarded pixels. Not only can JPEGs produce very small image sizes, they can contain millions of colors, unlike the GIF format’s maximum of 256 colors. Because of this color depth, JPEG is the ideal format for encoding photographs for the Internet.
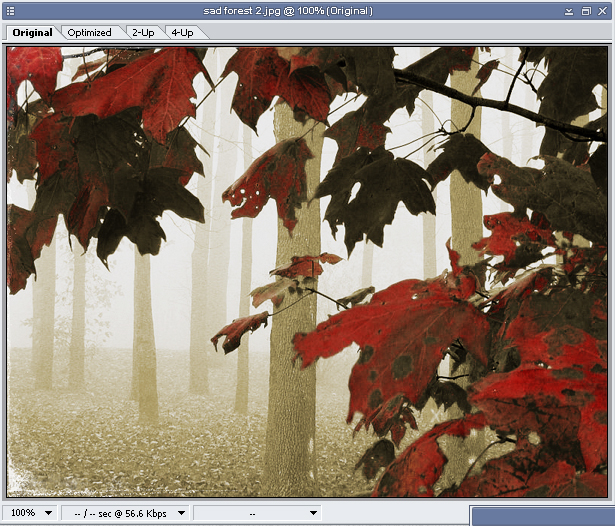
Now lets jump into this tutorial and open up a nice photograph, I am going to use a photograph of a forest, and yes this image ahs been slightly altered in Photoshop beforehand, just to add to the file size a bit (and because I like the look).
Now in the graphics display window press on the Optimize tab (CTRL + Y) . This will display the graphic as it will look once it is optimized.

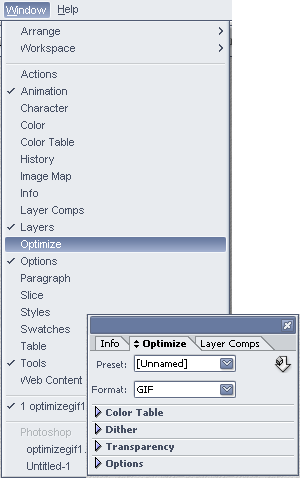
Now open the Optimize Dialog Box by going to Window > Optimize.
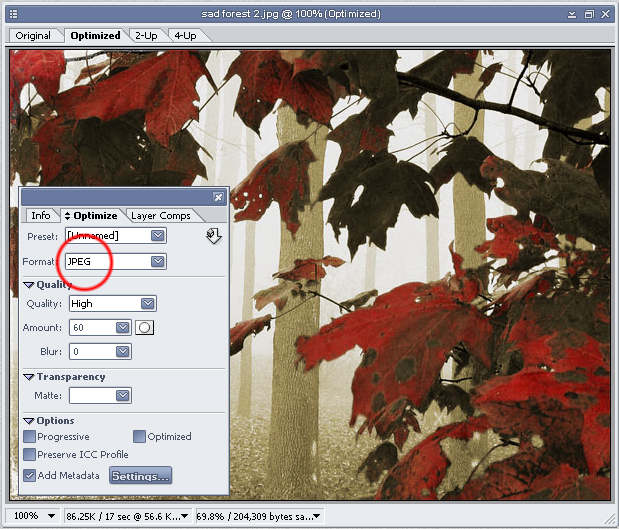
Once the Optimize palette is launched, specify JPEG under the Format drop-down menu. Choose a level of image quality, such as Medium, from the Quality drop-down menu in the Quality section of the Optimize palette. As you change this setting, the Amount field’s value will change. Further optimize your image’s quality by manually changing the Quality Amount selector’s percentage value by clicking on the arrow button to its right. Drag the slider to your desired percentage value (where 100% is a duplicate of the original image and 0% barely retains any original image data), and press the Enter key to confirm your new setting.
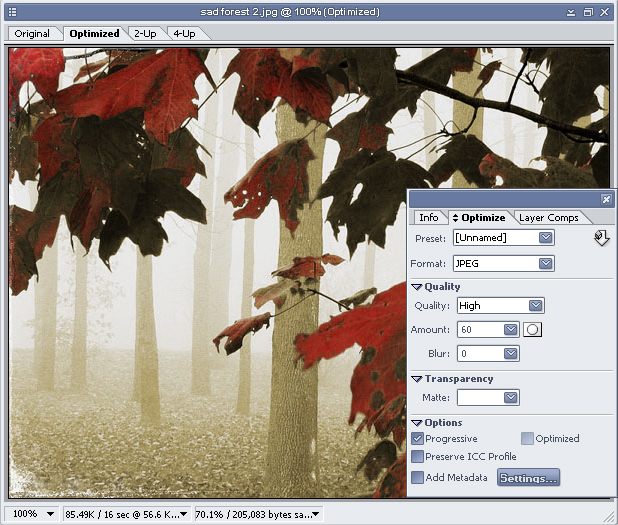
Check the Progressive checkbox in the Options section to allow the final JPEG file to be loaded in several stages, meaning that the Web browser will load a low-resolution version of the image first, then a medium-resolution version, and then finally the full-resolution image. (This option is helpful if your site’s visitors are connecting on slower modem Internet connections.)
Here is how our palette looks in the end:
Choose File > Save Optimized As to save the Web-ready version of the document you just modified. Here is our final version: the size went down from 290K to 85.49K, and the image still looks colorful and sharp.
